

A great user experience gives the user feedback as they go. Examples include:
- Required fields should have a visual indicator that they are required
- When a required field is not filled in an error should be displayed
- If there are errors on the page, the associated button should be disabled so that they cannot proceed with errors
Apex Designer makes this easy and this page shows you how.
Create an Add Supplier Page
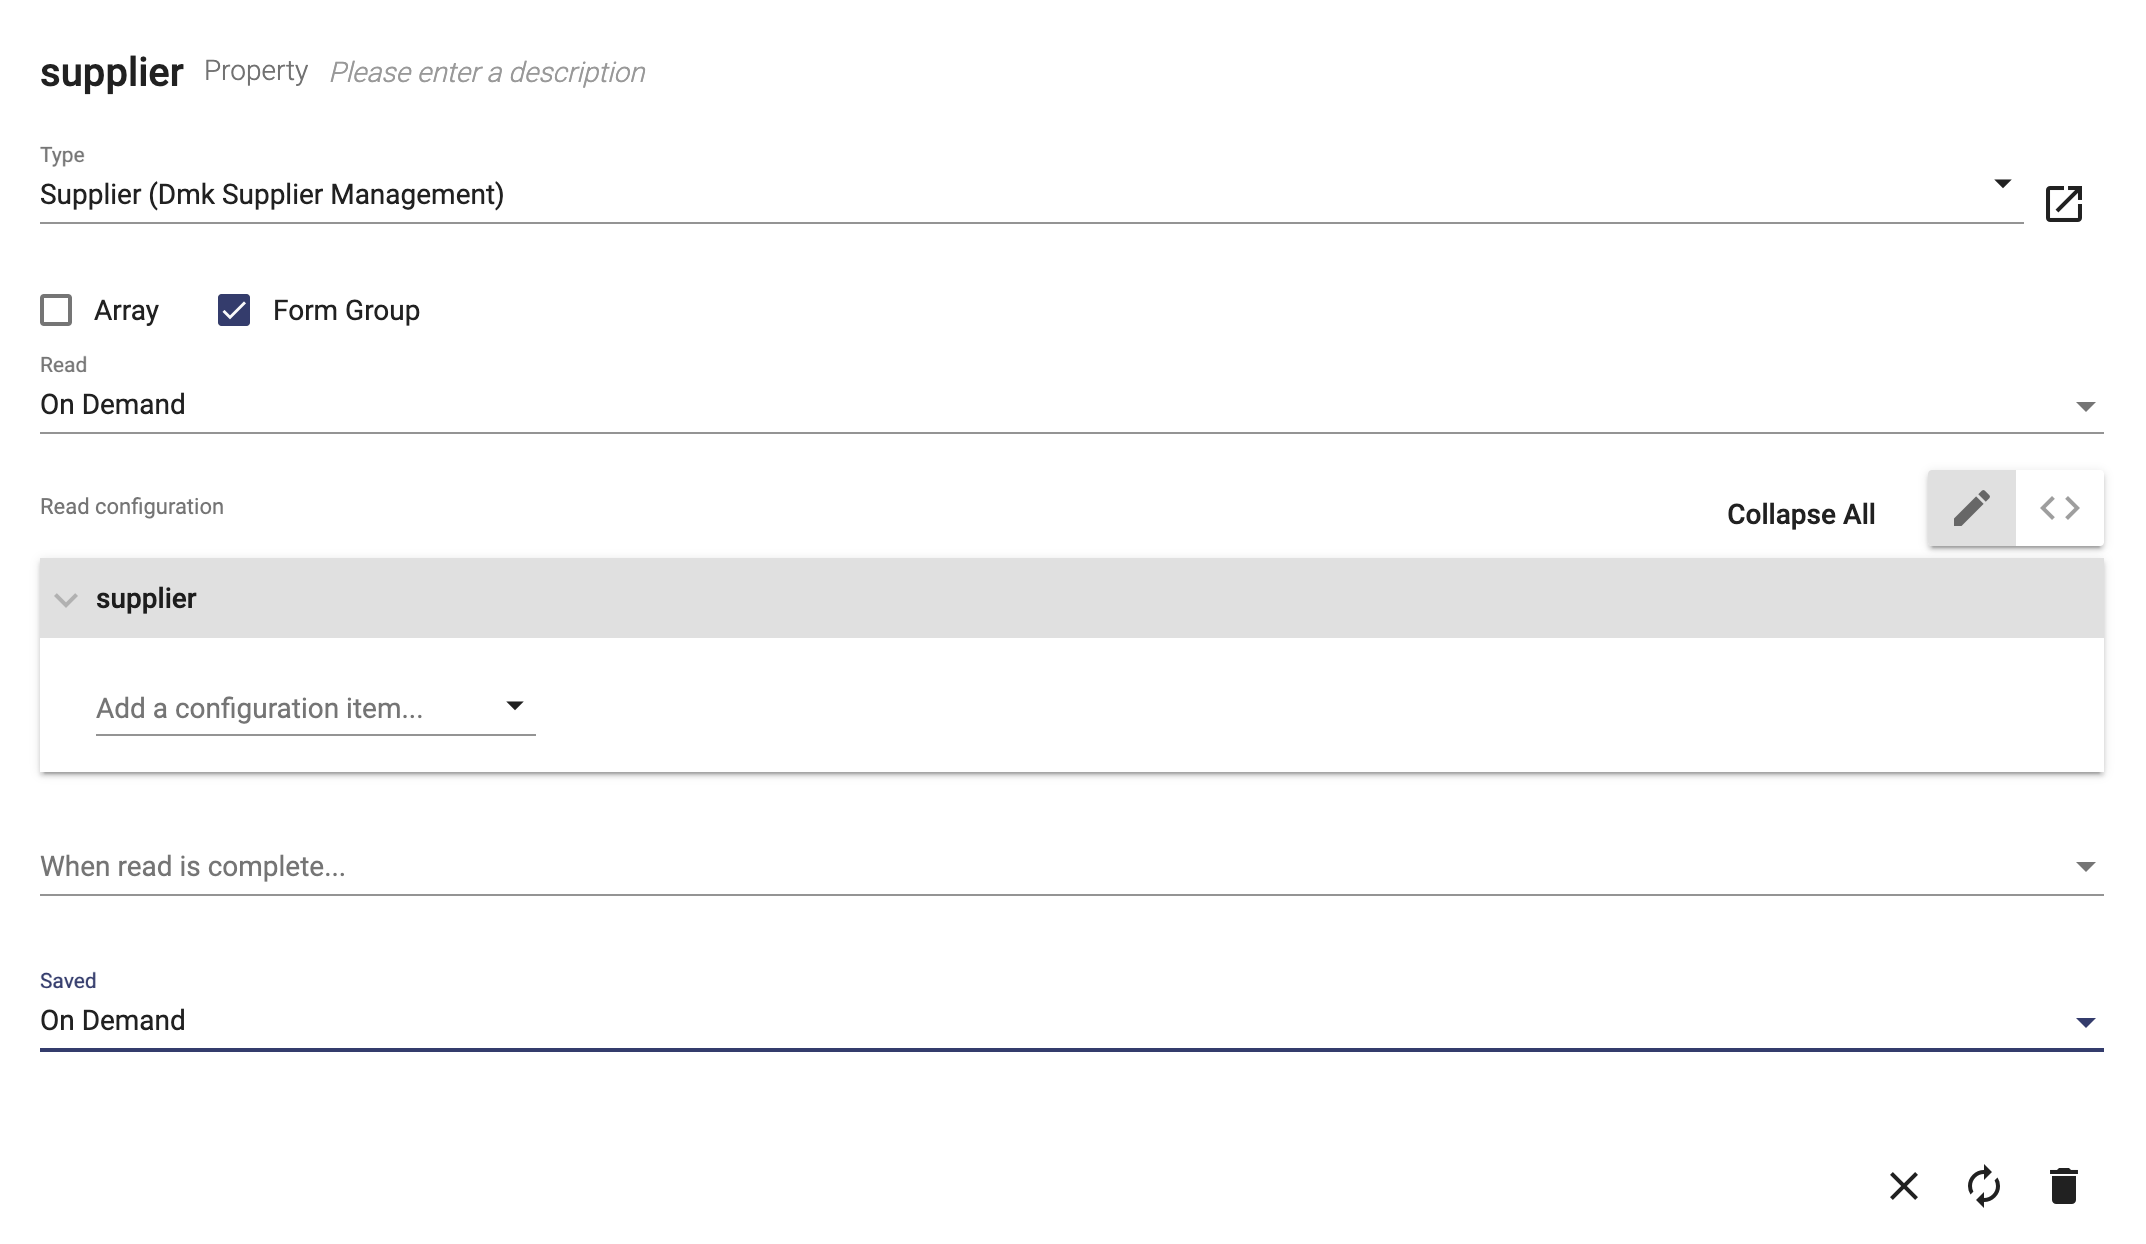
Create a new page called Add Supplier. Add a supplier property of type Supplier and set it to read On Demand and save On Demand:
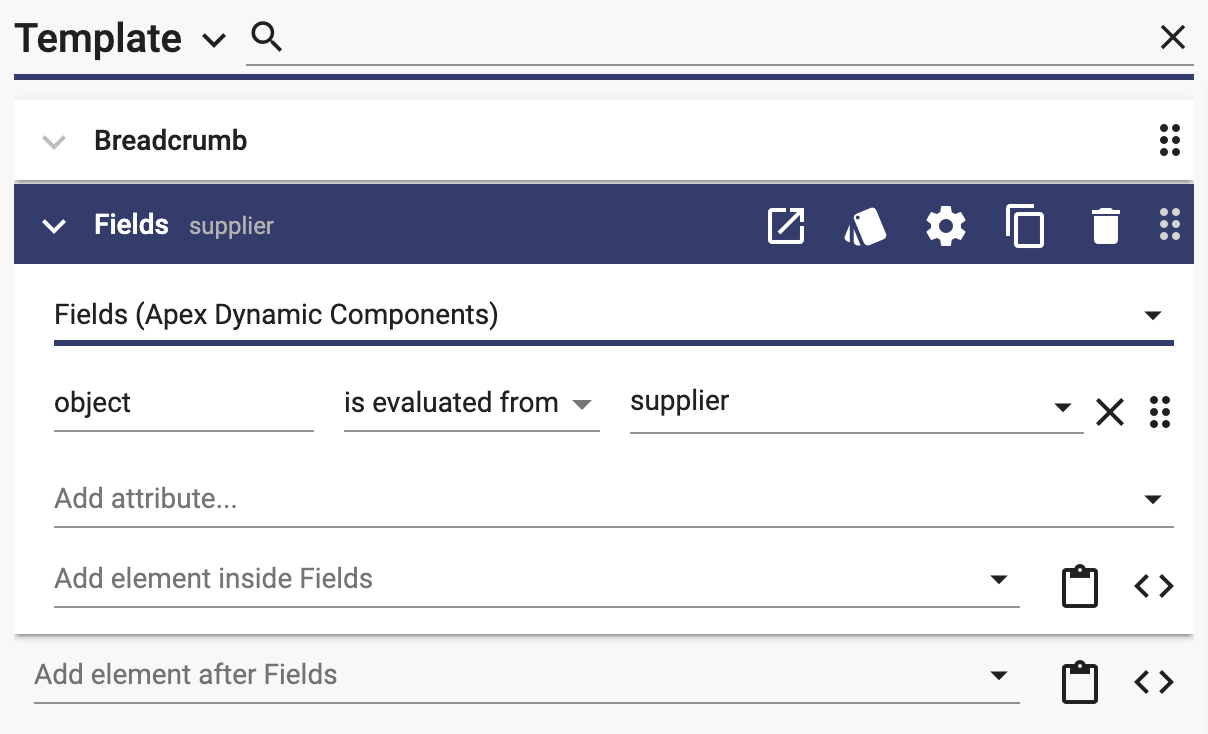
Add a Breadcrumb and Fields bound to the supplier property:
Generate the app and go to the /addSupplier url:

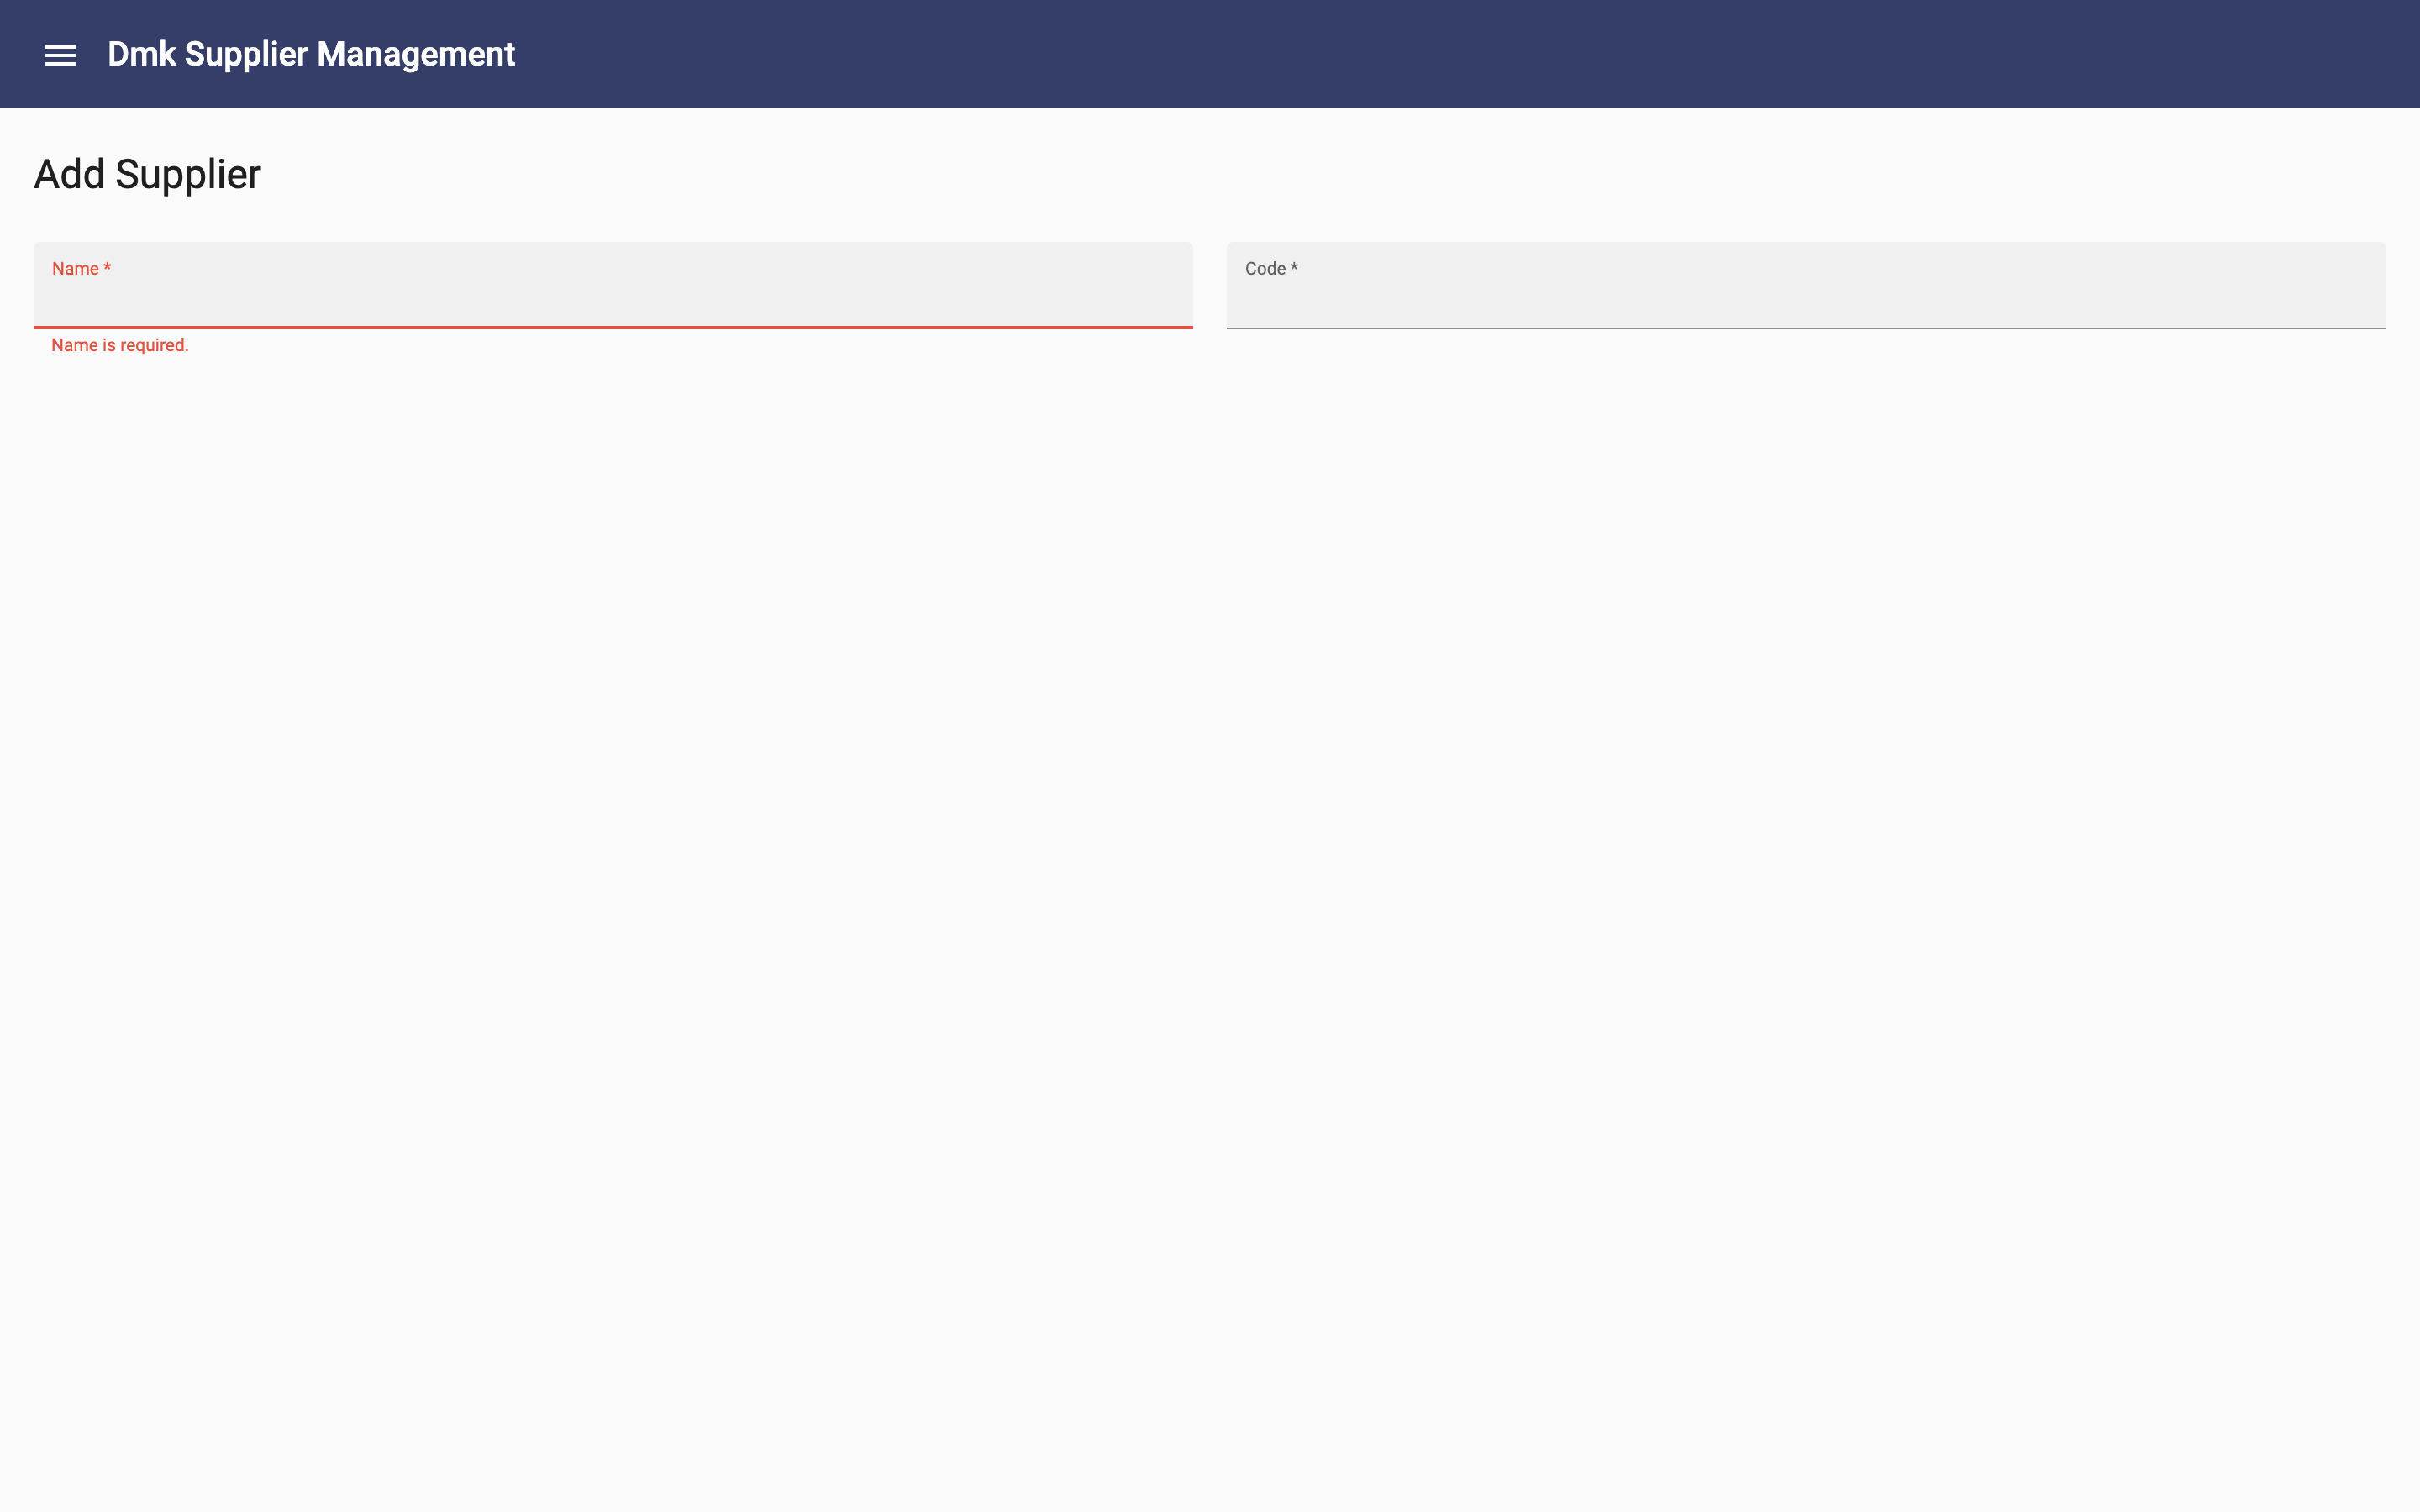
Make Name and Code Required
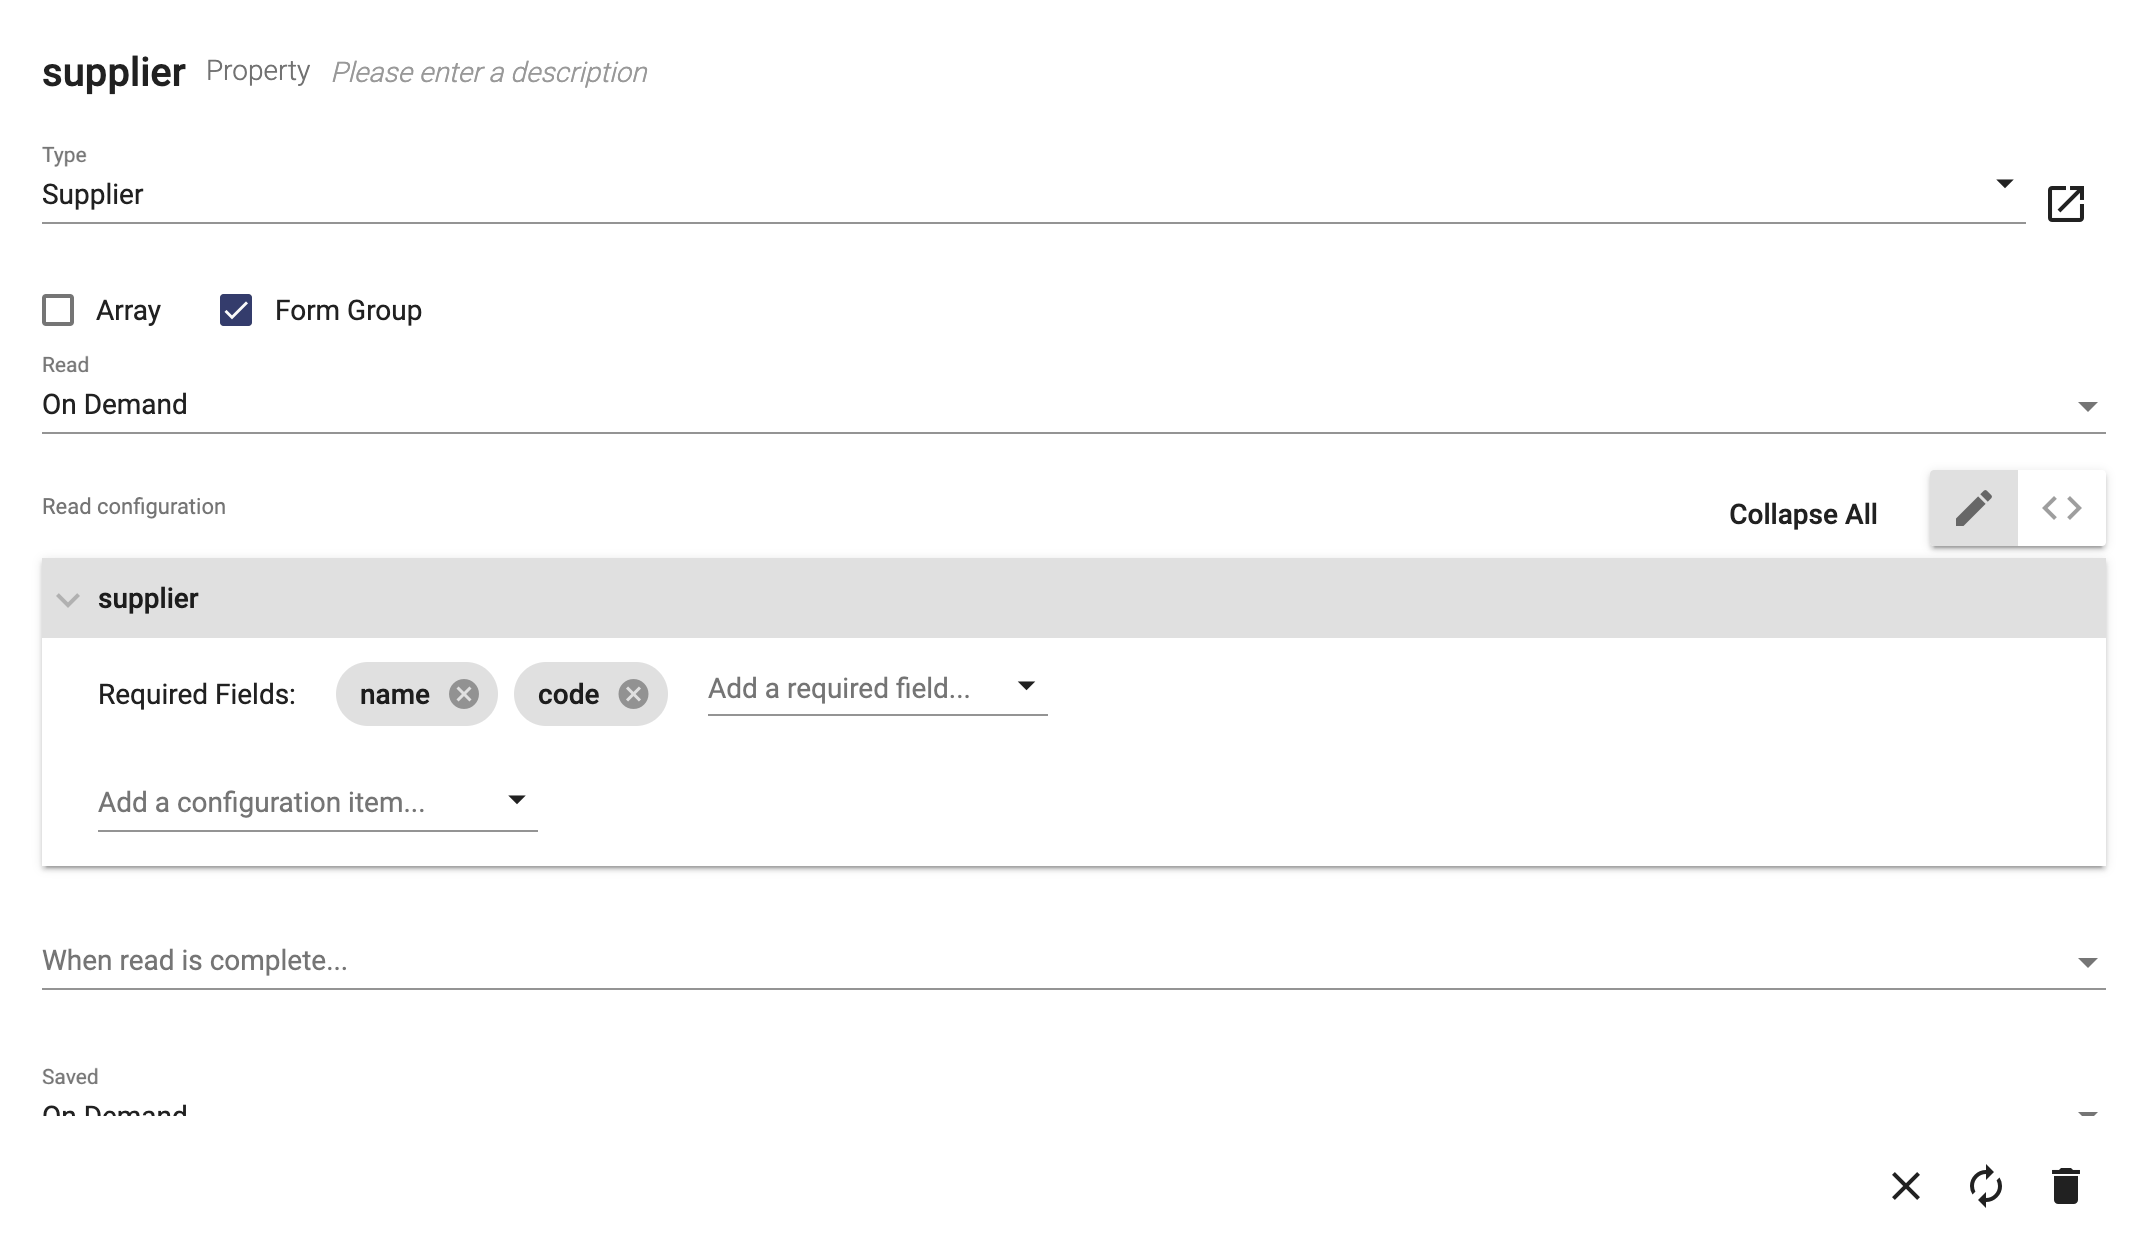
Click the suppliers property and update the Read Configuration to make the name and code fields required:
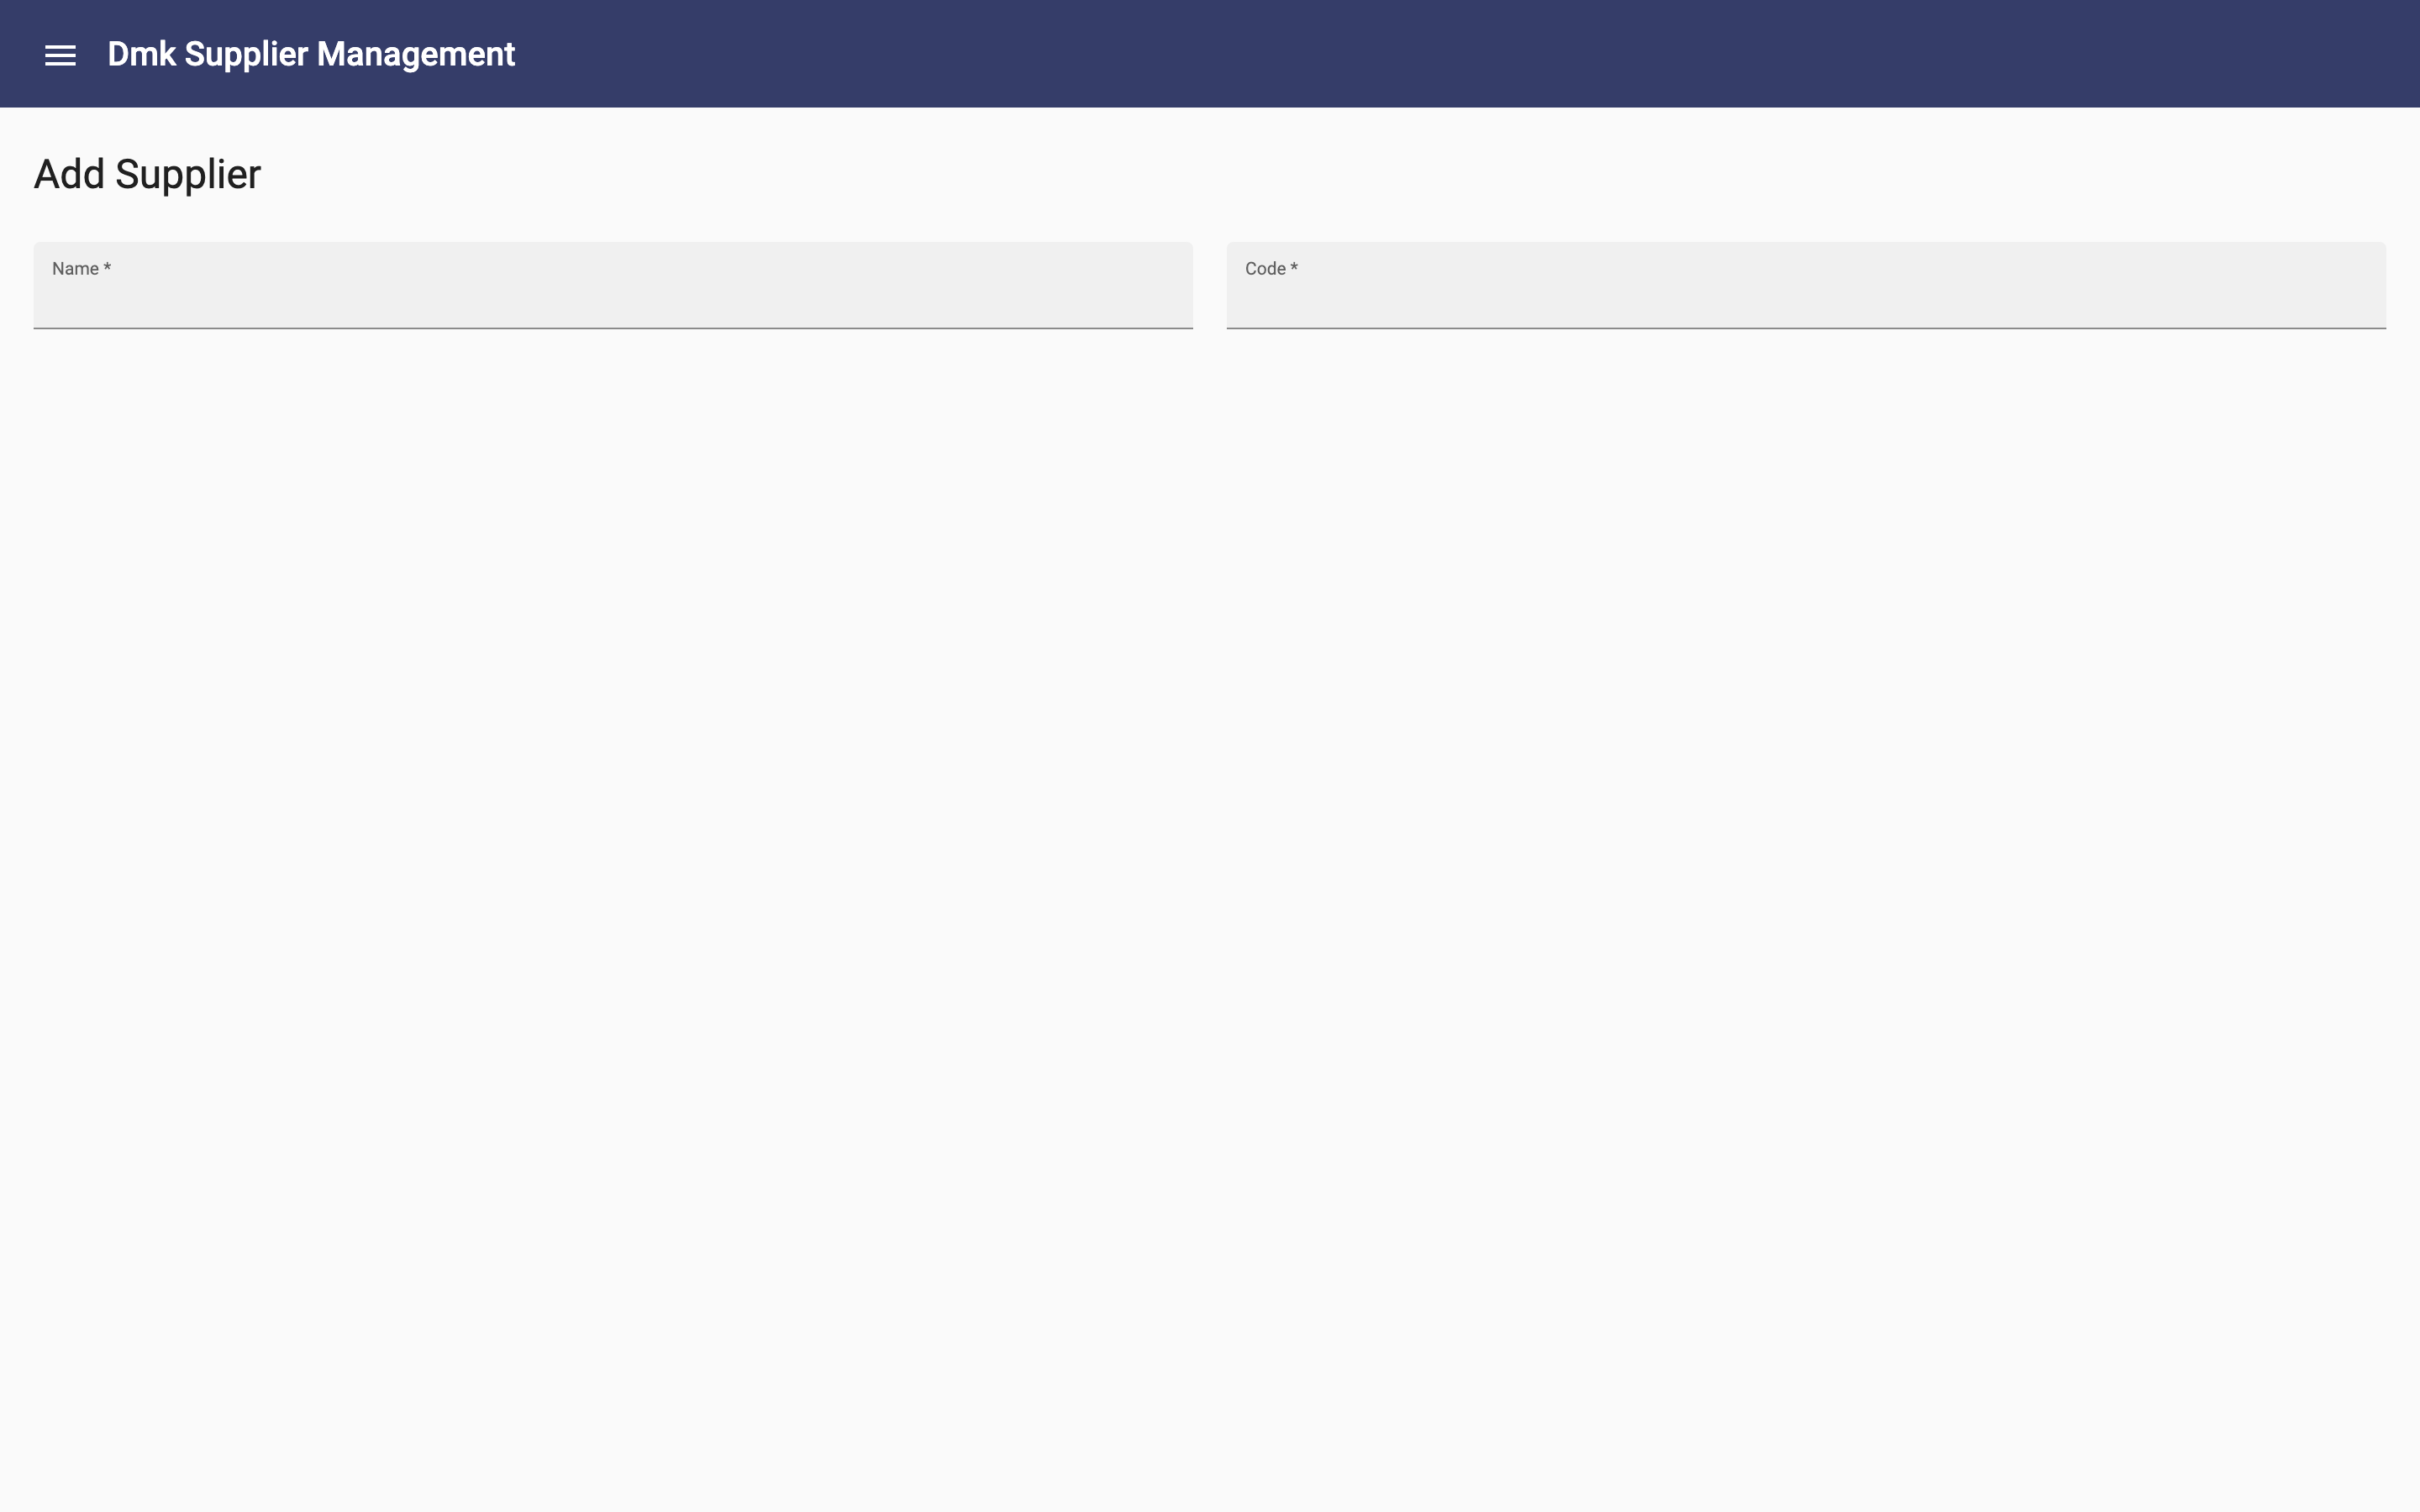
Generate the app, and notice that the fields now have the asterisk indicating that they are required:
Enter something in name and then remove it and click or tab out of the field. The field display the error:
Add a Create Button
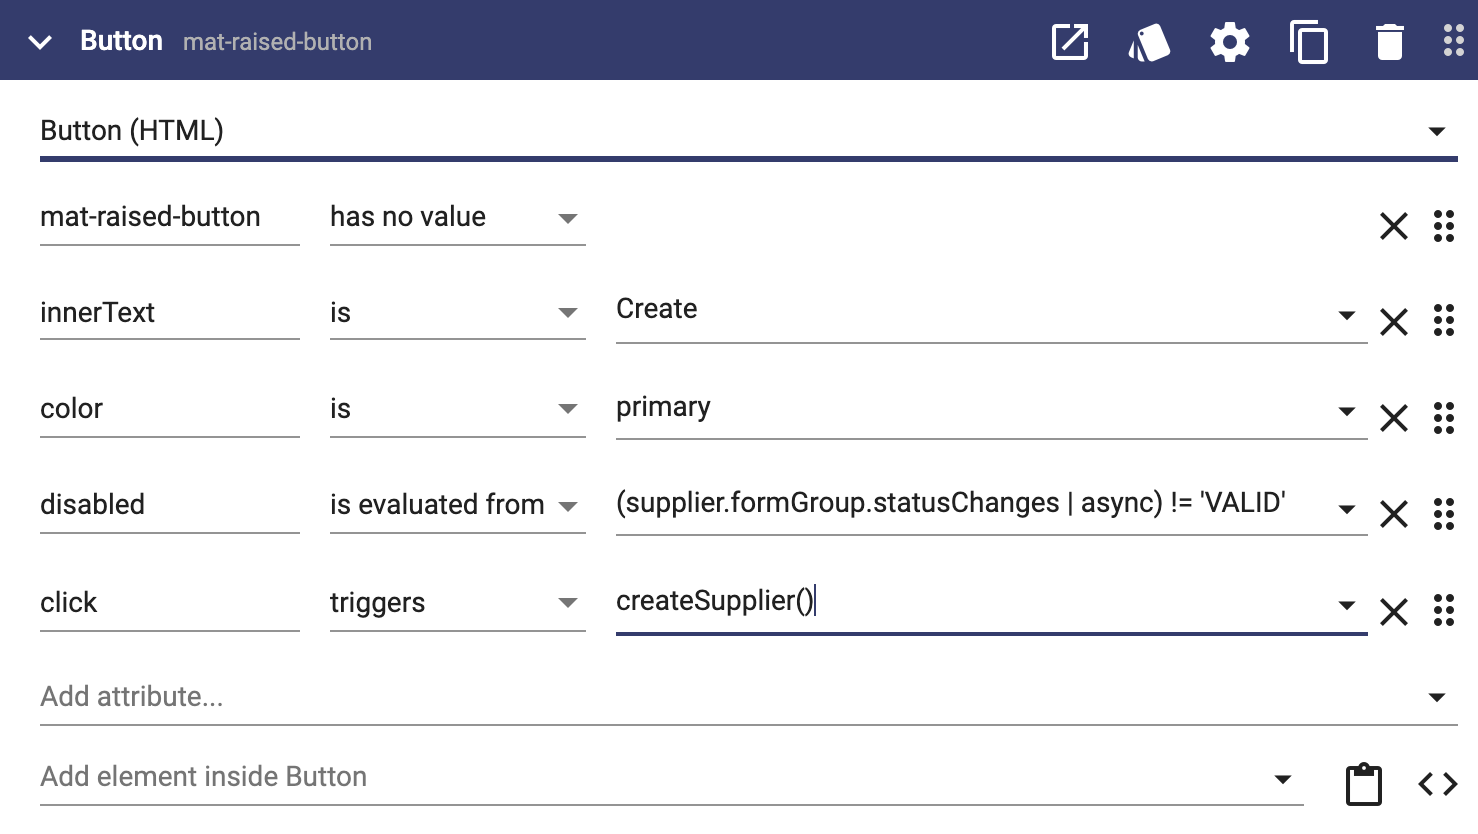
Add a raised button that creates the supplier (order of the attributes does not matter):
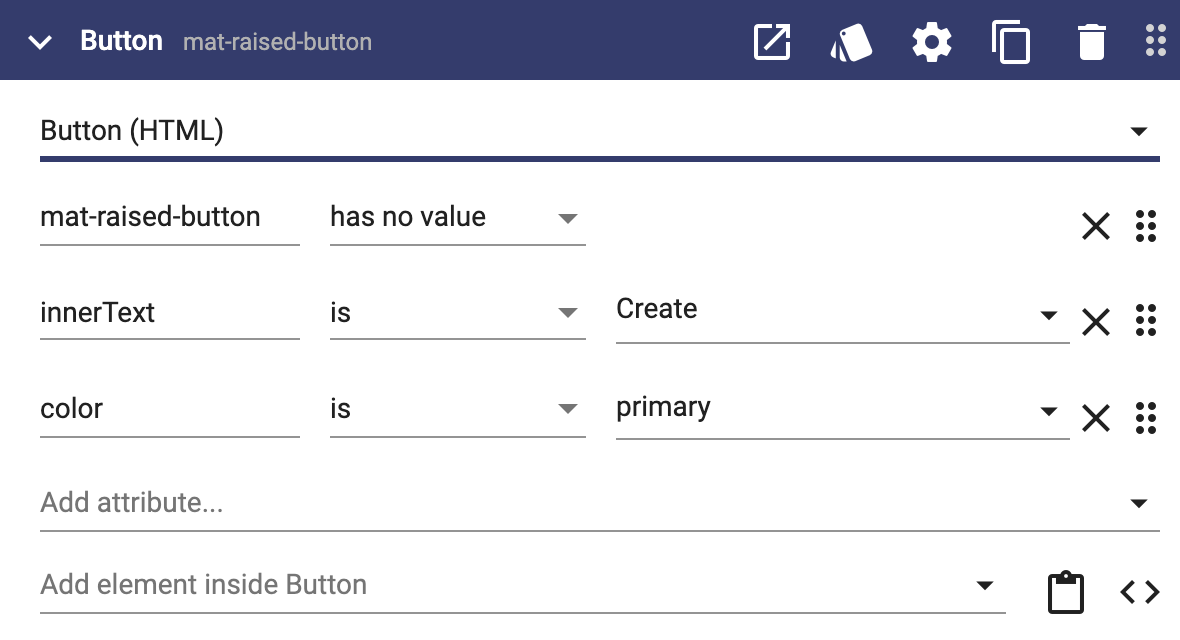
Here are the details:
- innerText sets the label of the button to "Create"
- "mat-raised-button" makes this an Angular Material raised button
- "color" sets color of the button to the app's primary color
- "click" will trigger the create of the supplier by calling the .save method
Enable / Disable a Button
That's great but we don't want the user to click the button unless the values are valid. Add a disabled attribute to the button with this value:
(supplier.formGroup.statusChanges | async) != 'VALID'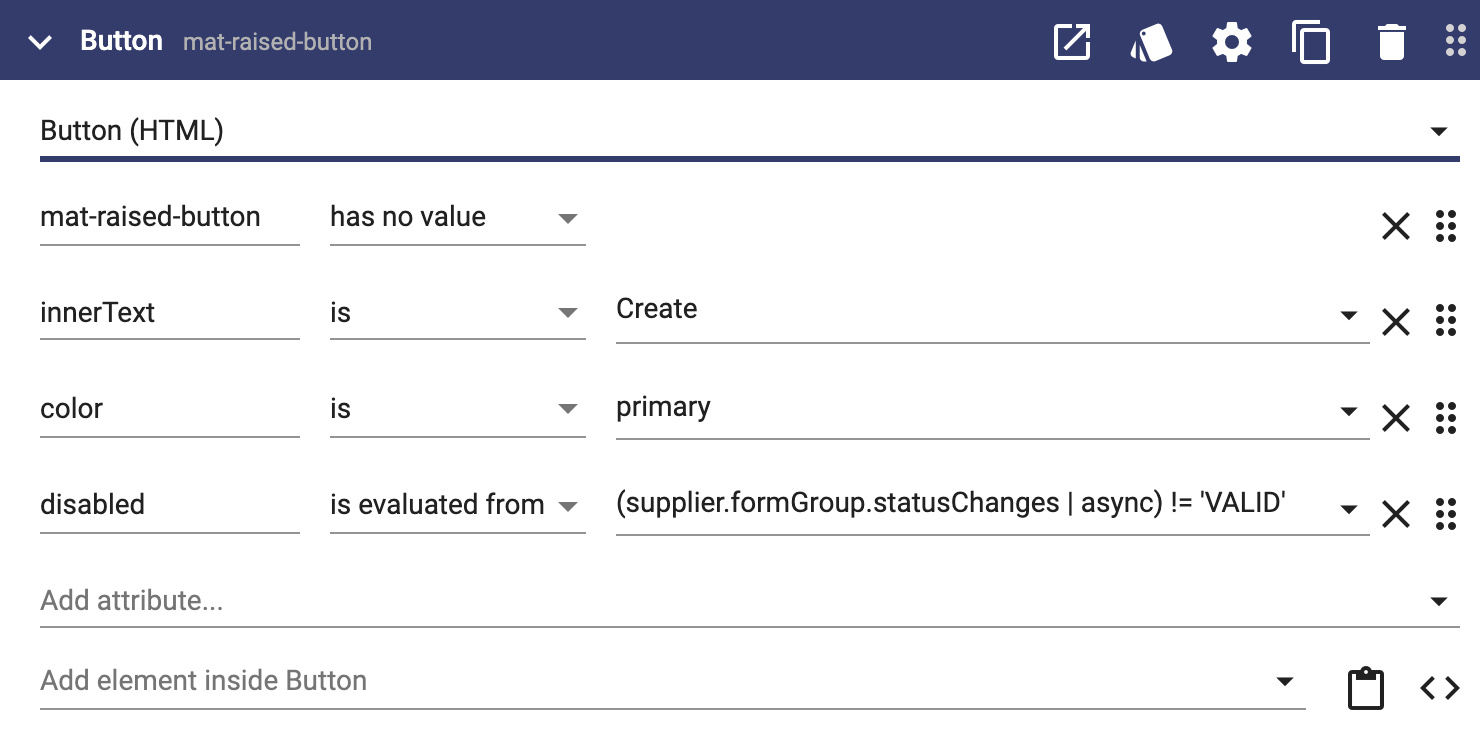
Let's go through the details of that expression:
- "supplier.formGroup" is the Angular Form Group for supplier
- "supplier.formGroup.statusChanges" returns a stream of values as the user edits properties of the supplier
- The parenthesis, the pipe (" | ") and "async" convert that stream of values into a single value
- " != 'VALID' " checks the value and returns true or false
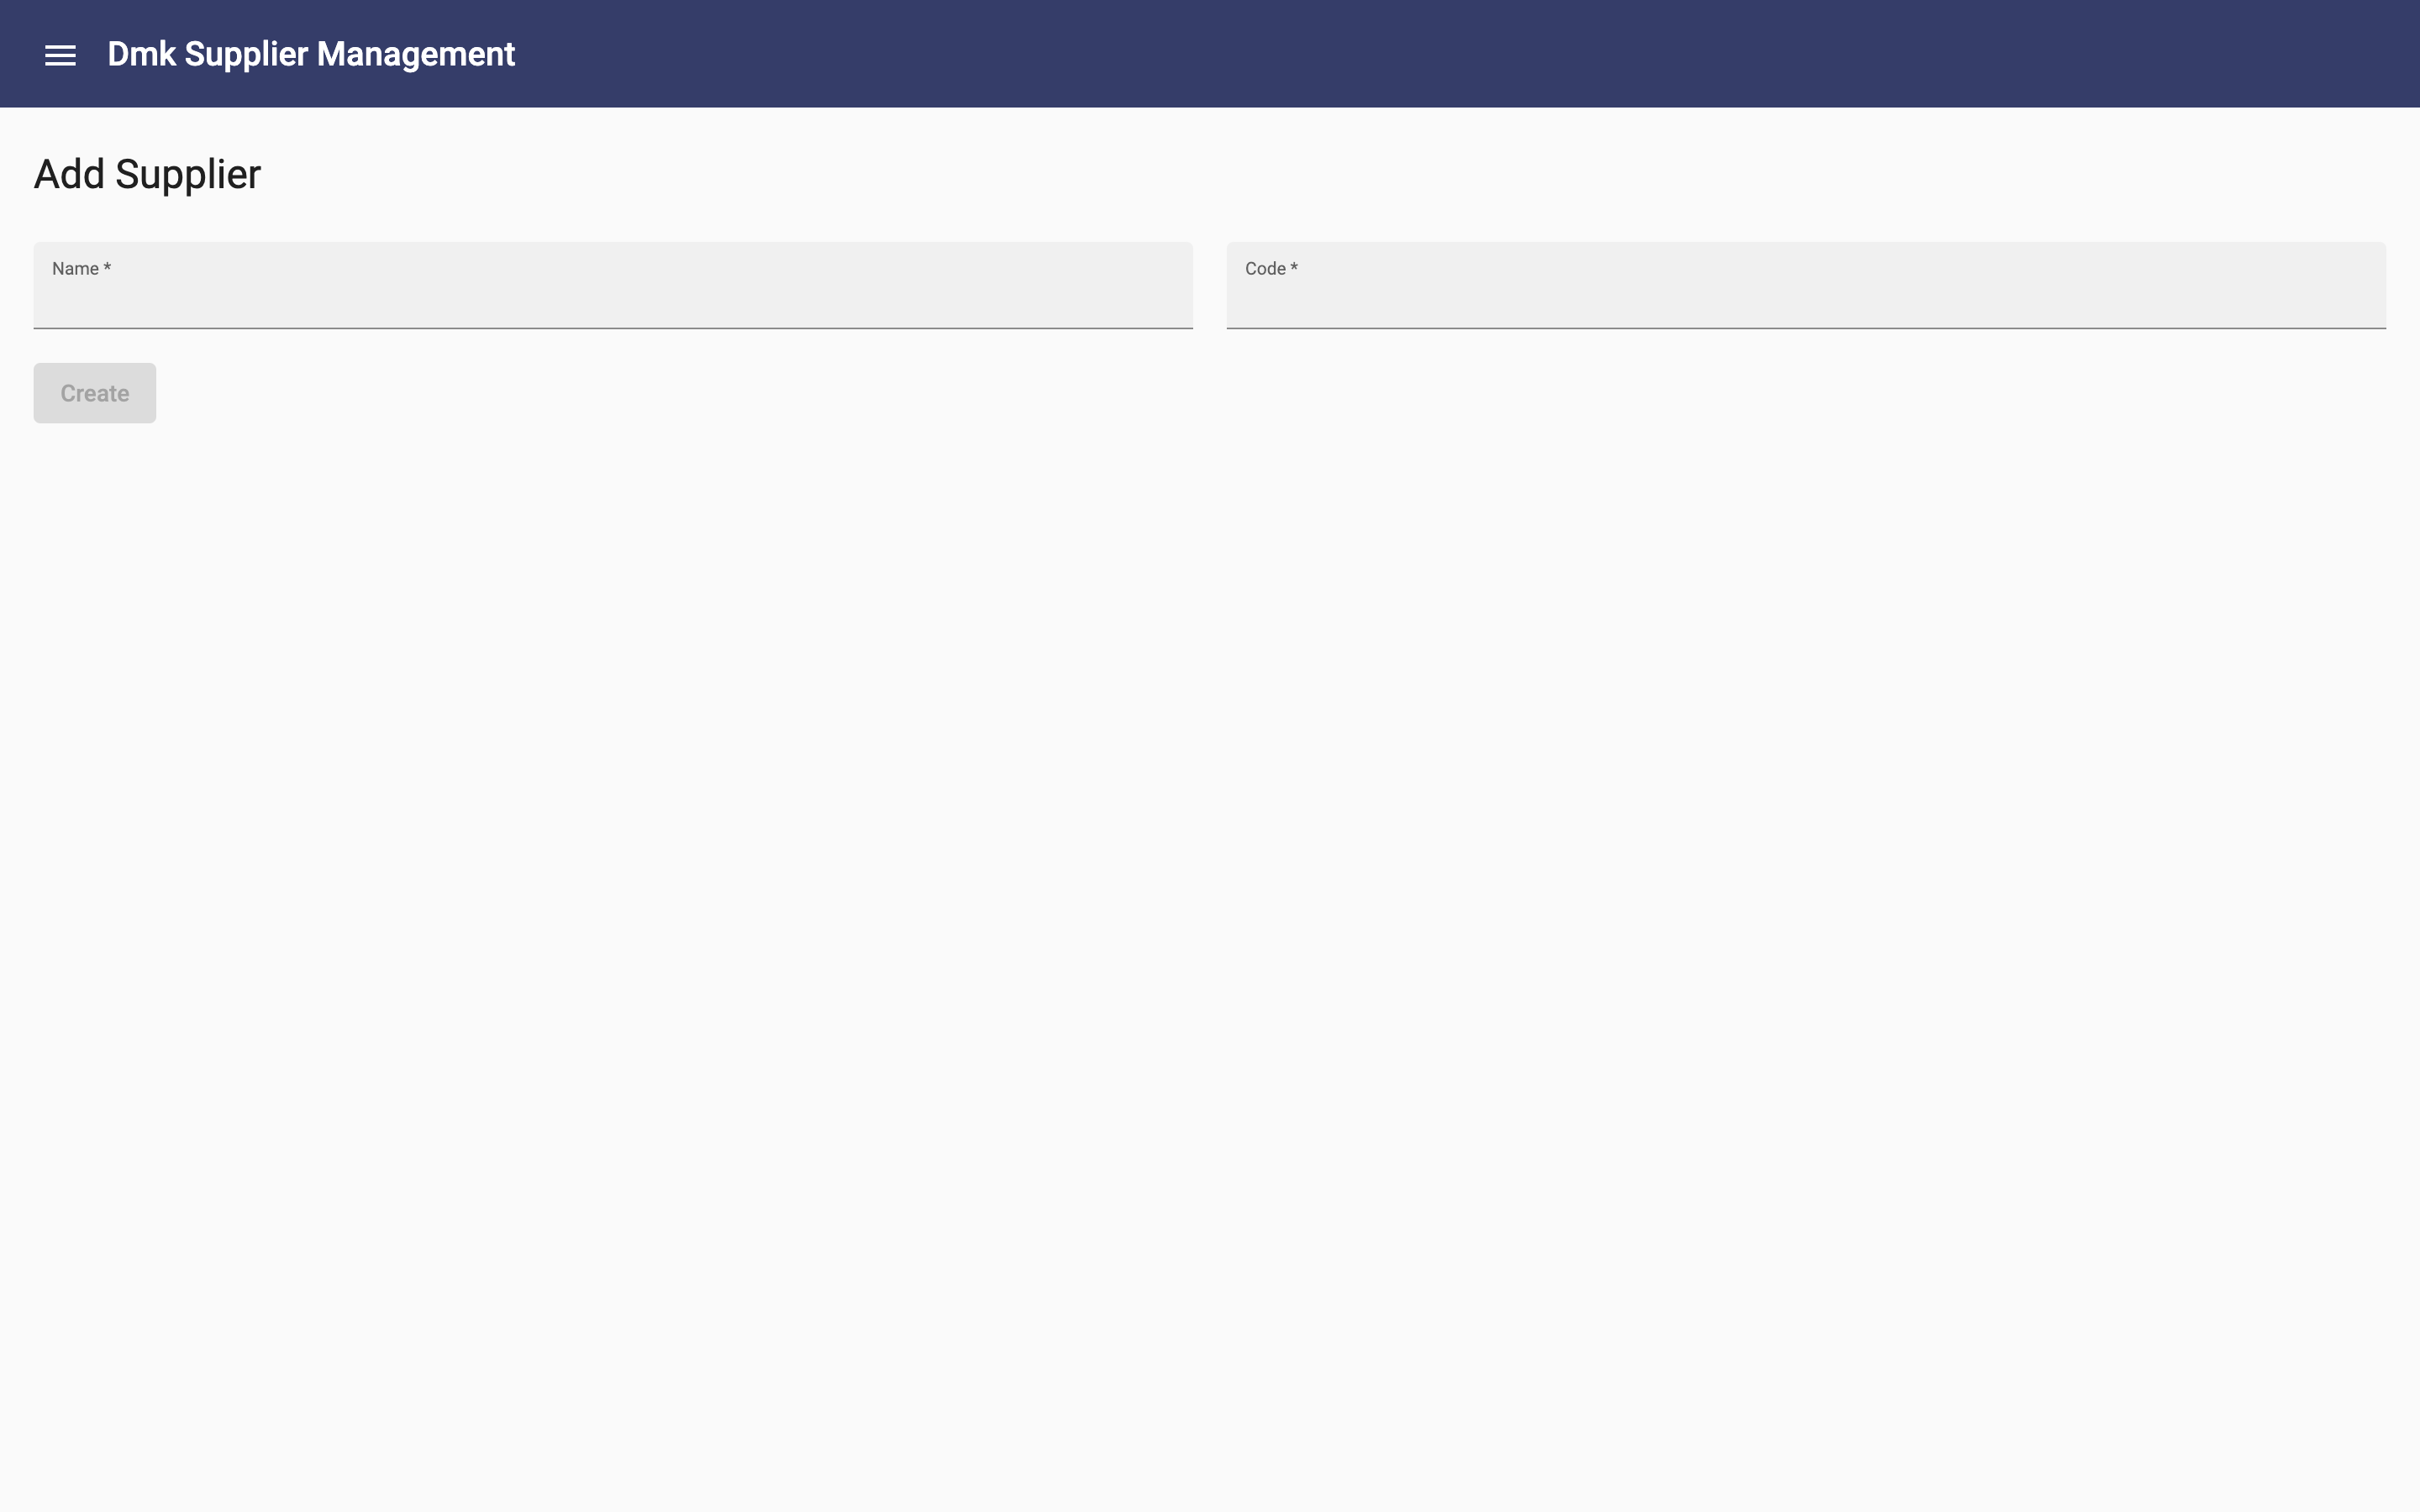
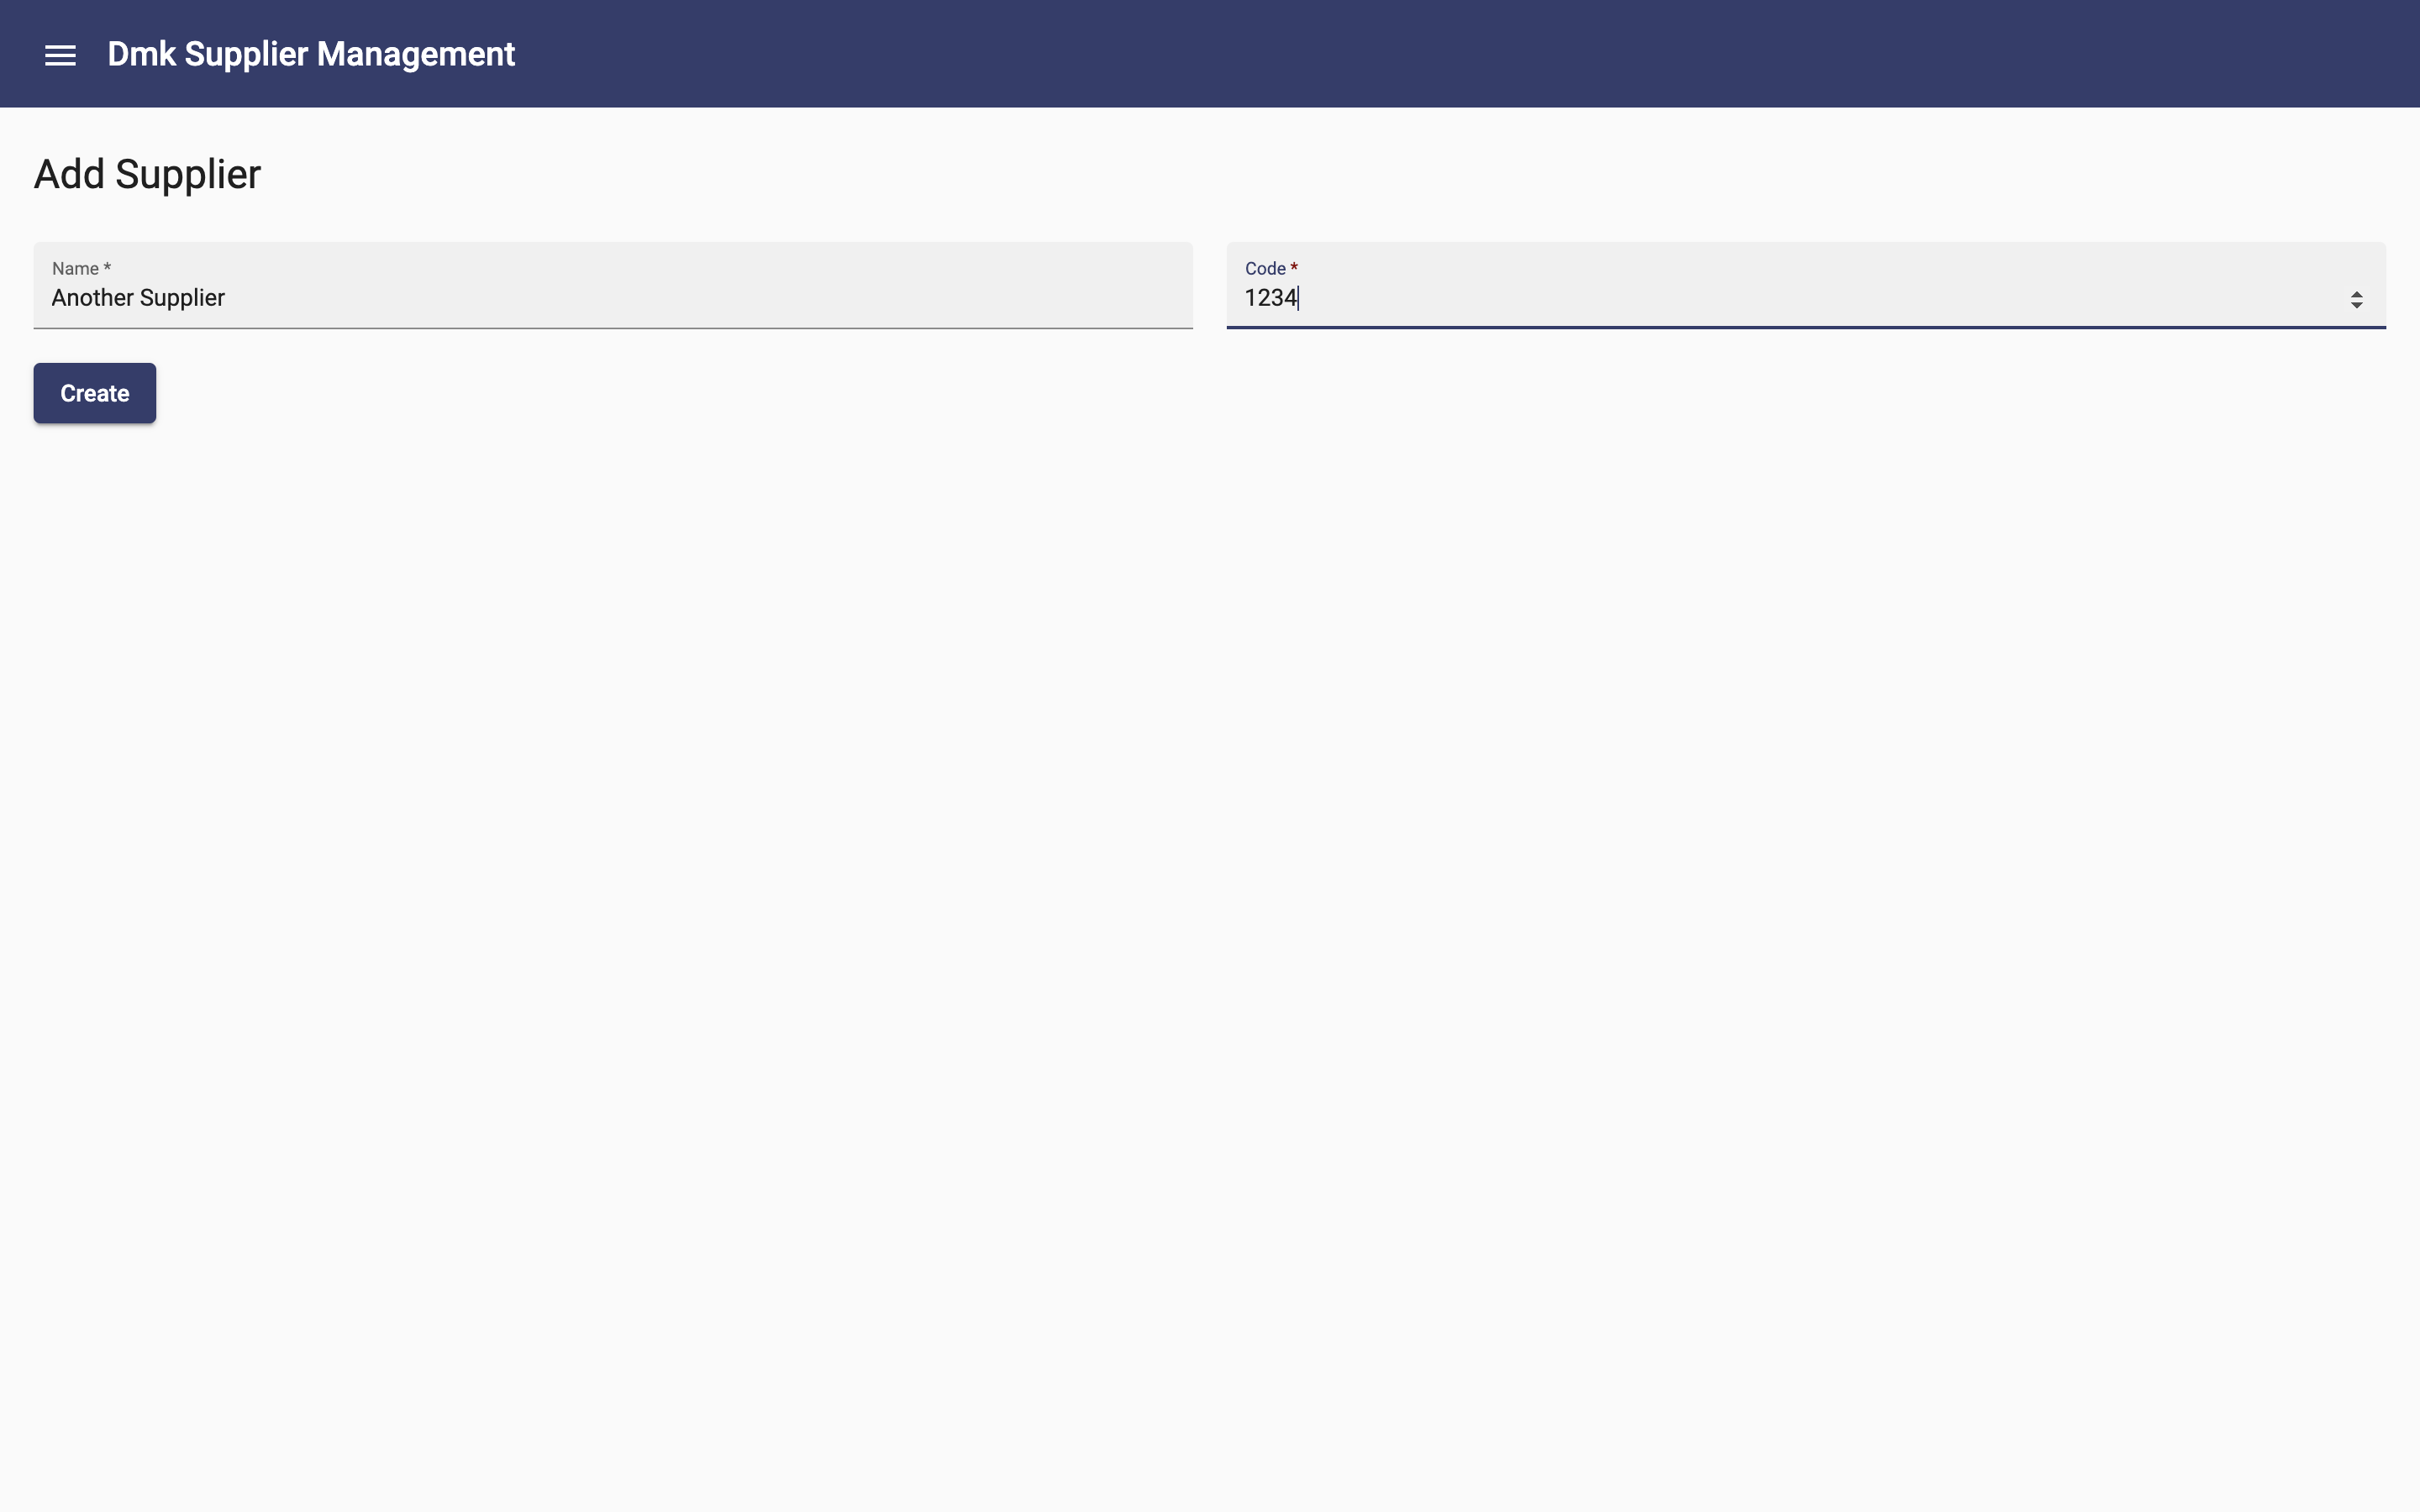
Generate the page and try it out. Initially the button is disabled:
After you enter valid values in the two fields, the button is enabled:
Add the Create Supplier Method
You should review User Interface Methods, before doing this step.
Add a user interface method called createSupplier, check the "Is async" checkbox and put this code in it:
await this.supplier.save();

this.router.navigateByUrl('/suppliers');
The first line creates the supplier. The second line tells the app to navigate to the Suppliers page. Note that the "await" is critical here to ensure that the supplier is created before the app goes to the Suppliers page. If it was not there, the user may see the list of suppliers without the new entry.
Add the Click Action to the Button
Add the click action to the button:
Generate the app and give it a try!