Set defaults using the business object definition and a behavior. Also use icon buttons in place of a field.
Written by Andy Roper
Updated 4 years ago
4 min read
This lesson introduces setting Business Object defaults using the static assignment and behaviors. Behaviors are server-side logic that extend the basic create, read, update, delete behavior of a business object. It also shows you how to control which properties are shown in different contexts and how to use icon buttons to change values.
Set Default Values
Setting a Static Default
When we create a supplier, we want the status value to default to "Proposed". We can set that static default in the Business Object Definition.
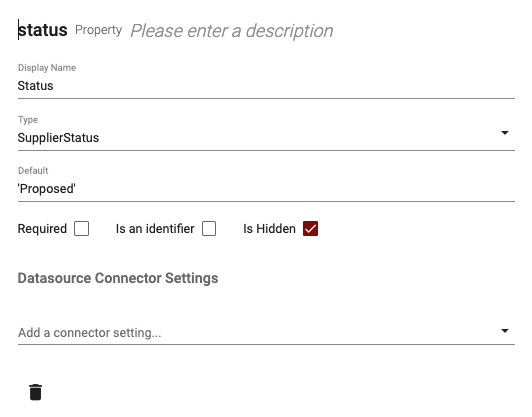
Open the Supplier business object and click the status property. Add the default value of 'Proposed' in the Default field. Since we are setting the status automatically, there is no point in prompting the user for that when adding a supplier. To eliminate this, we can check the "Is Hidden" checkbox:
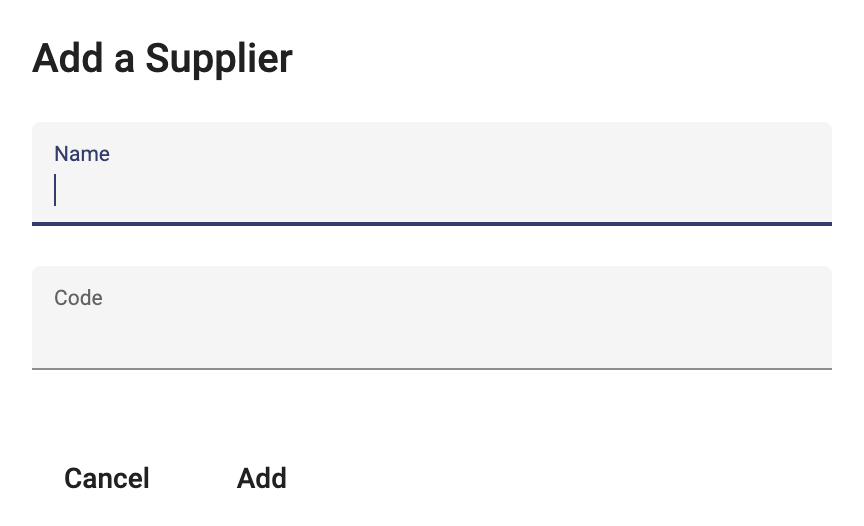
Generate the business object and try it out. You will see that the Status field is not shown on the add dialog:
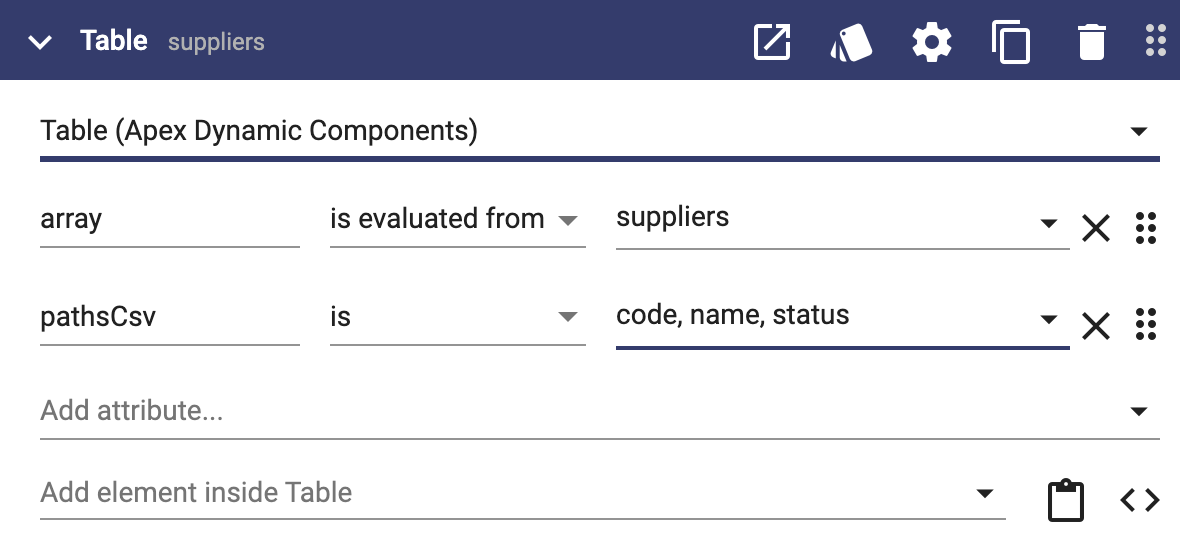
Since we have hidden the status field on the Add Supplier page, we should show the status on the Supplier table. To do this, open the Suppliers page and add "status" to the pathsCsv attribute of the table:
Generate the page and try it out. Status is now the third column on the table.
Setting a Dynamic Default Value
We also want the code field to default to the next sequential number from all of the Suppliers we have entered. We will use a Business Object Behavior to achieve this server side.
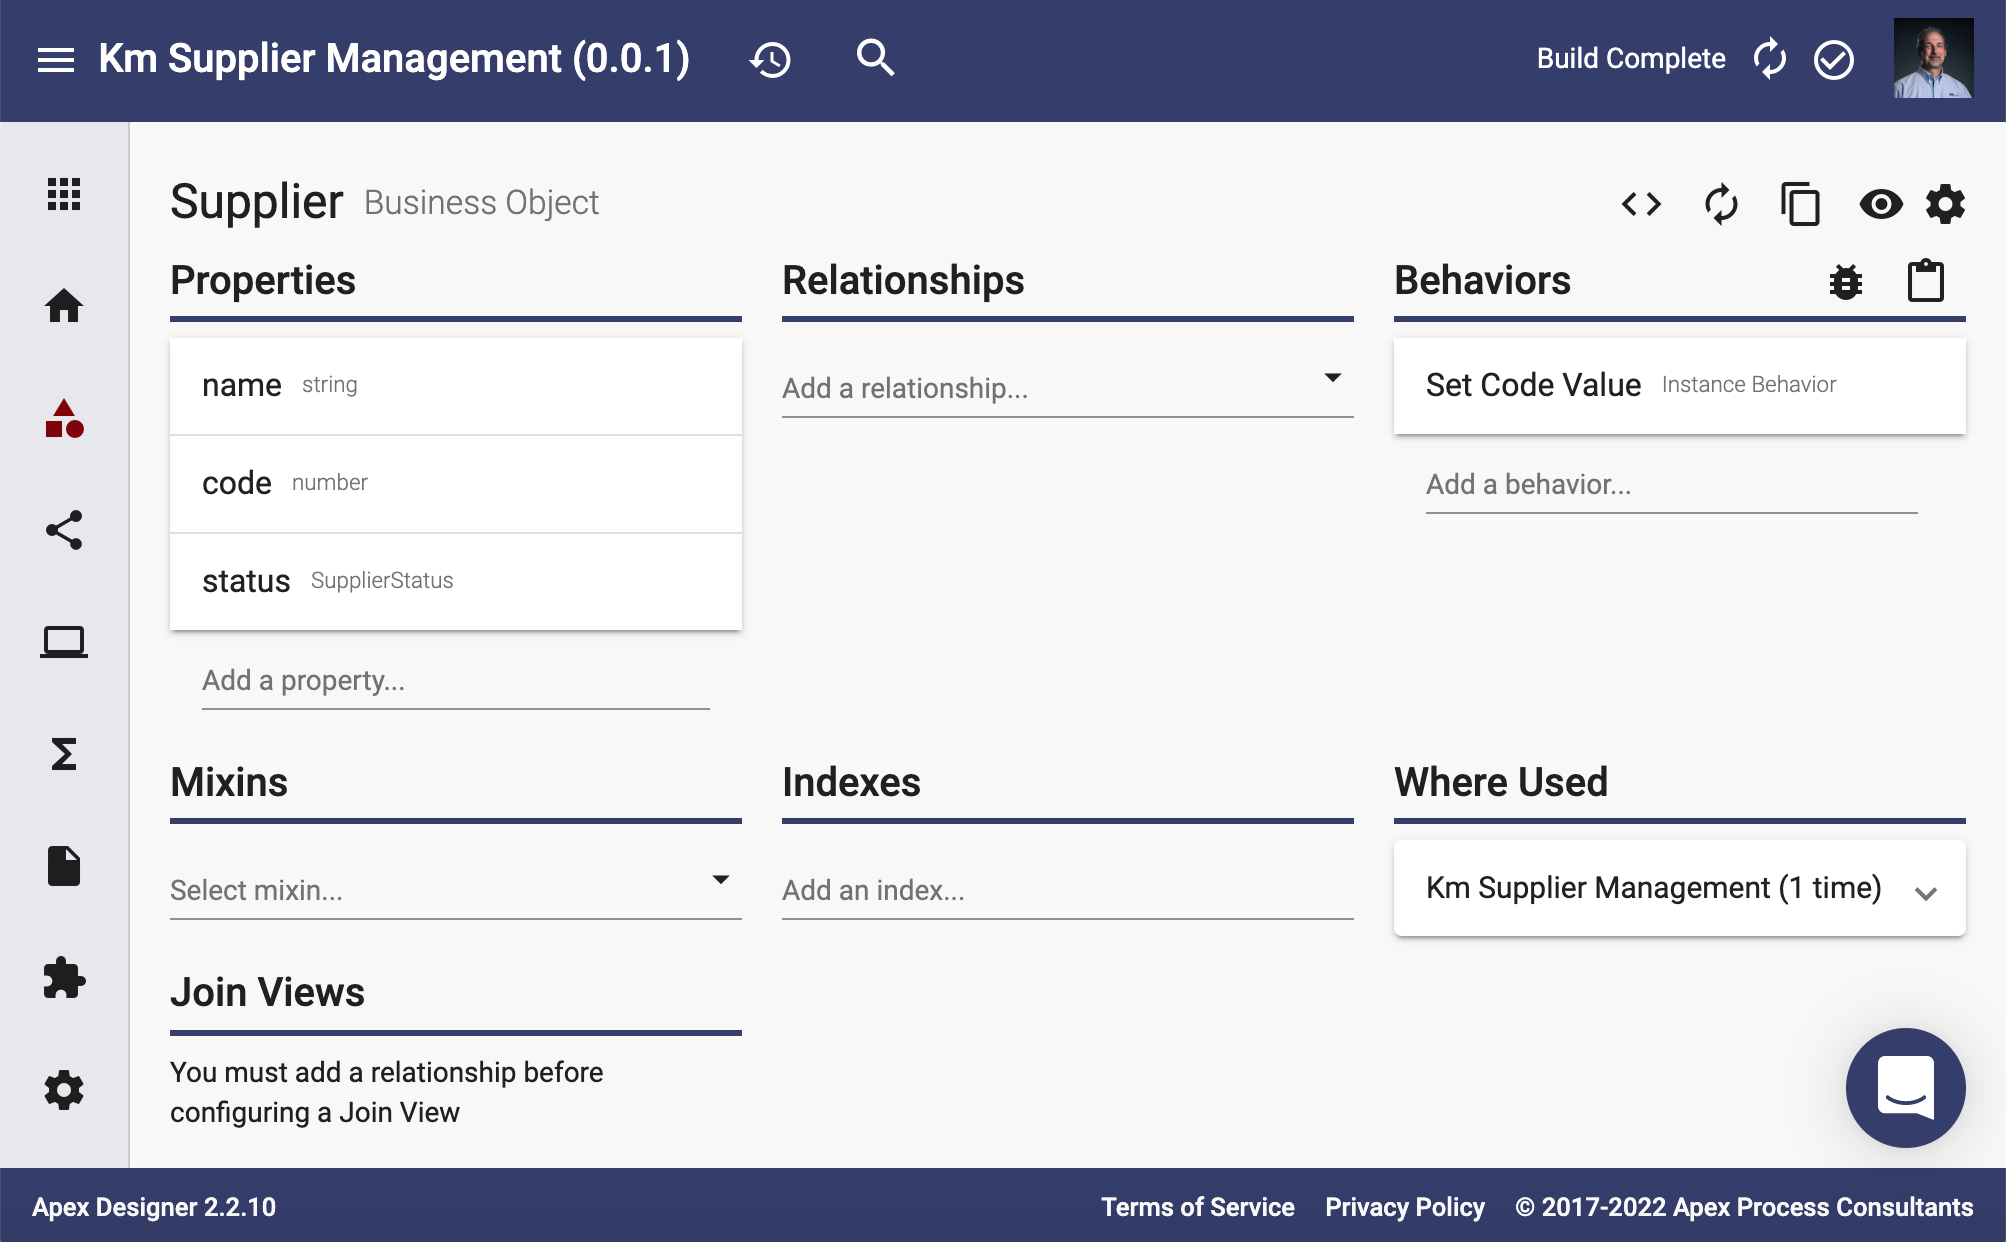
Open the Supplier Business Object and enter "set code value" in the "Add a behavior..." field:
Press enter to add the behavior.
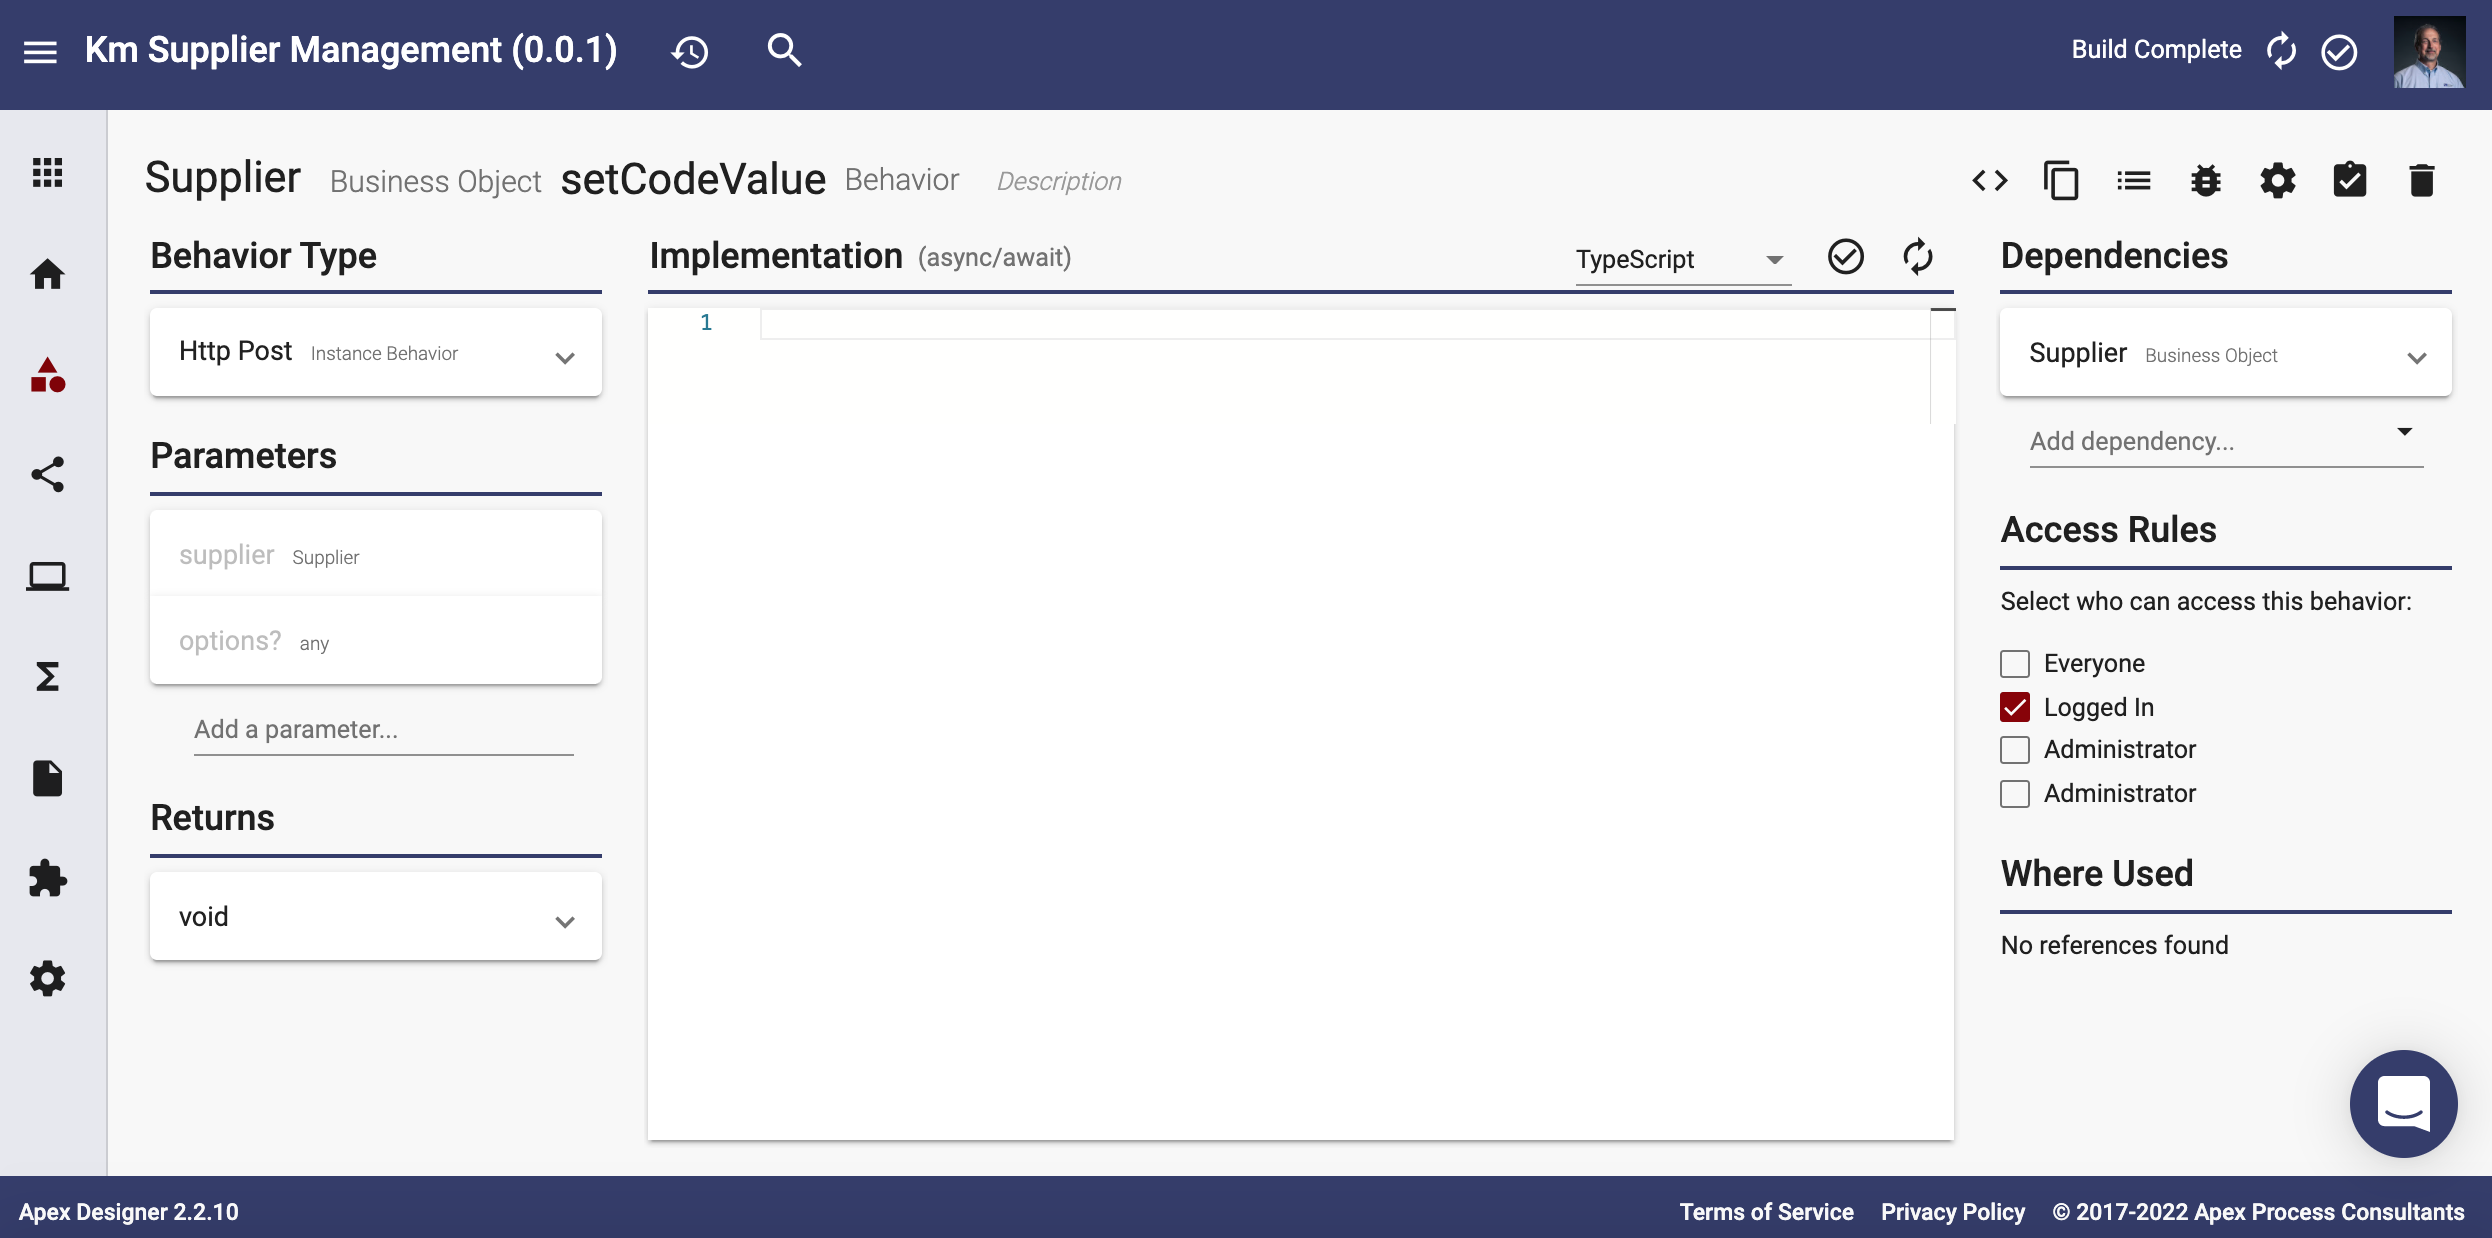
The Business Object Behavior page is shown:
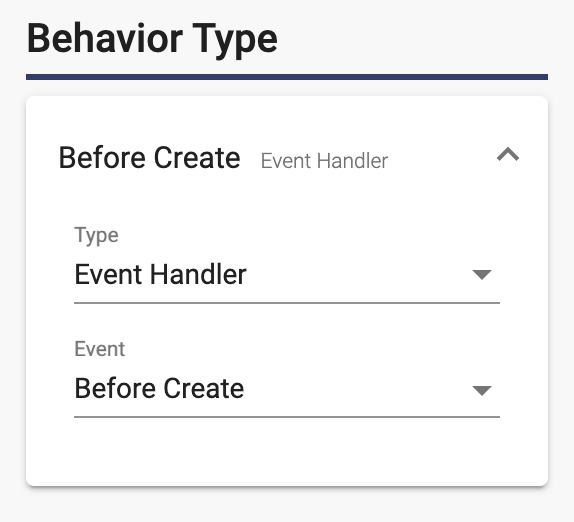
On the top left, click the "Http Post" behavior type (which is the default) and change Type to "Event Handler" and leave the default Event as "Before Create":
The logic in this behavior will be called before each Supplier business object is created.
Notice that "supplier" is the first parameter (input) for this behavior. In the Implementation pane, enter this line:
let max = await Supplier.findOne({ order: 'code desc' }, options);
debug('max %j', max);

supplier.code = max.code + 1;
Generate the business object behavior and try it out by creating a supplier without specifying the code. It will populate with the maximum code value + 1 from your suppliers.
Add an Activate Supplier Icon Button
If you open a supplier, you will notice that the Status field is no longer there. That is because we marked it hidden. Instead, we'll add an icon button with a "click" event to update the status.
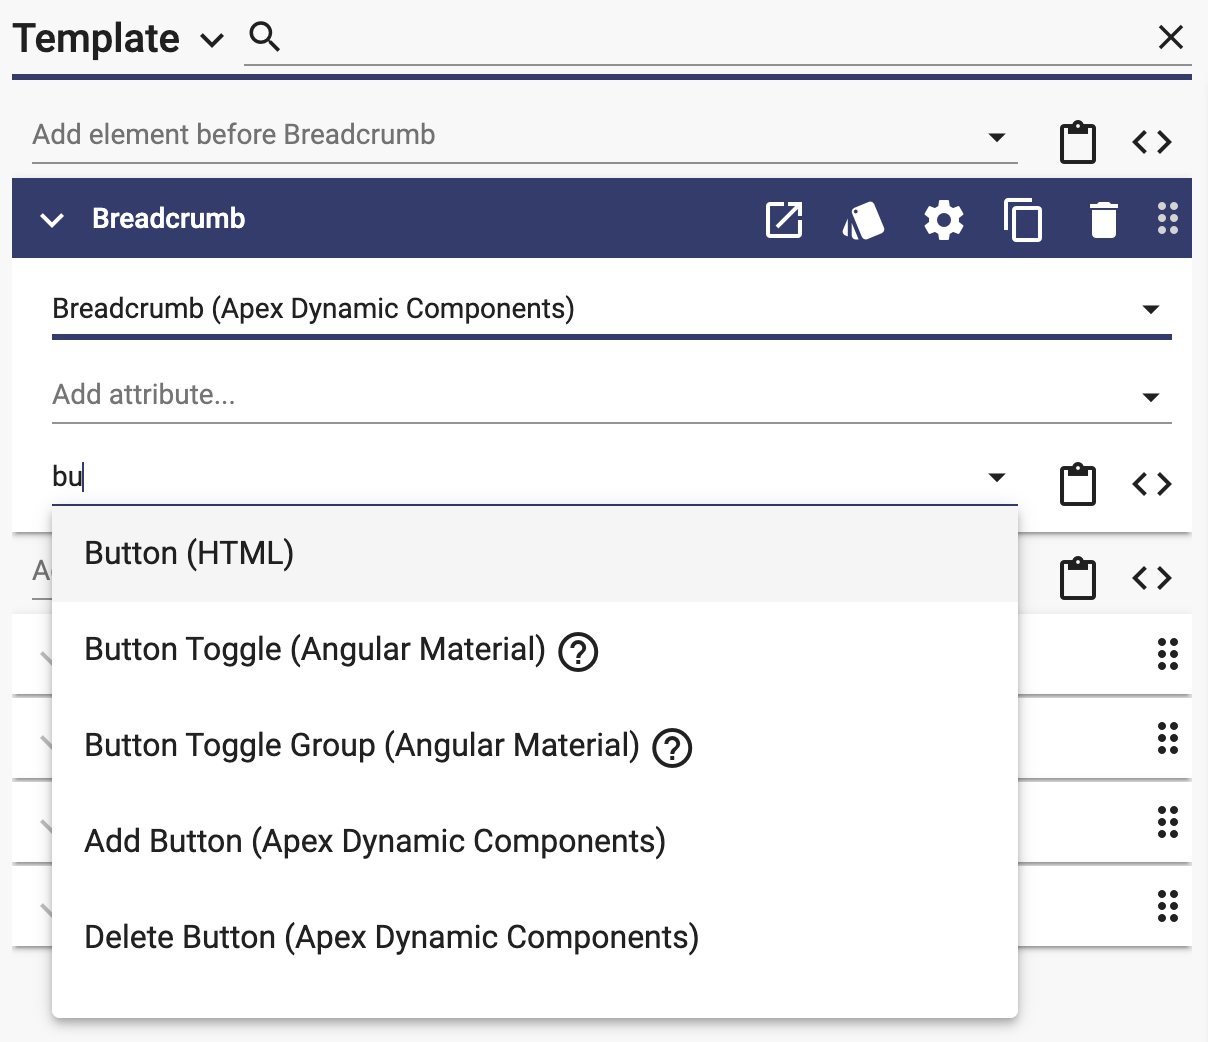
Open the Supplier page, expand the Breadcrumb element and enter "bu" in the "Add element inside Breadcrumb" field:
Press enter to select the "Button (HTML)" component.
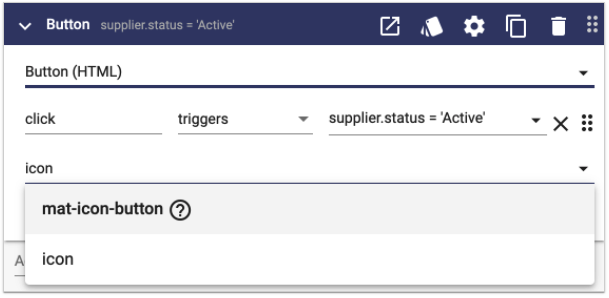
The button is added with a default attribute "click" that "triggers" an action. Enter "supplier.status = 'Active' in the value:
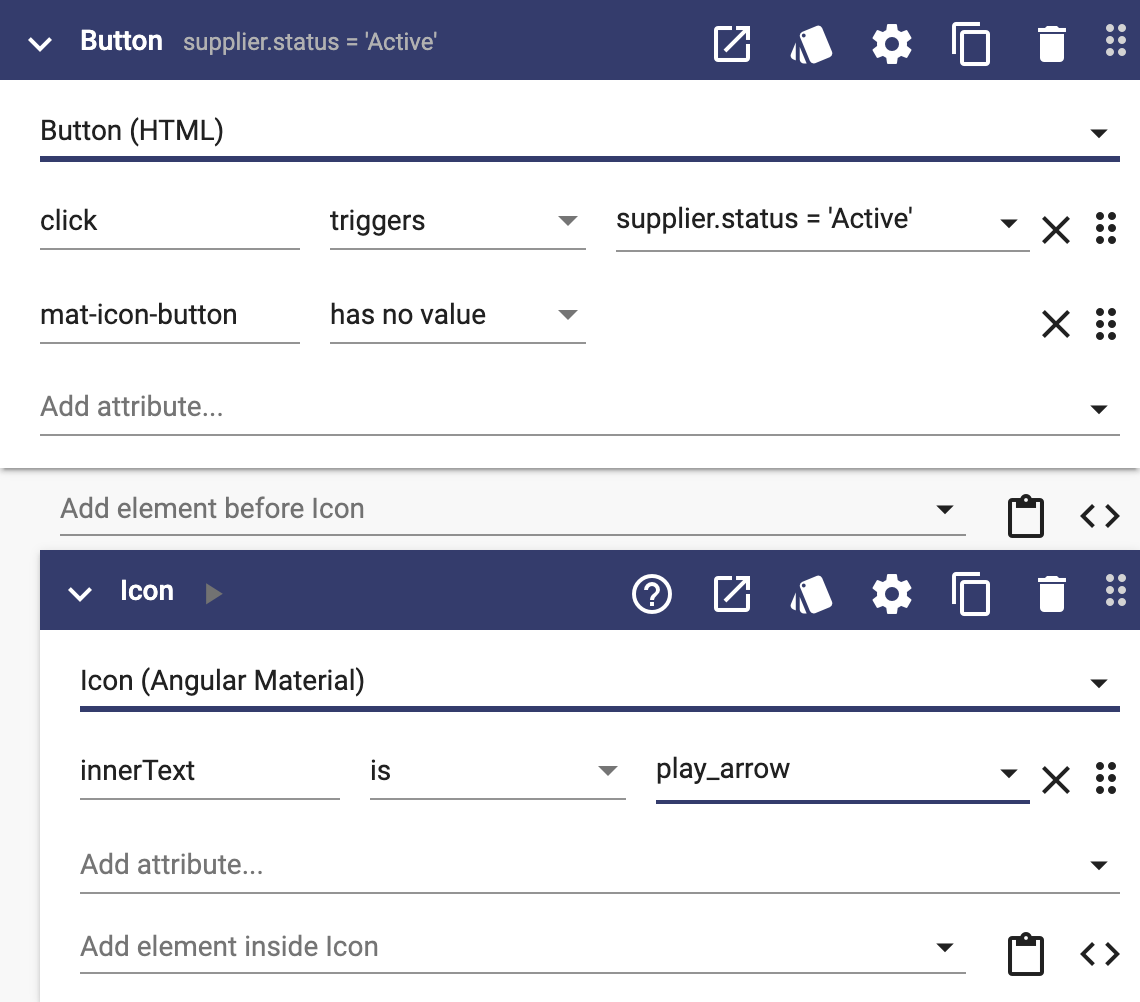
In the "Add attribute..." field, enter "icon":
"mat-icon-button" is an Angular Material "directive" that tells Angular to display the button as an icon button. Press enter to add the attribute.
The Authoring Rules in the Angular Material library, automatically add an Icon element inside the button. Enter "play_arrow" in the innerText to set the icon:
You can use any of the Material Icons that you like.
Generate the page and try it out. Notice that the button is not quite in the right place:
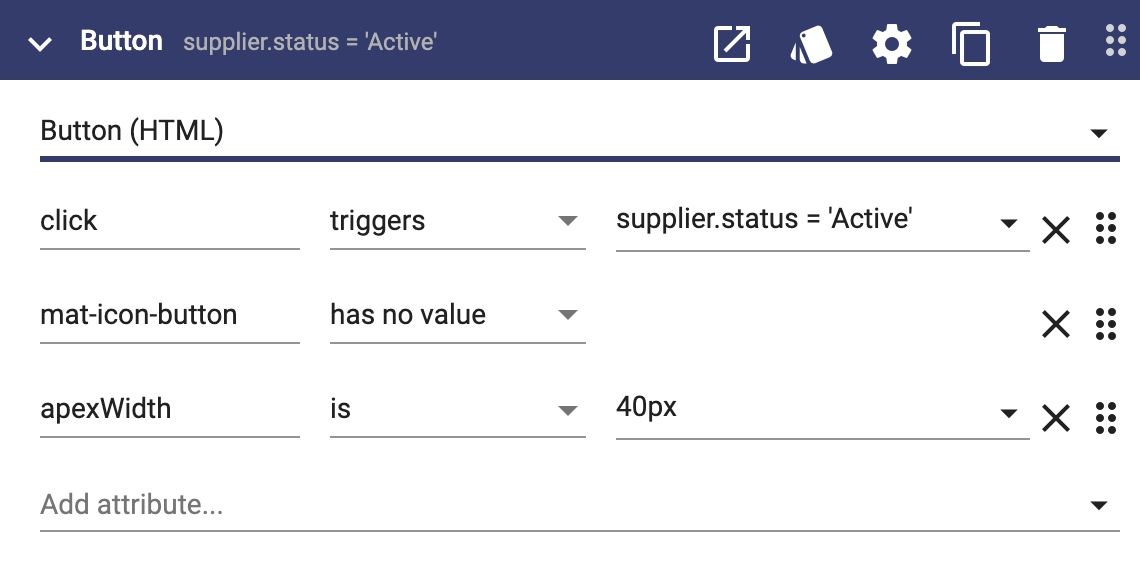
That is because we didn't set a width for the button so 1/2 the width went to the breadcrumb and 1/2 the width went to the button.
Add an "apexWidth" attribute and set it to "40px":
Generate the page and see the result.
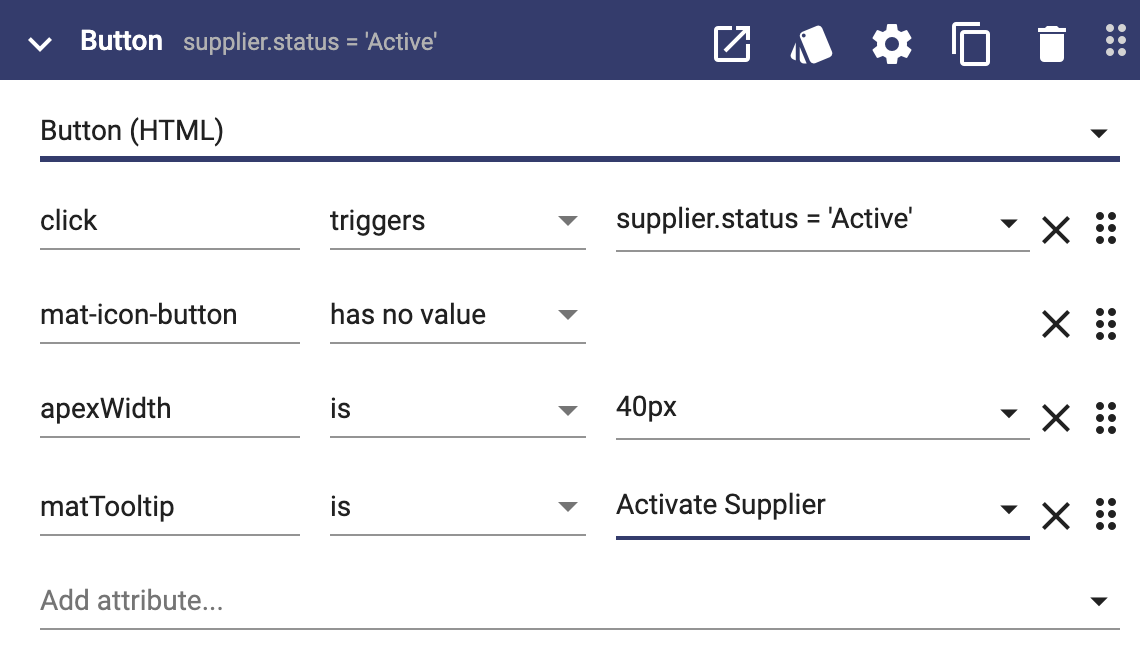
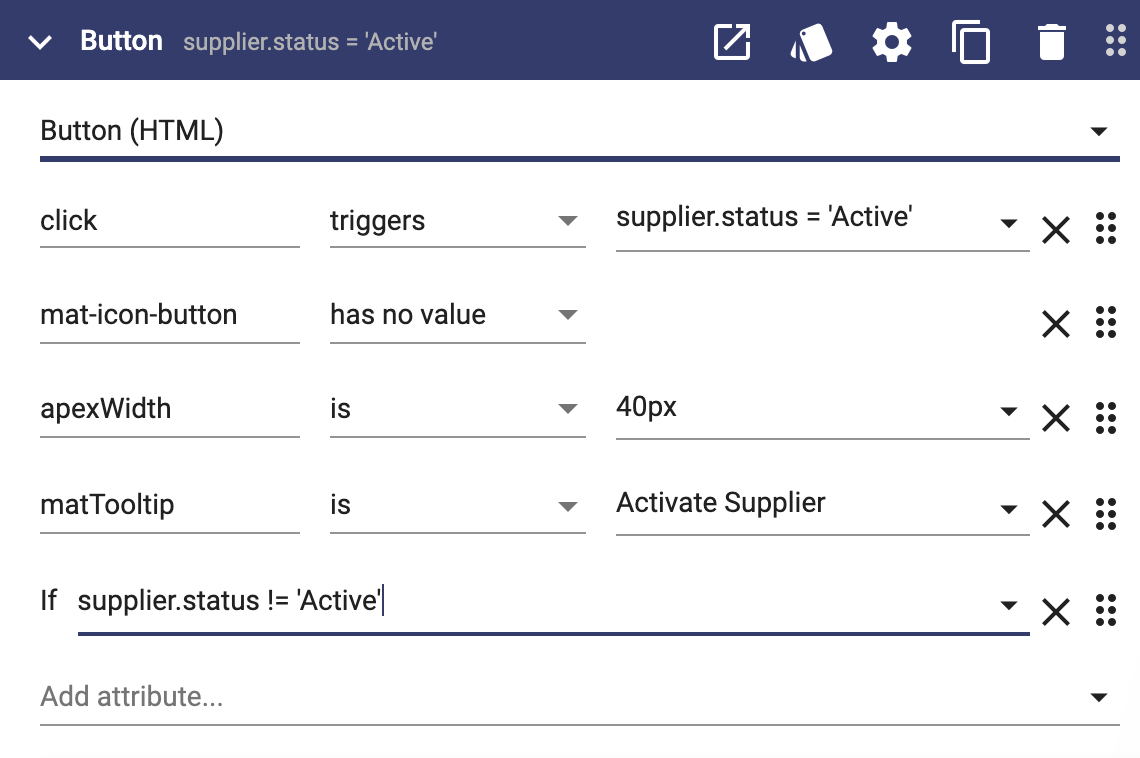
Finally, users like to know what an icon button does before they click it. Add a "matTooltip" attribute with a value of "Activate Supplier":
Generate the page and try it out. Clicking the button will set any supplier to status Active. You can see the result in the Suppliers page.
Add an Inactivate Supplier Button
That was cool, but we don't have any visual feedback that a supplier is active and don't have a way to make a supplier inactive.
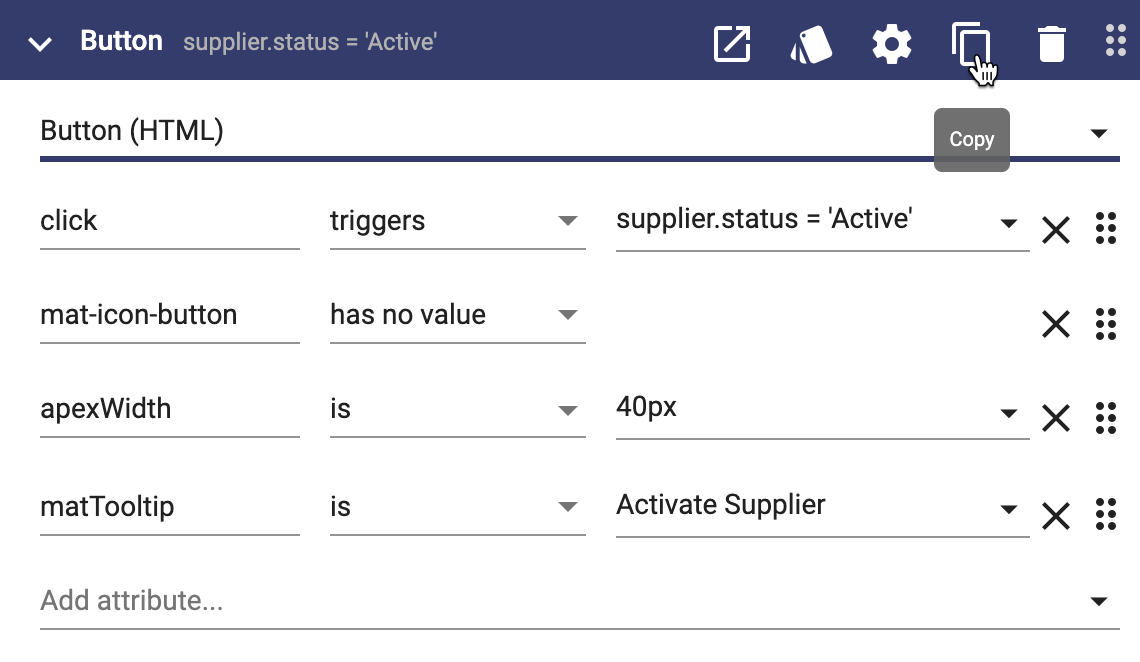
Copy the button by clicking the copy icon button in the blue header:
Click the paste icon button to the right of the "Add element after Button" field:
Change the click action to "supplier.status = 'Inactive', the tooltip to "Inactivate Supplier" and the Icon to "stop". Generate the page and try it out.
Make the Buttons Conditional
While both buttons work, it seems strange to have them both on the page at the same time. Ideally, only the applicable button should be shown.
Add an "if" attribute to the activate button with the expression "supplier.status != 'Active'":
Add an "if" attribute to the inactivate button with the expression "supplier.status == 'Active'".
Generate the app and try it out.
Summary
You added your first default and Business Object Behavior to set the default status and code for new suppliers. You set the status field to be hidden by default and then added that as a column in the table on the Suppliers page. Finally, you added Icon Buttons that set the supplier status to "Active" or "Inactive" and controlled which button was showing with a conditional expression. Click the Next Topic link below to continue.