Create a page that manages a single object and add a base types and property.
Written by David Knapp
Updated 4 years ago
3 min read
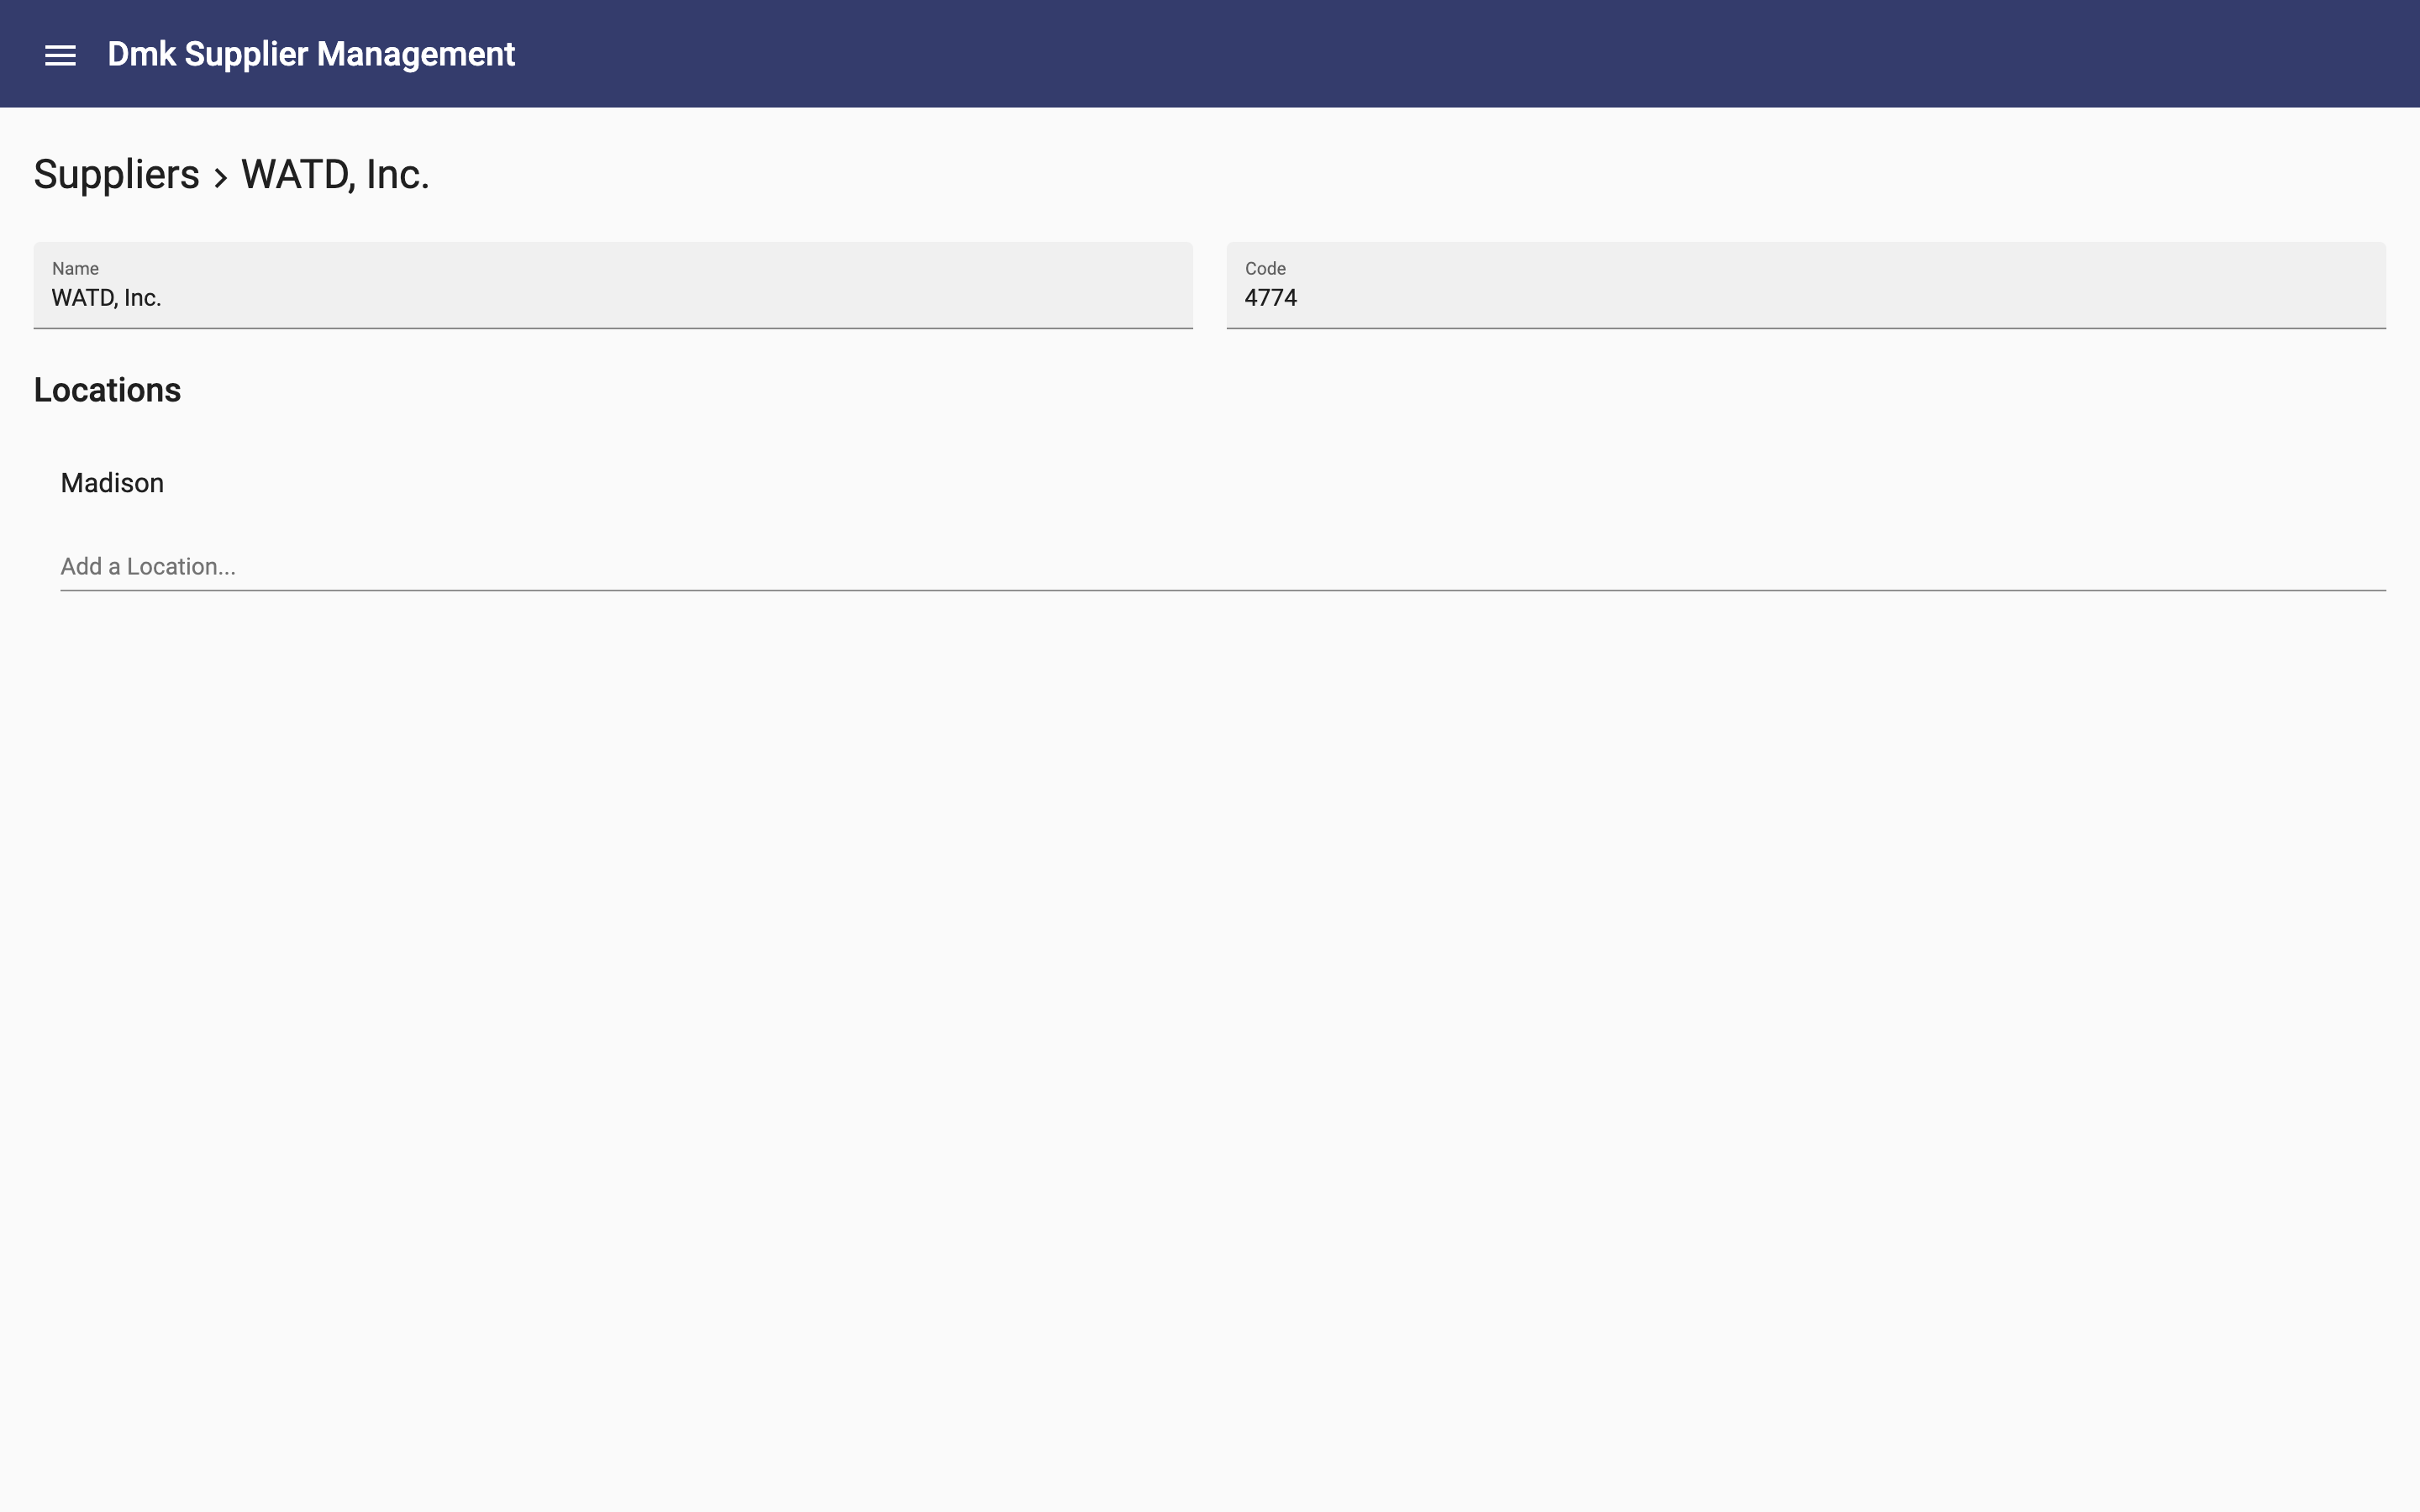
This lesson continues development of the Supplier Management app that you created in the prior lessons. You will create a Supplier Page to manage a supplier. You will add a status property to supplier with a list of valid values. Start your app manager if needed.
Create a Supplier Page
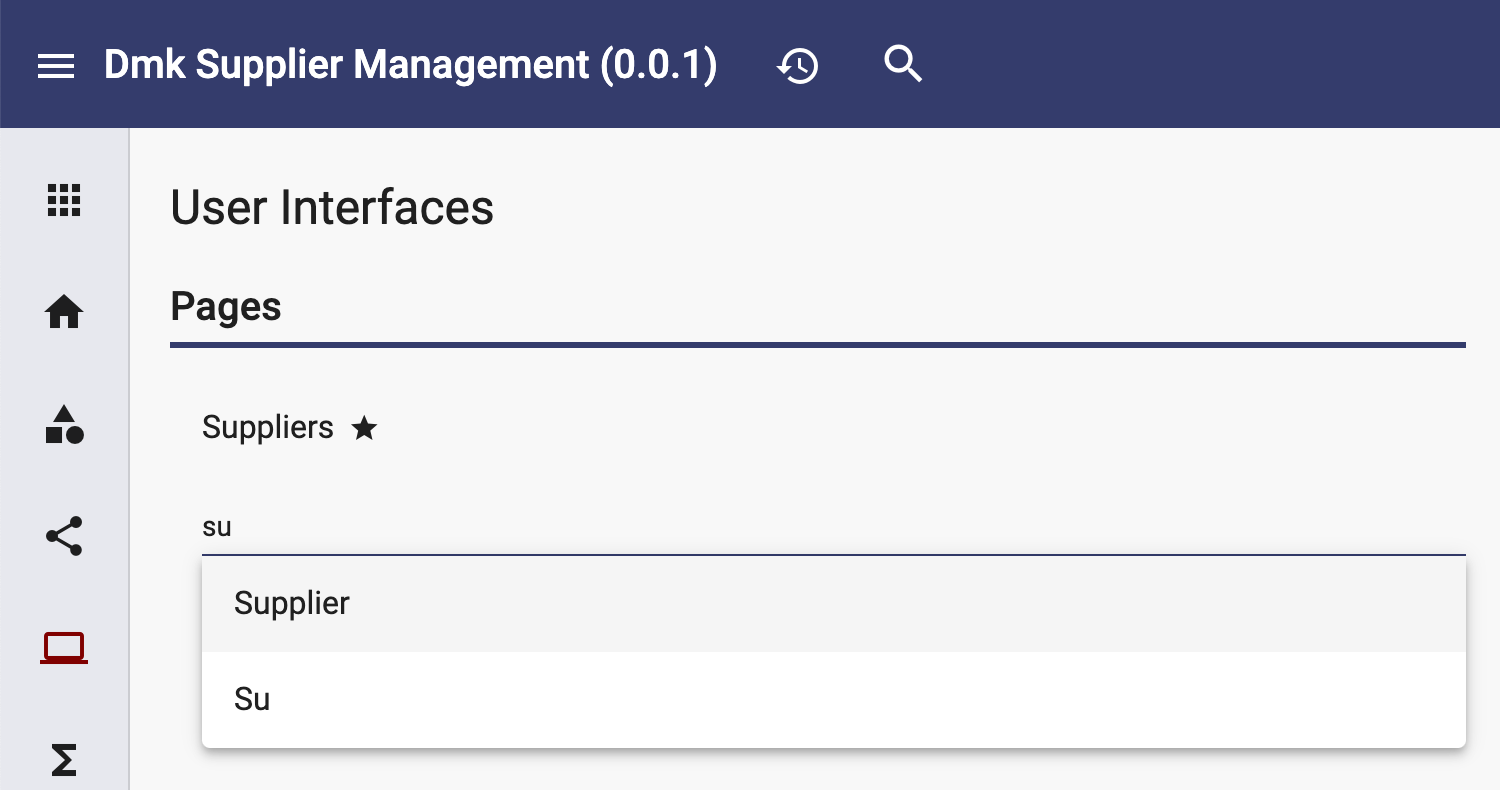
Click User Interfaces on the ribbon and enter "su" in the "Add a page field...":
Notice that Apex Designer did not offer the "Suppliers" option again because you already have that page.
Press enter to create the Supplier page:
Notice that the page is "/suppliers/:supplier.id". The ":" indicates that this is a path parameter. "supplier.id" indicates that the parameter will be assigned to supplier user interface property.
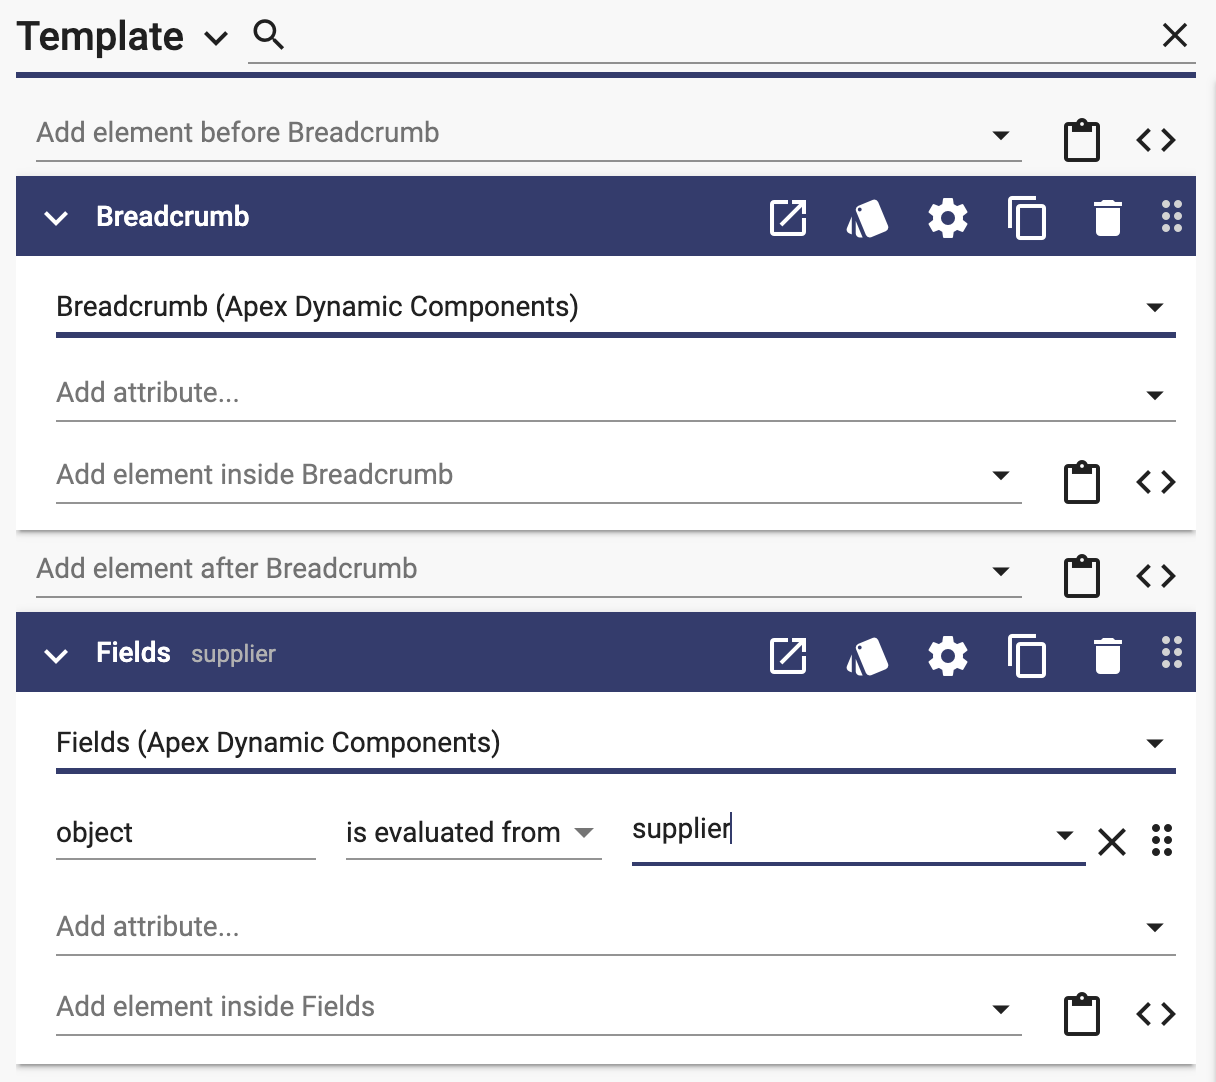
Add a Breadcrumb and Fields to the template:
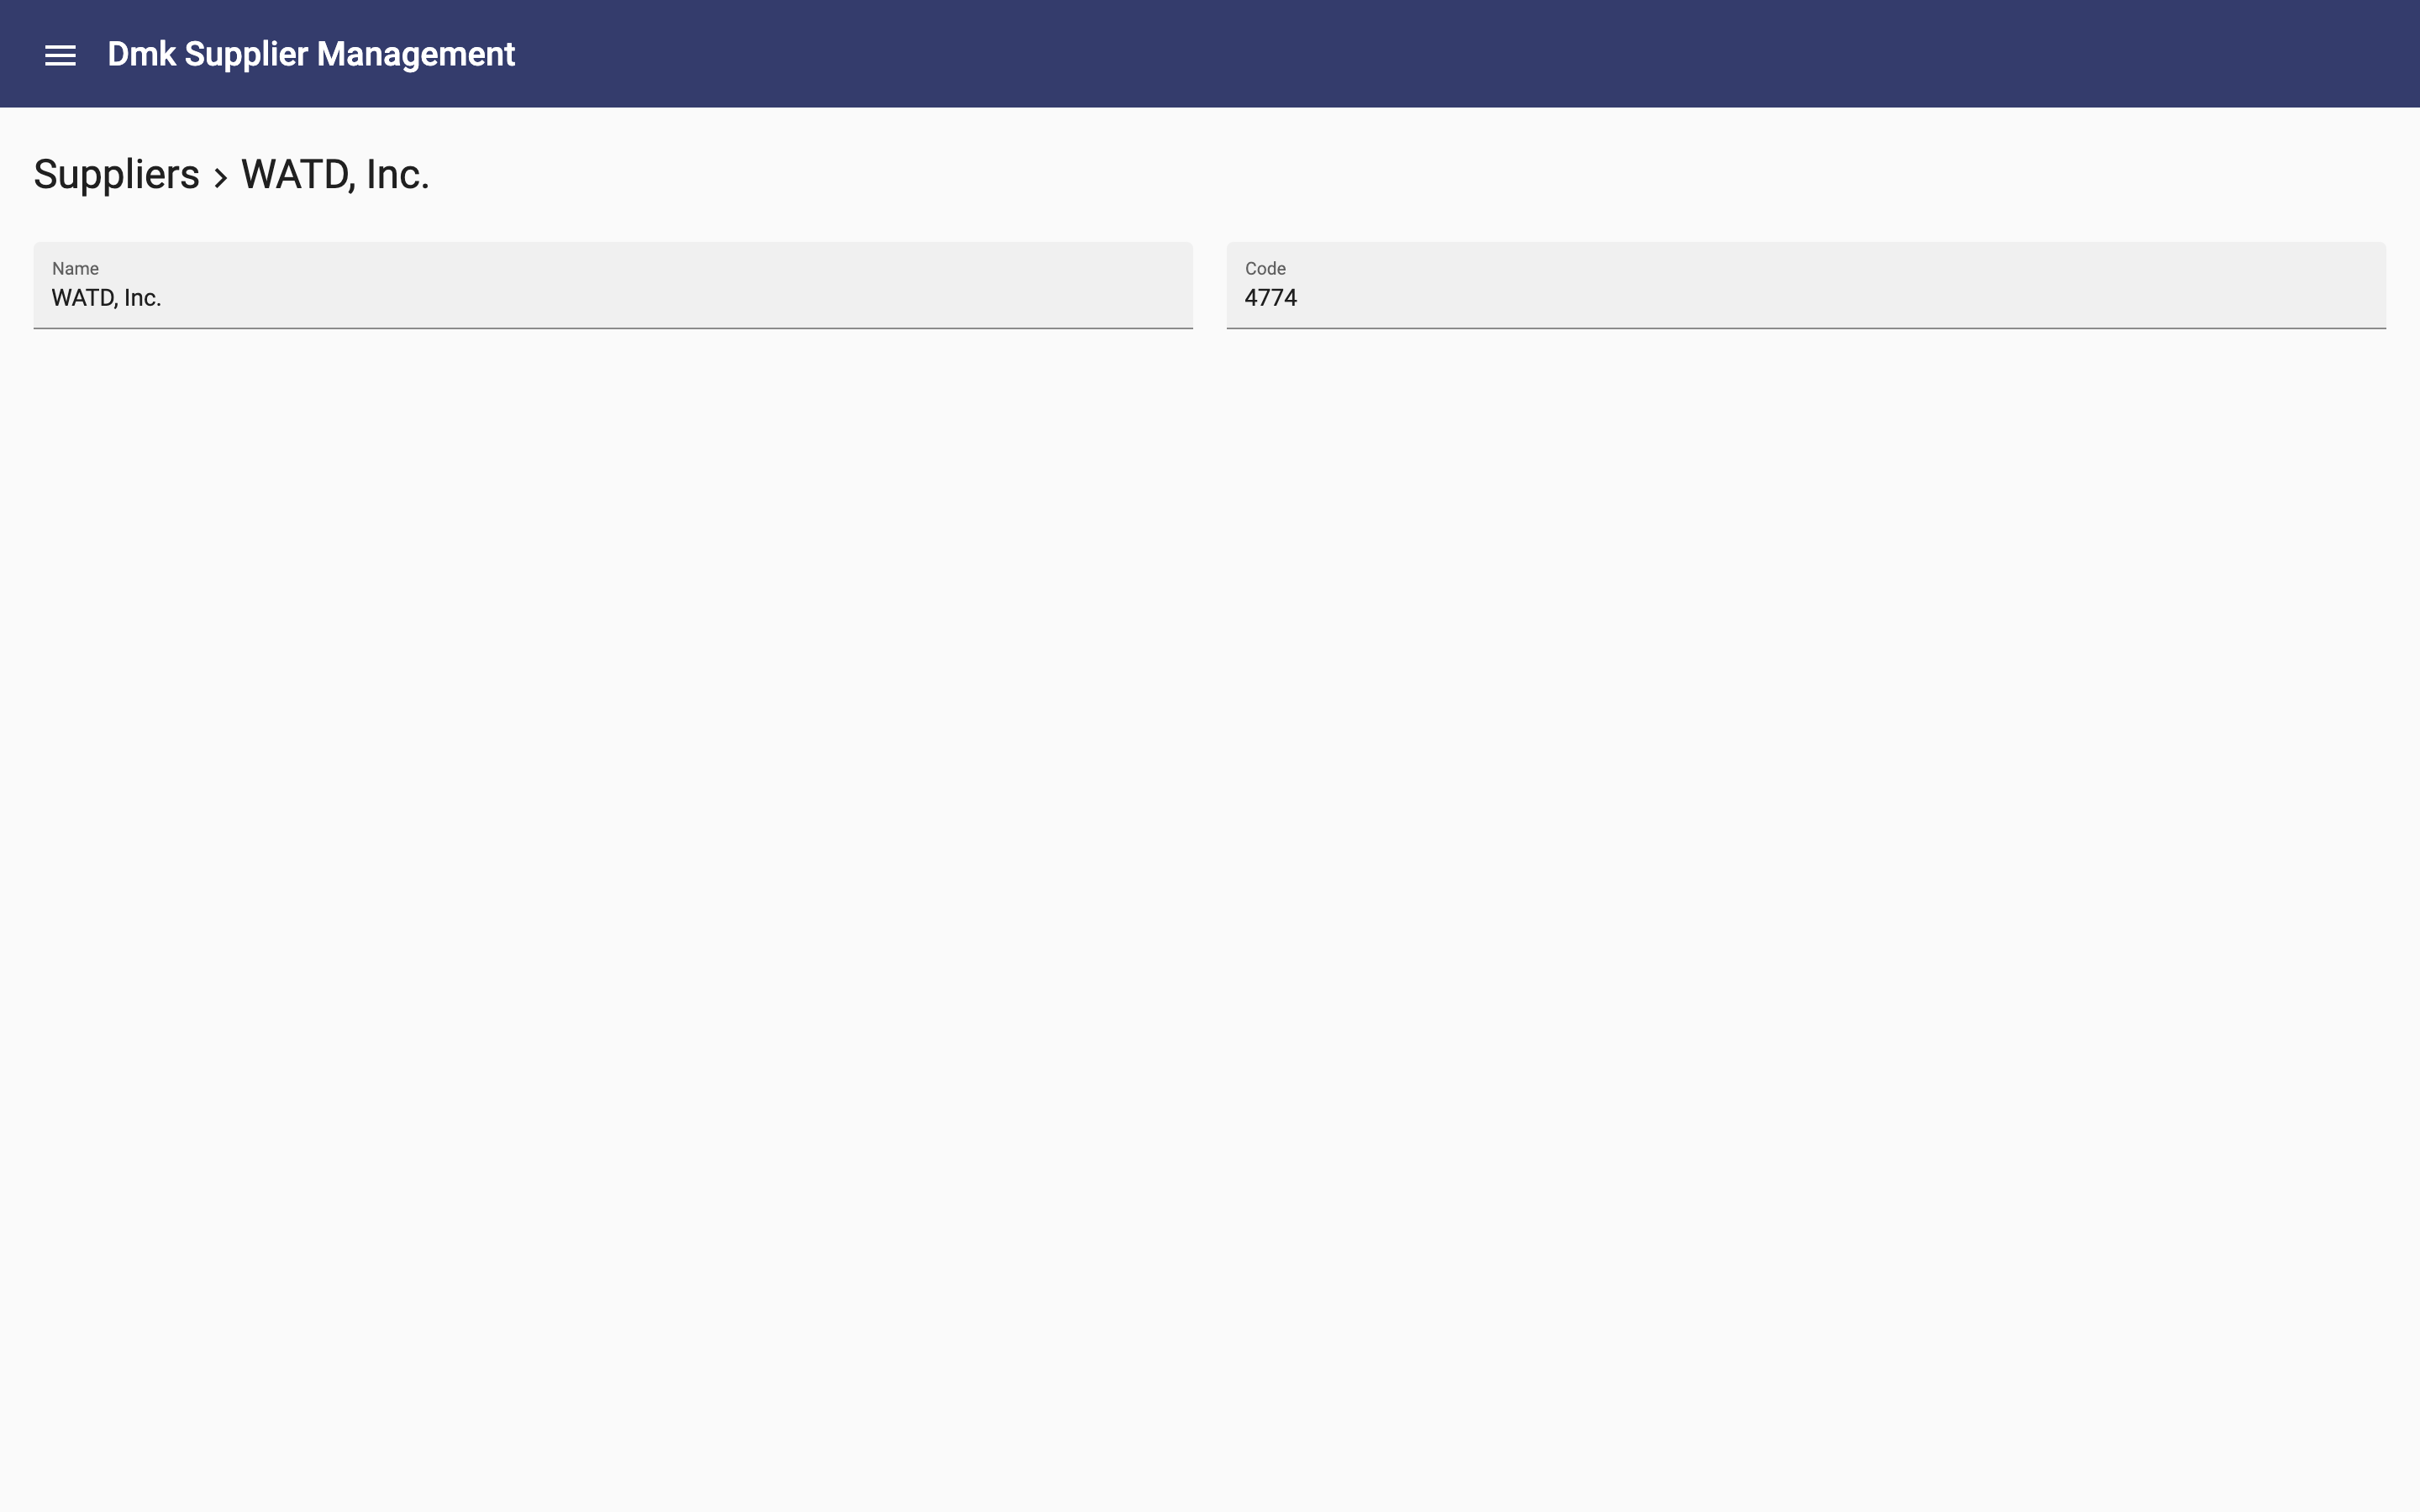
Generate the page and try it out:
Add the Locations
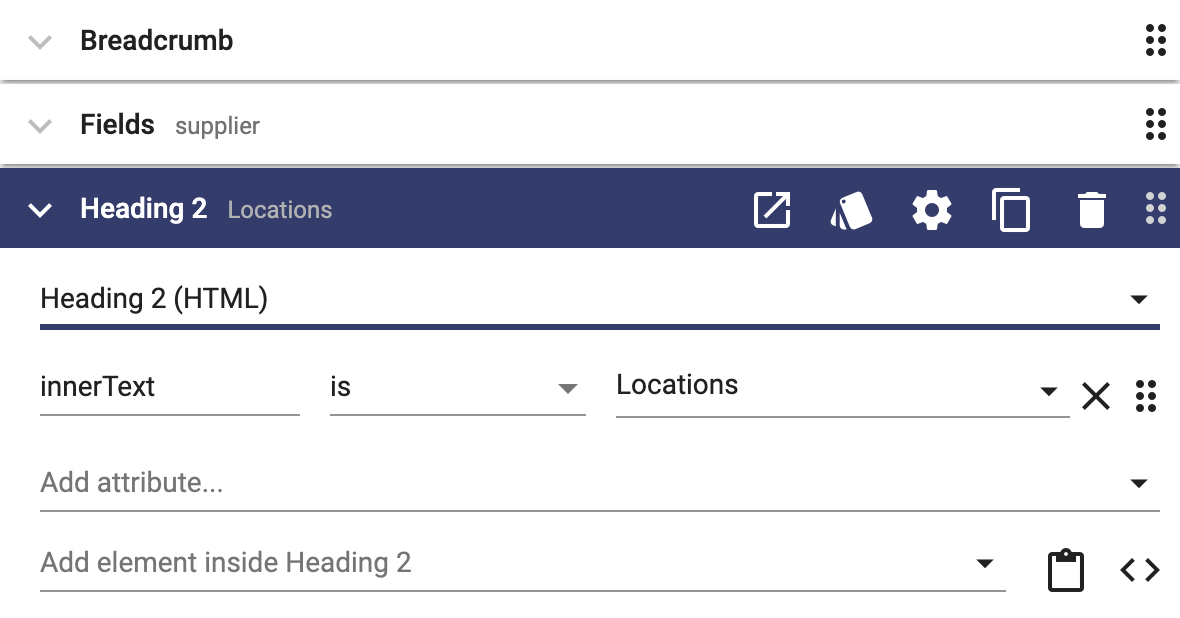
Add a Heading 2 after the Fields element and set the innerText to "Locations":
Notice that the attribute binding is "is" instead of "is evaluated from". That is because "Locations" is a constant vs a reference to a user interface property.
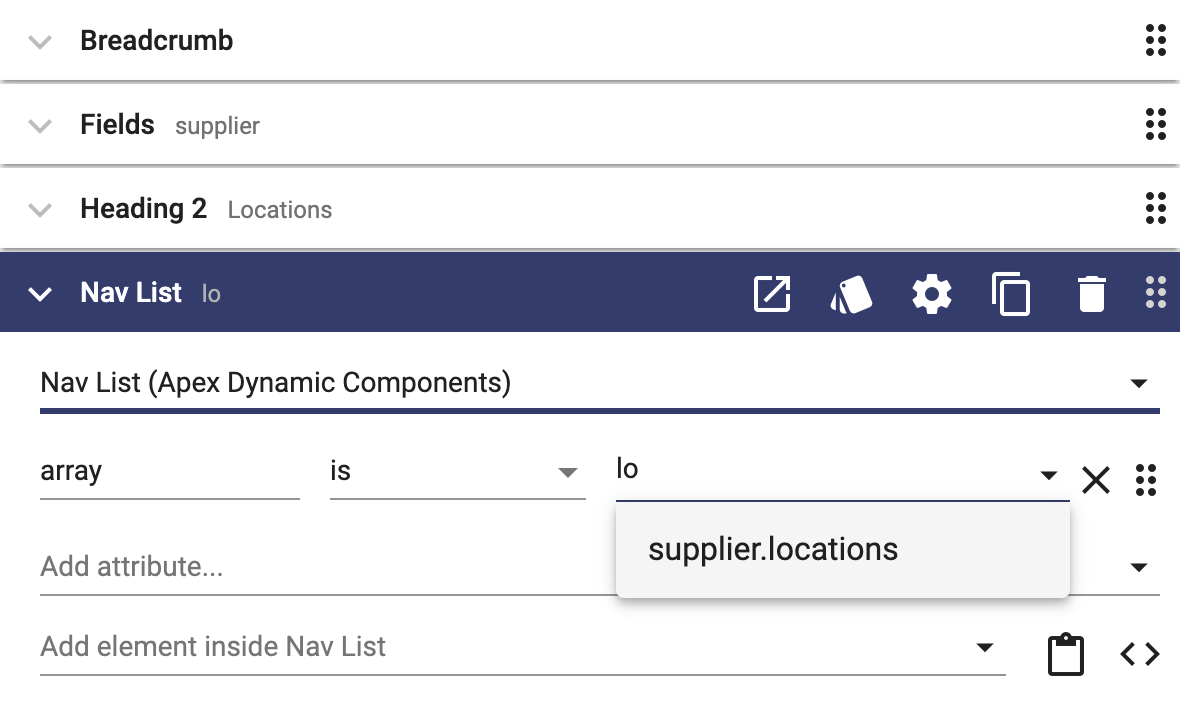
Add a Nav List from the Dynamic Components library after the Heading 2 and enter "lo" in the array attribute value:
Notice that the autocomplete shows you supplier.locations. Press enter to select that option. After the supplier.locations option is selected, the array attribute binding will change to "is evaluated from".
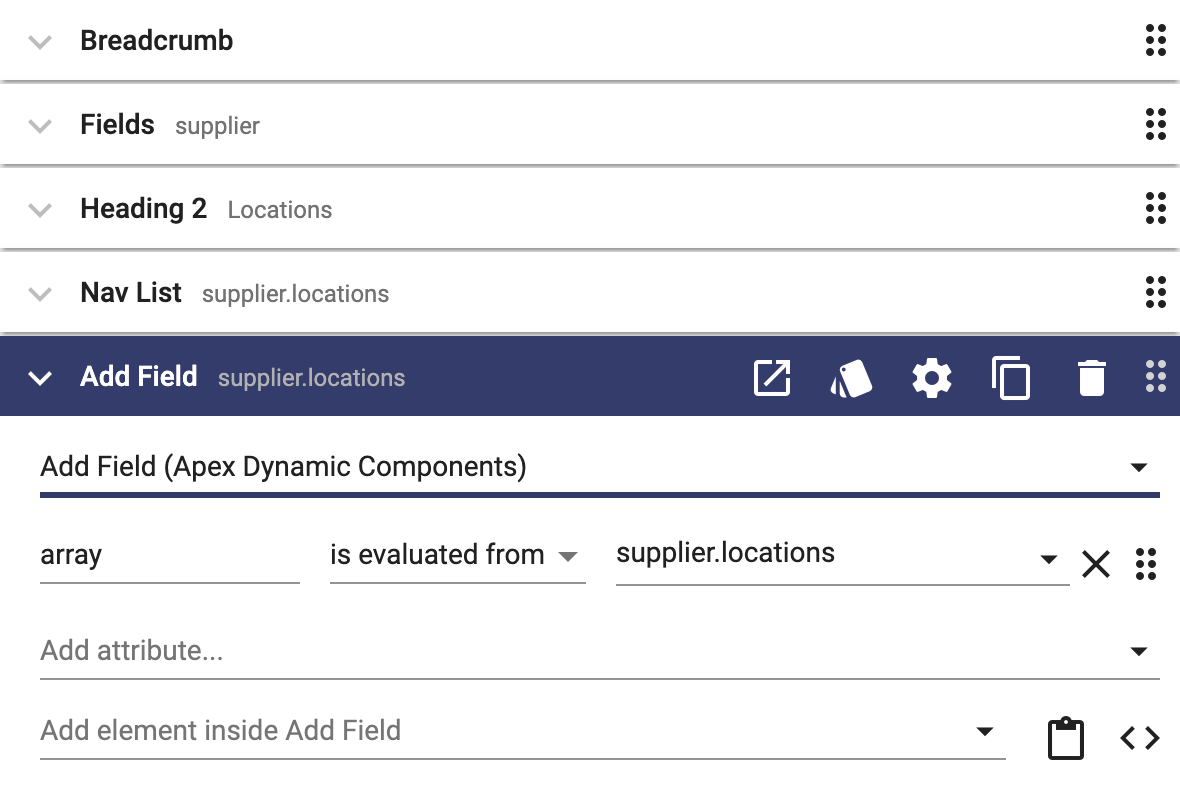
Add an "Add Field" after the nav list with array set to "supplier.locations":
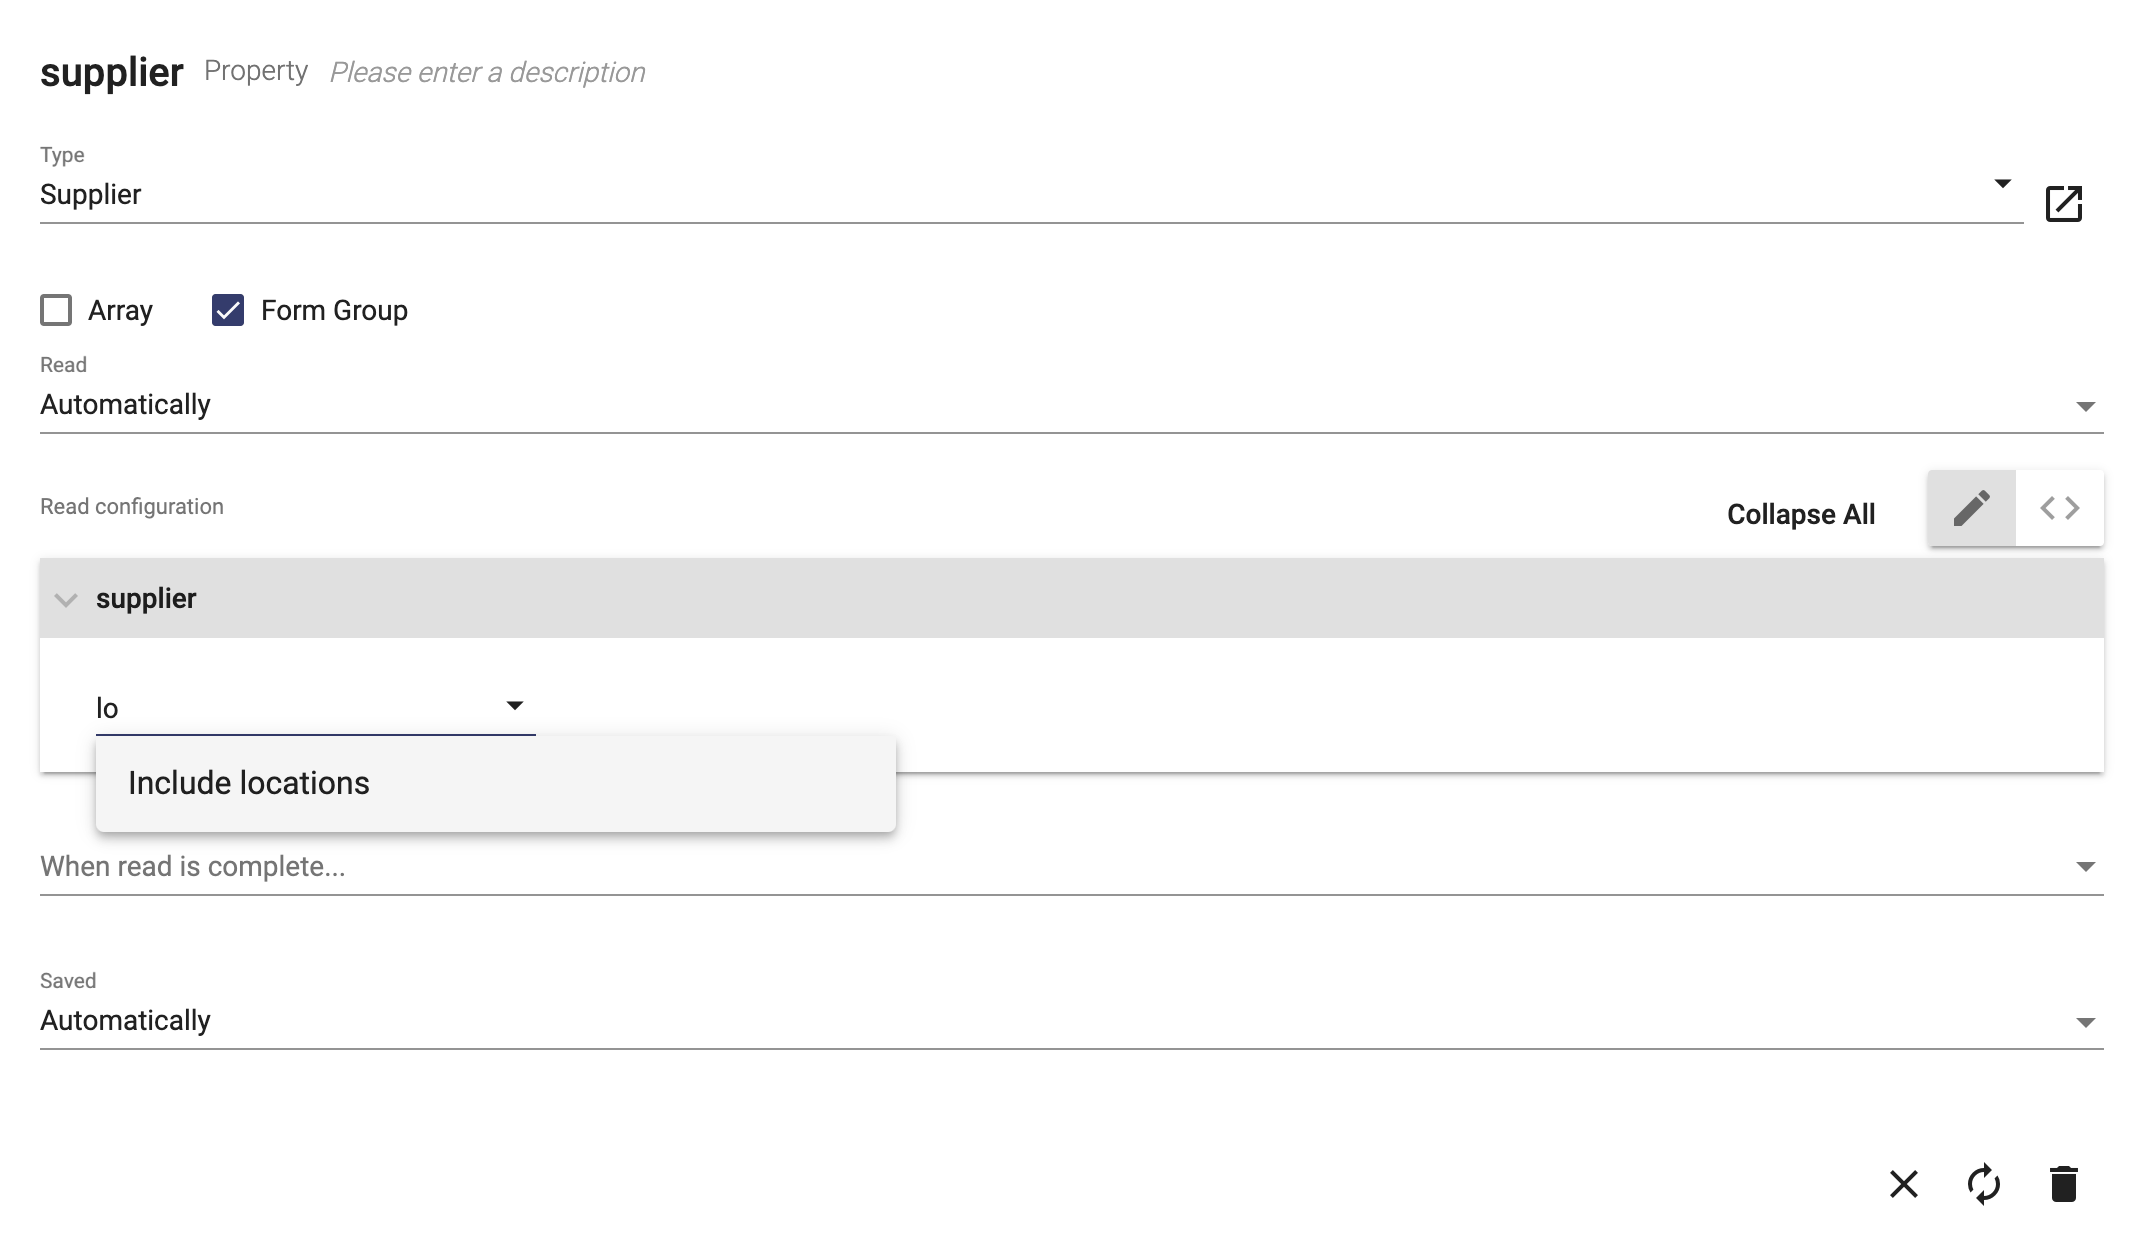
Now we need to ensure that the locations are retrieved with the supplier. Click the "supplier" user interface property and enter "lo" in the "Add a configuration item..." field:
Apex Designer shows an "include" option for any model related to this model. Press enter to select "Include Locations".
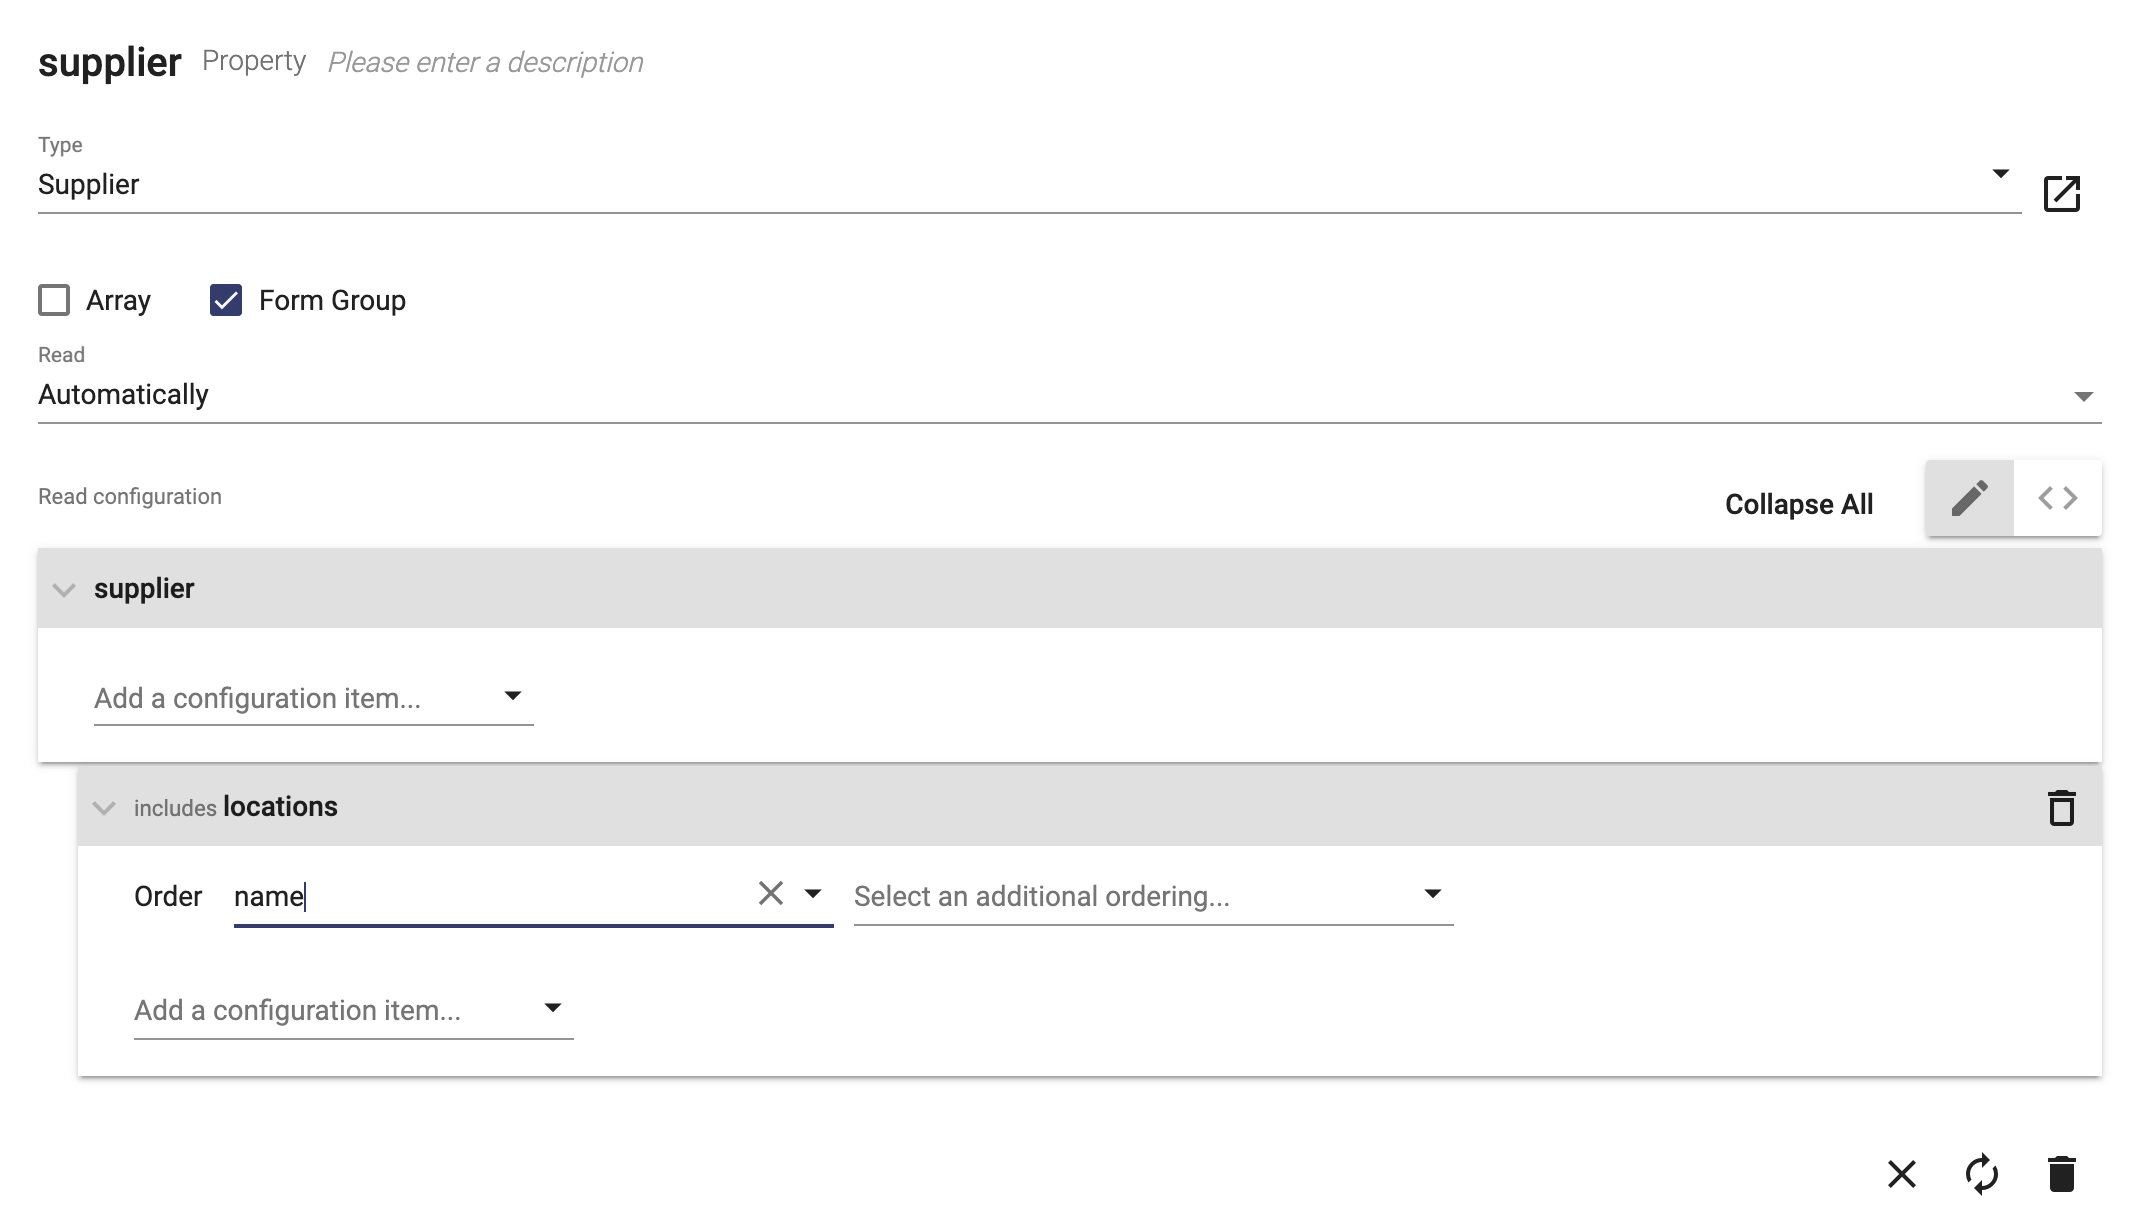
Set the Order for Locations to "name":
Generate the page and try it out:
Add a Status to Supplier
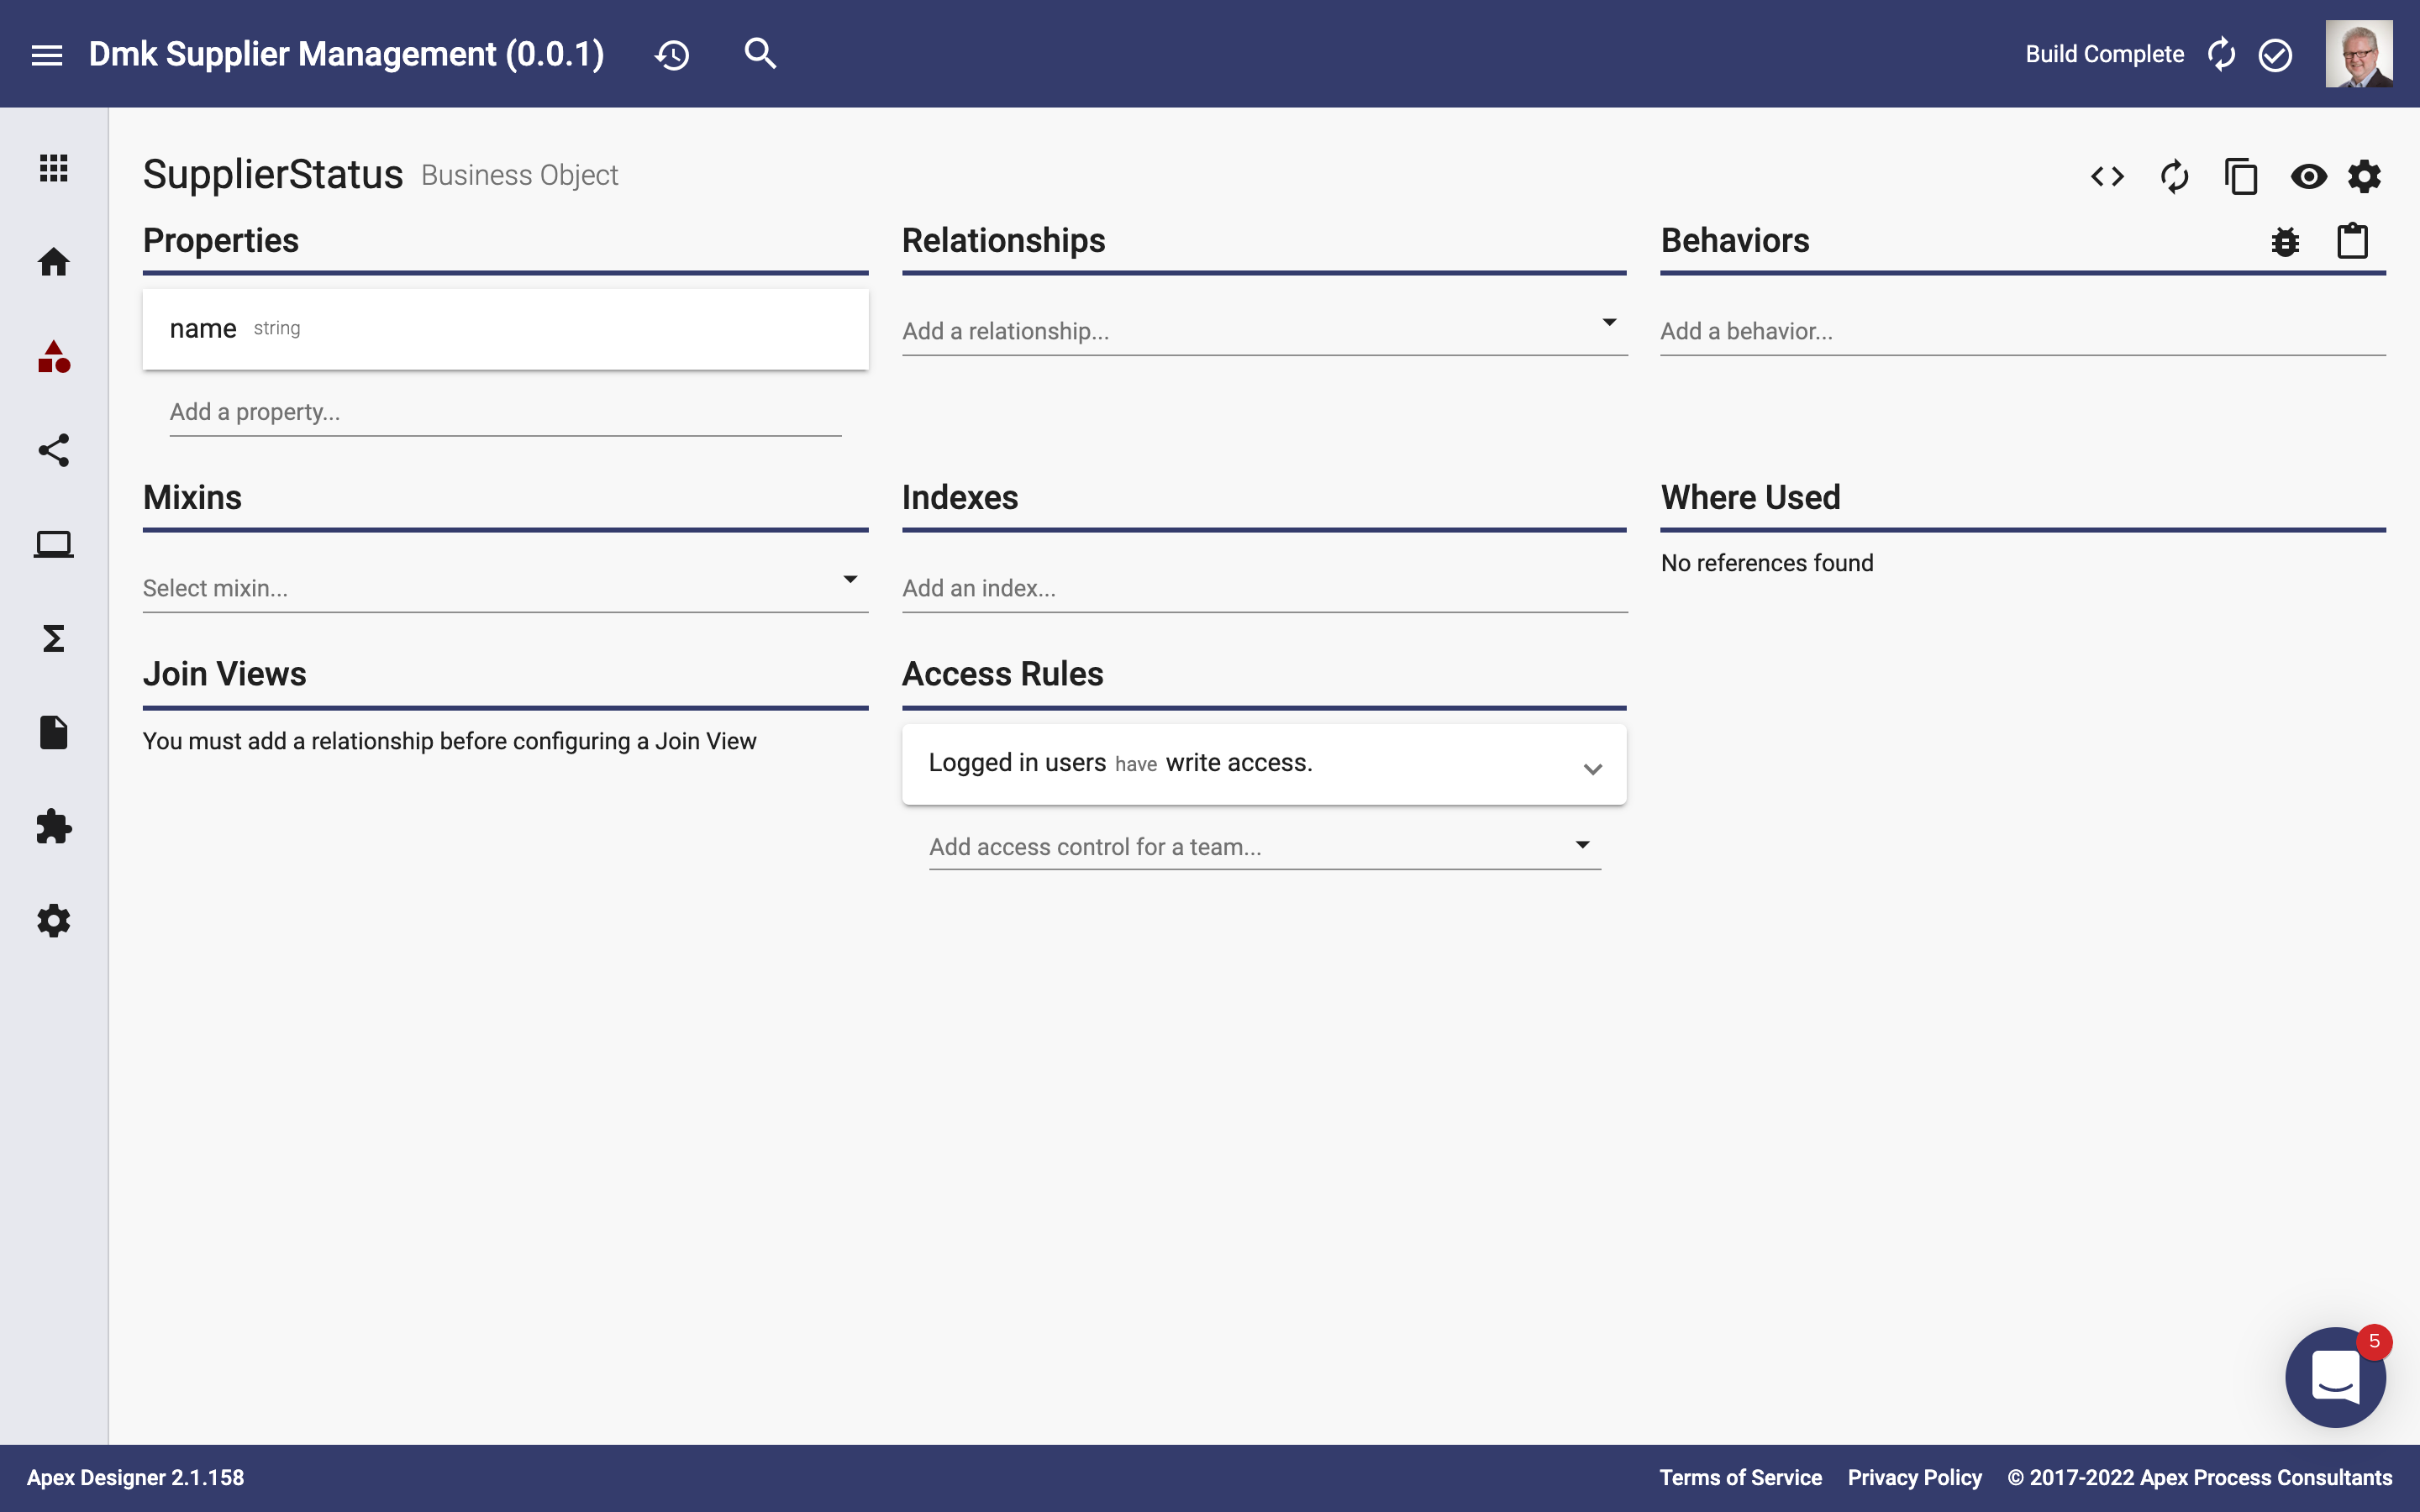
Click Business Objects on the ribbon and enter "supplier status" in the "Add a business object..." field and press enter:
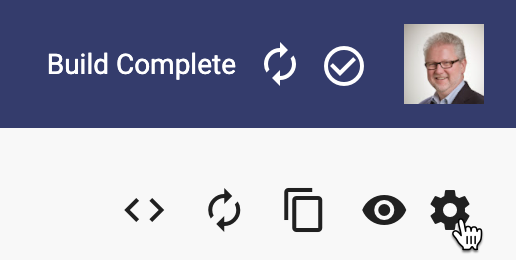
Click the Settings icon button on the top right:
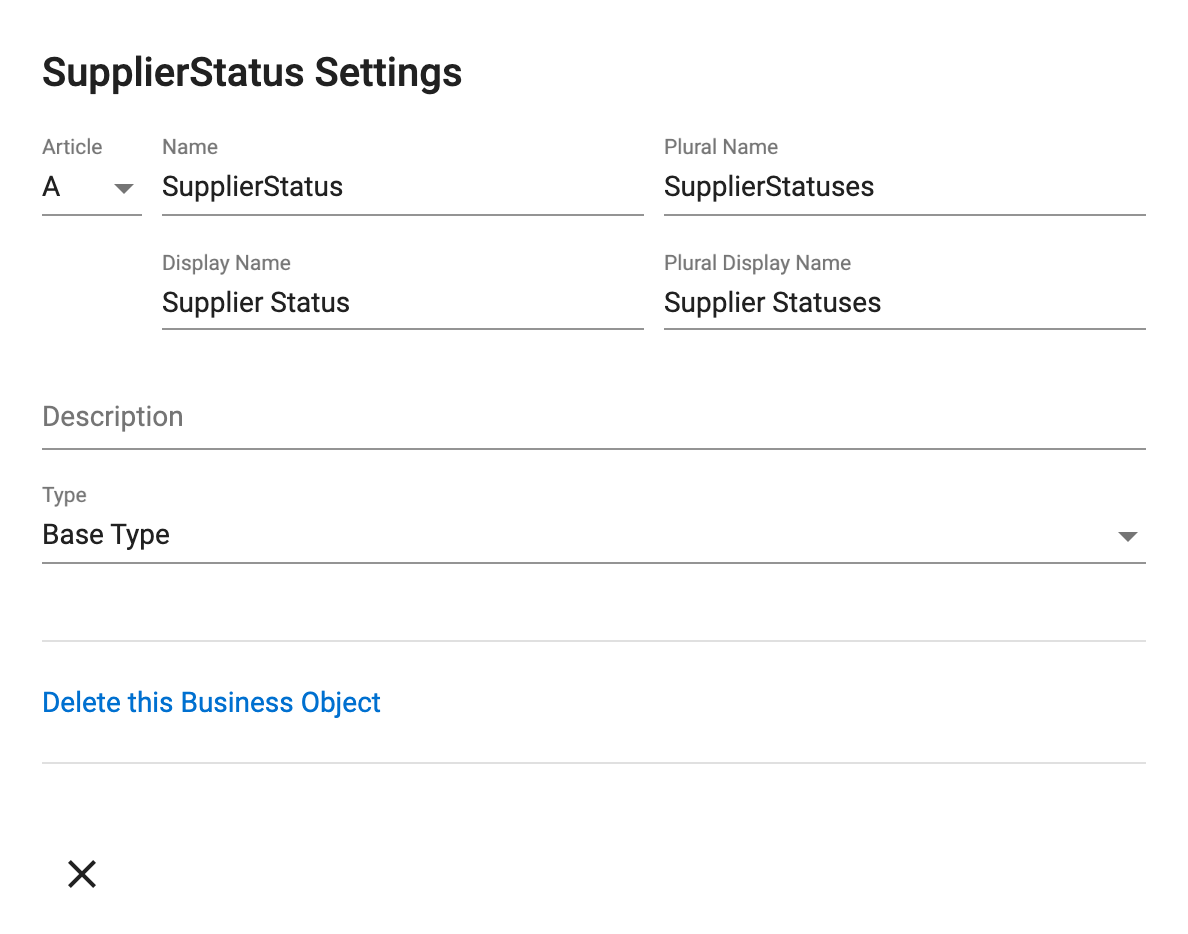
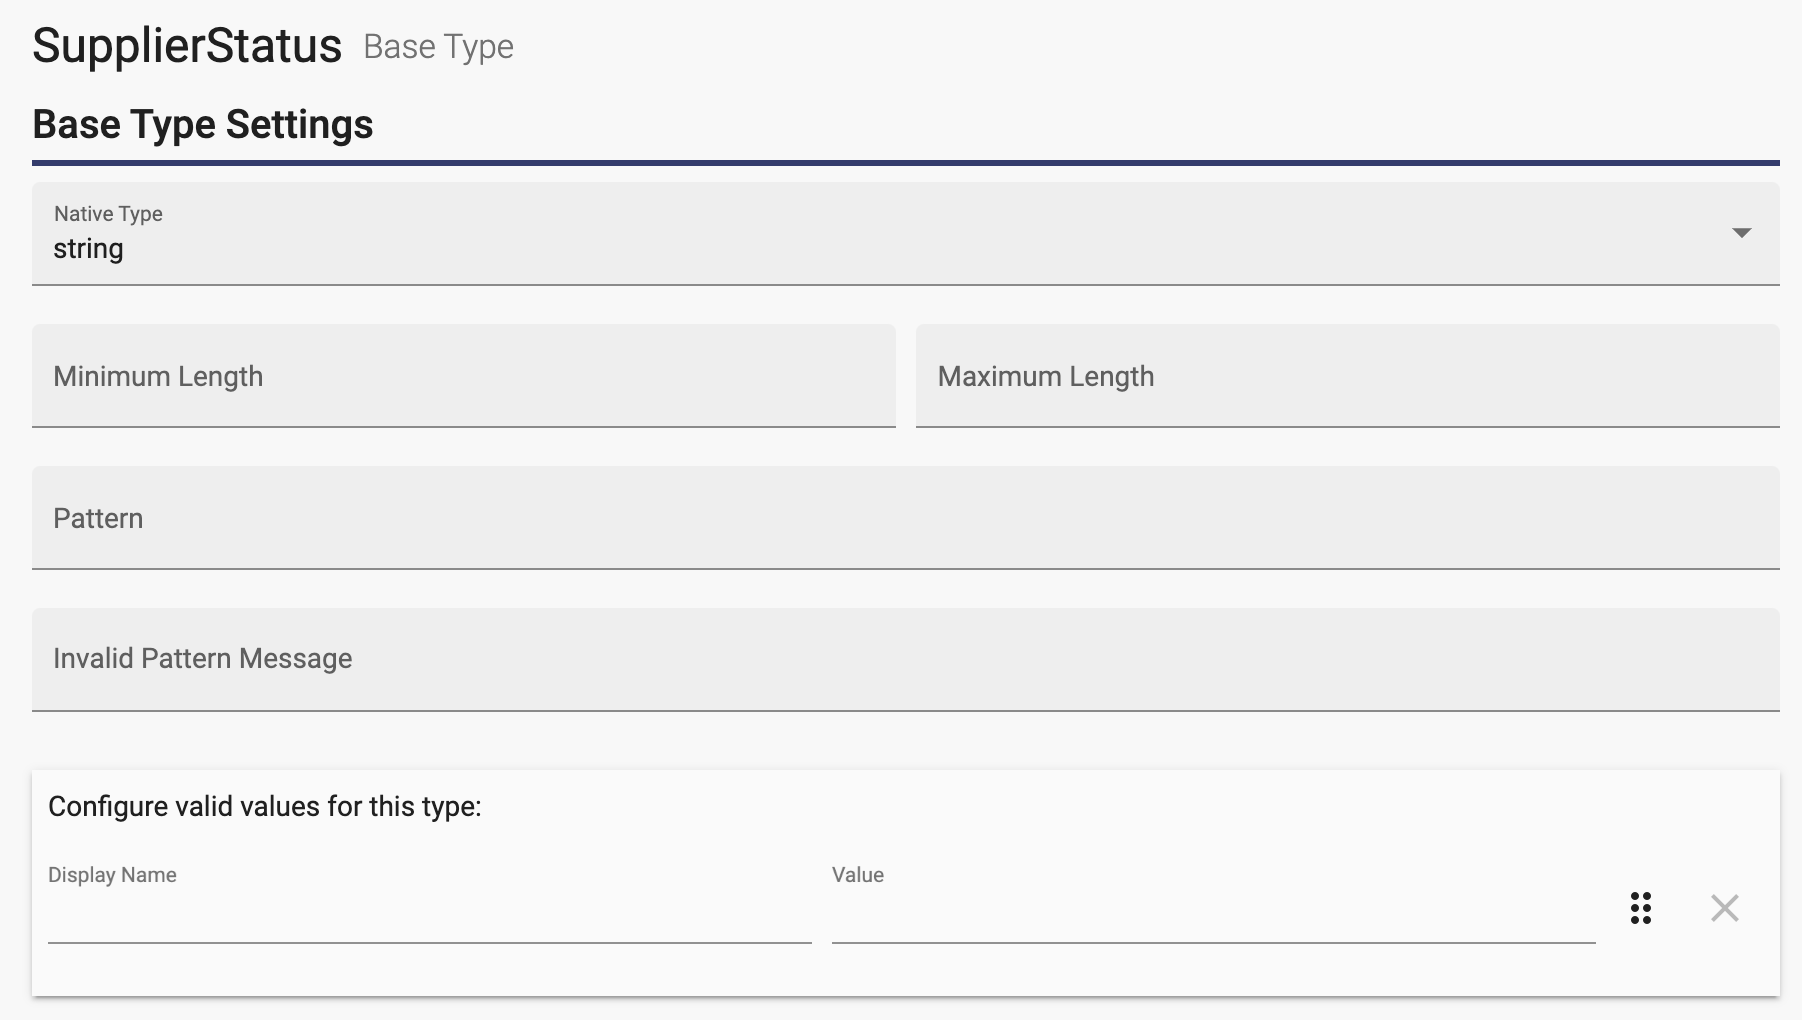
The SupplierStatus Settings dialog is opened.
Click the "Type" field and select "Base Type":
Close the dialog and set "Native Type" to "string":
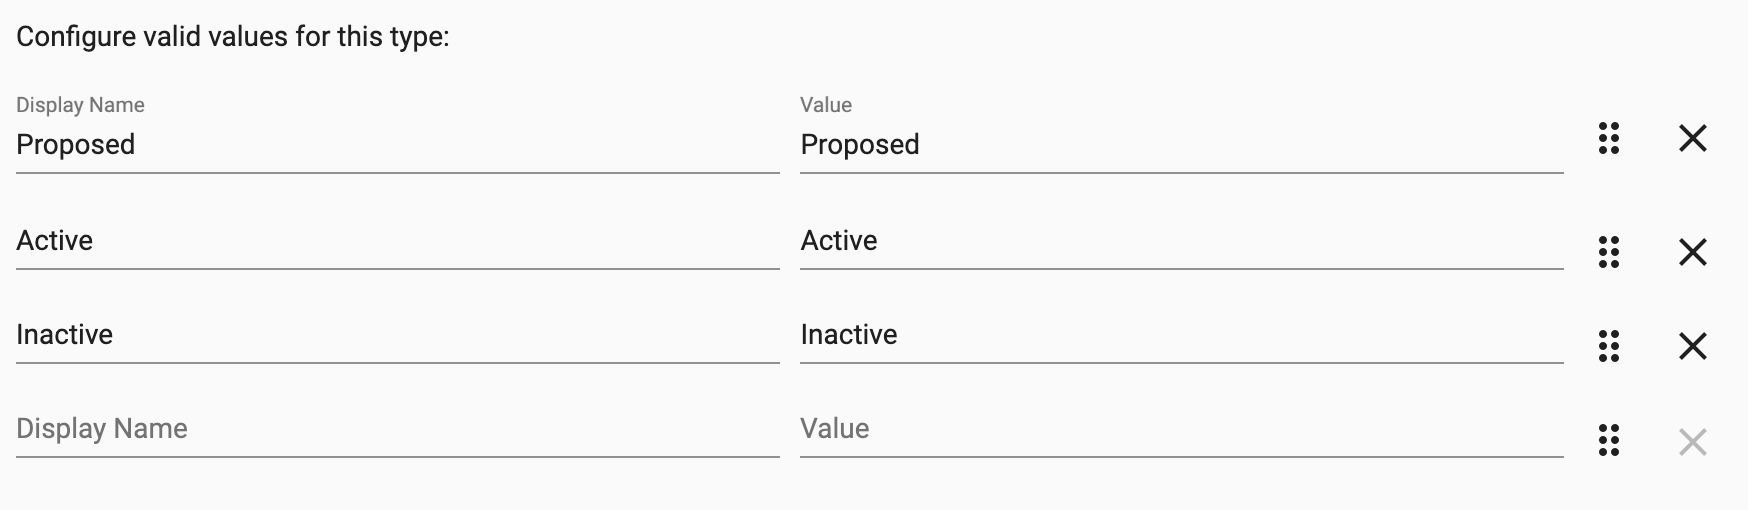
Configure the valid values as shown here:
Add Status to the Supplier Business Object
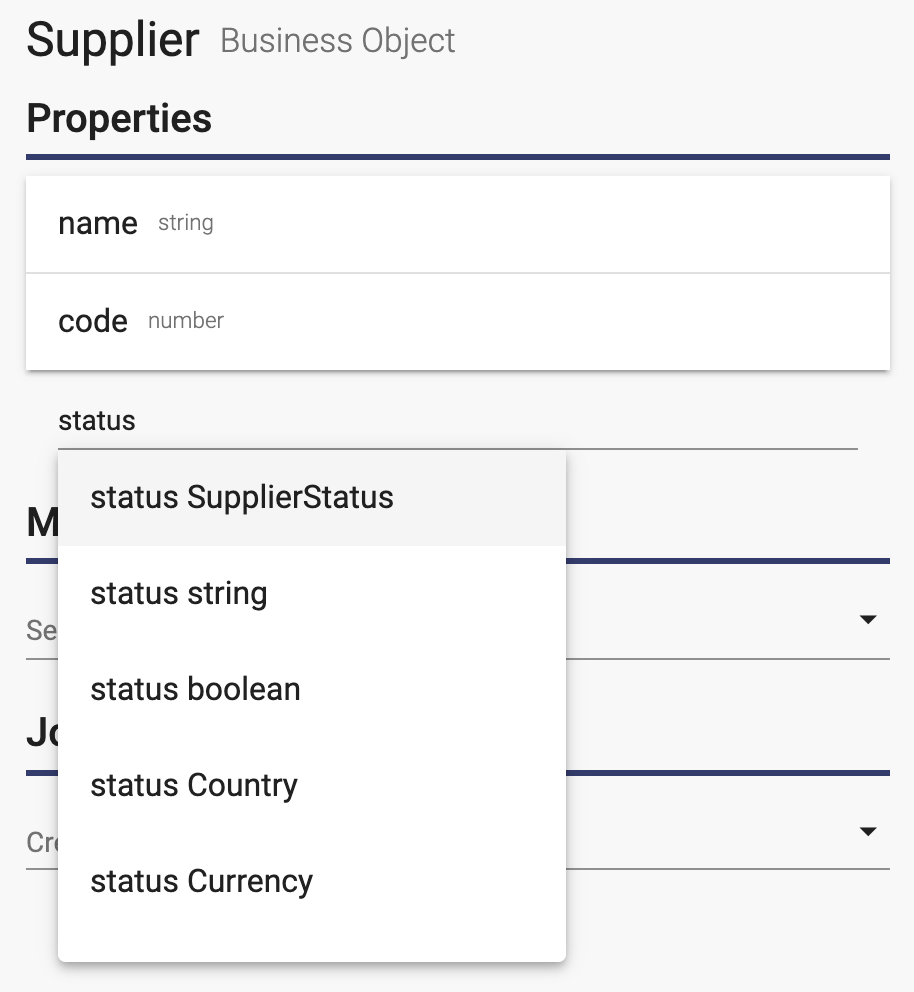
Click Business Objects on the ribbon and click the Supplier business object to open it. Enter "status" in the "Add a property..." field:
Press enter to add the property.
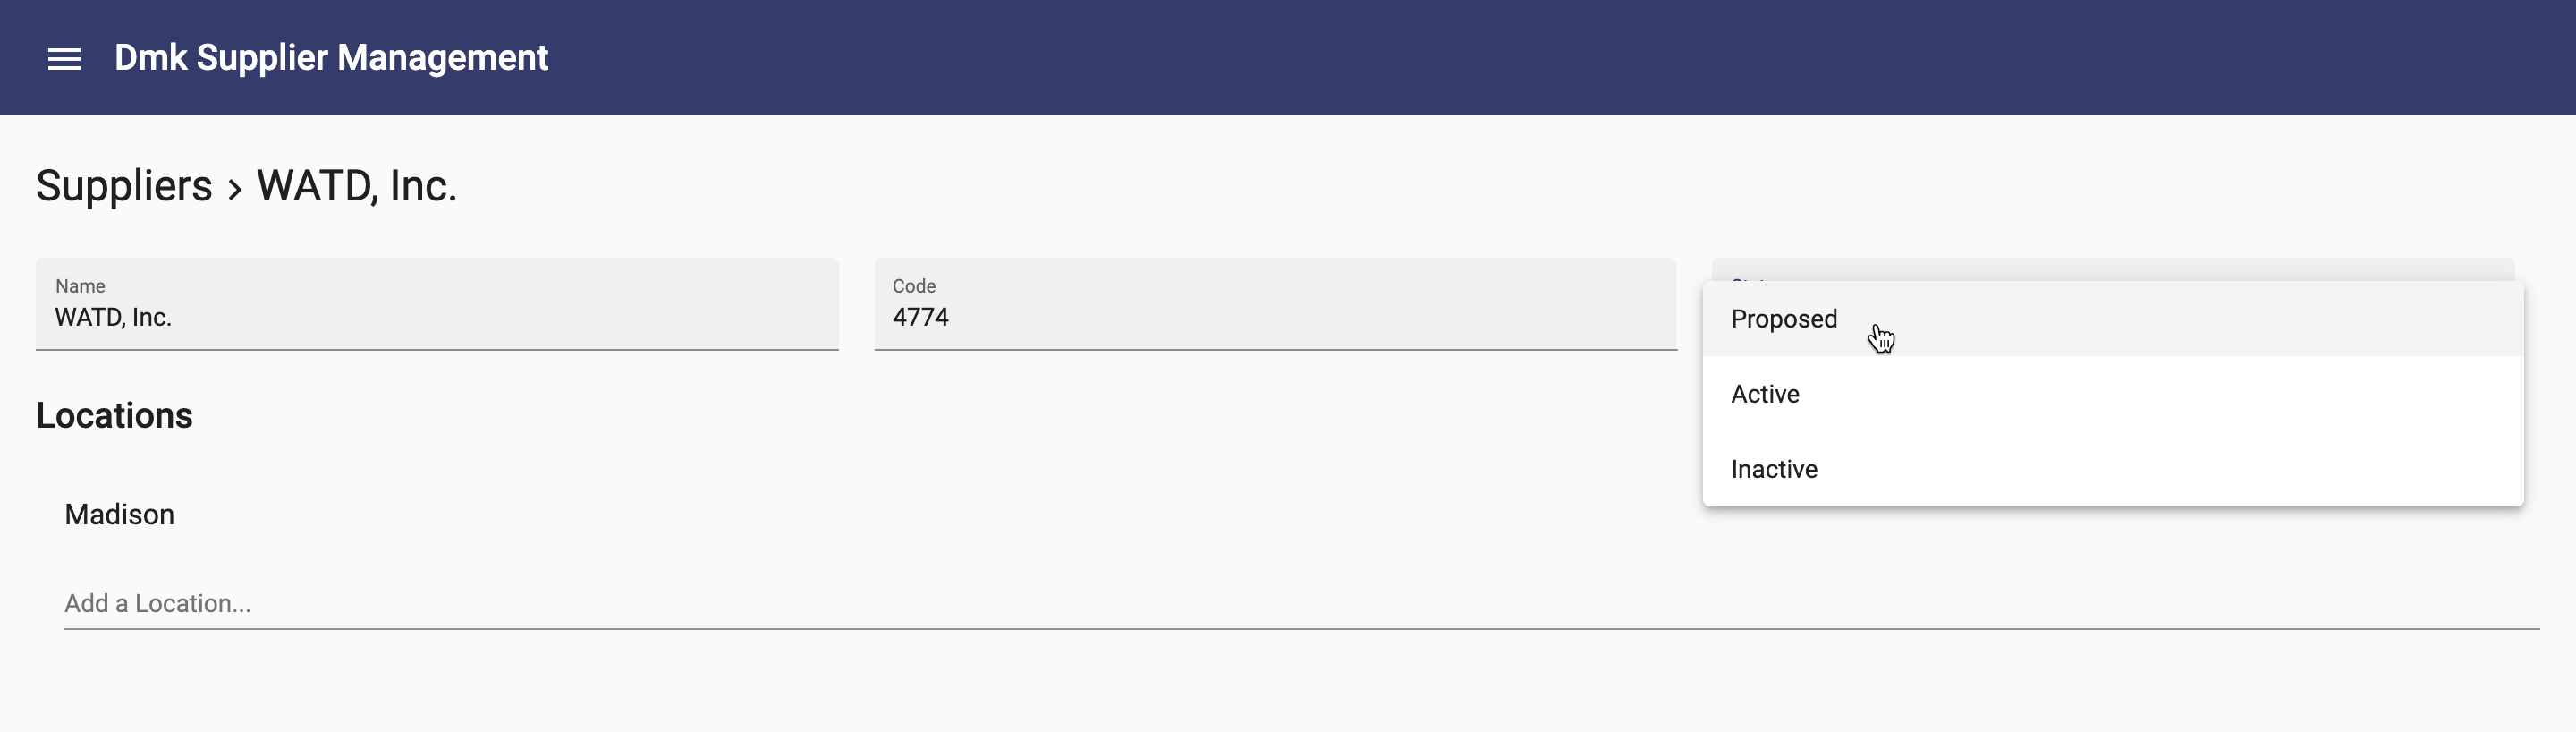
Generate the Supplier business object and try it out:
Notice that the Fields component on the Supplier page automatically added the Status field as a select field with the proper valid values.
Summary
You created a Supplier page with a breadcrumb and fields. You updated the suppliers UI property to bring in the locations as well. You added a heading, nav list and add field for the locations. Finally, you added a status property to Supplier using a new base type with valid values. Click the Next Topic link below to start the next lesson.