

Getting feedback from your customers and giving them a great support experience is critical to the success of your app. The Apex Support Library makes it super easy to add live chat support to any Apex Designer app. It supports multiple conversations (one for each issue / idea the user submits), includes realtime notifications when agents respond and specialized pages for Agents to prioritize, assign and close conversations. You can see this library in action by clicking the Ask a Question button at the bottom right of this site.
Add Libraries and Dependencies
Add the following dependencies to your project (if you don't already have them):
- Socket Io Library
- Slack Library
- Notification library
- Support Library
Page Content Components
The Support Library contains a number of "xxx Page Content" components. This gives you the flexibility to use whatever page names, path conventions and access control schemes that you want. The cost of this flexibility is that you will have to create several "shell" pages that wrap the page contents components. The steps shown on this documentation page give you a good starting point but feel free to use whatever conventions you like.
Add Environment Variables
Since you have control over the path of the agent and user pages, there are two environment variables you need to set:
{
    notificationsPathPrefix: '/myConversations',
    conversationsUrl: 'https://<your app manager url>/agentConversations'
}
The first one is used to route users to conversations from the notification button (more on that later). The second one is used in Slack notifications to direct agents to a specific conversation.
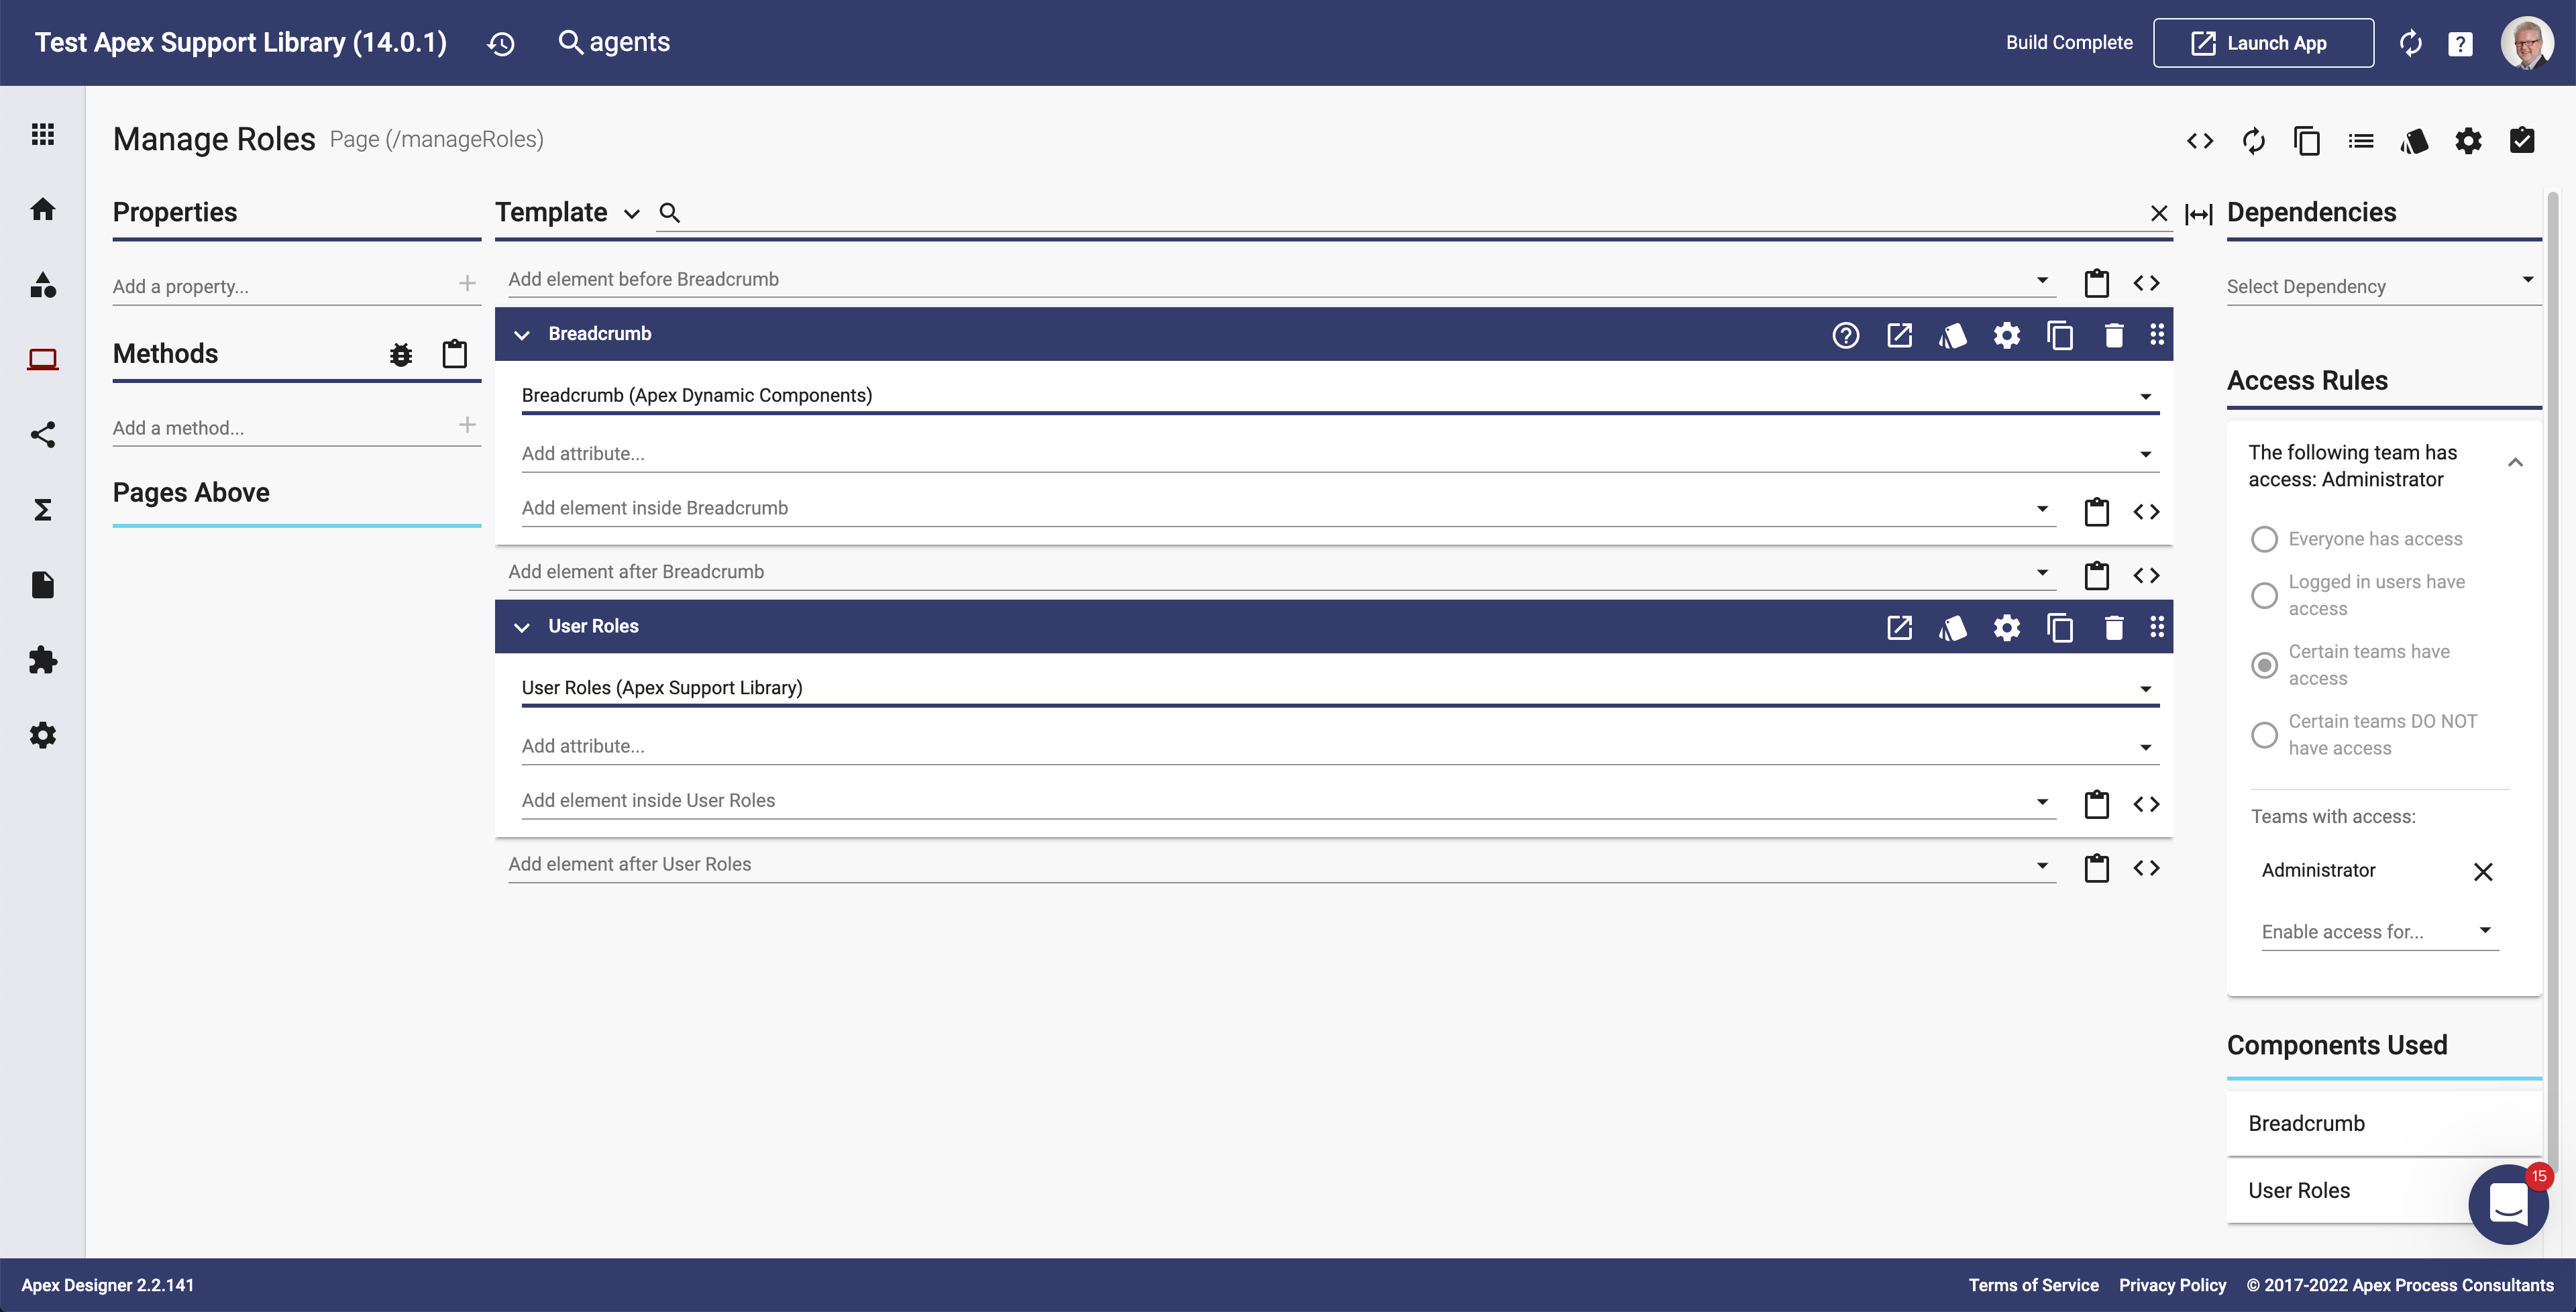
Add a Manage Roles Page
The Support Library includes a "Agents" role which is used to control who can see and respond to user conversations. If your app does not already have a way to manage roles, you can create a Manage Roles page with a Breadcrumb and the User Roles component from the library:
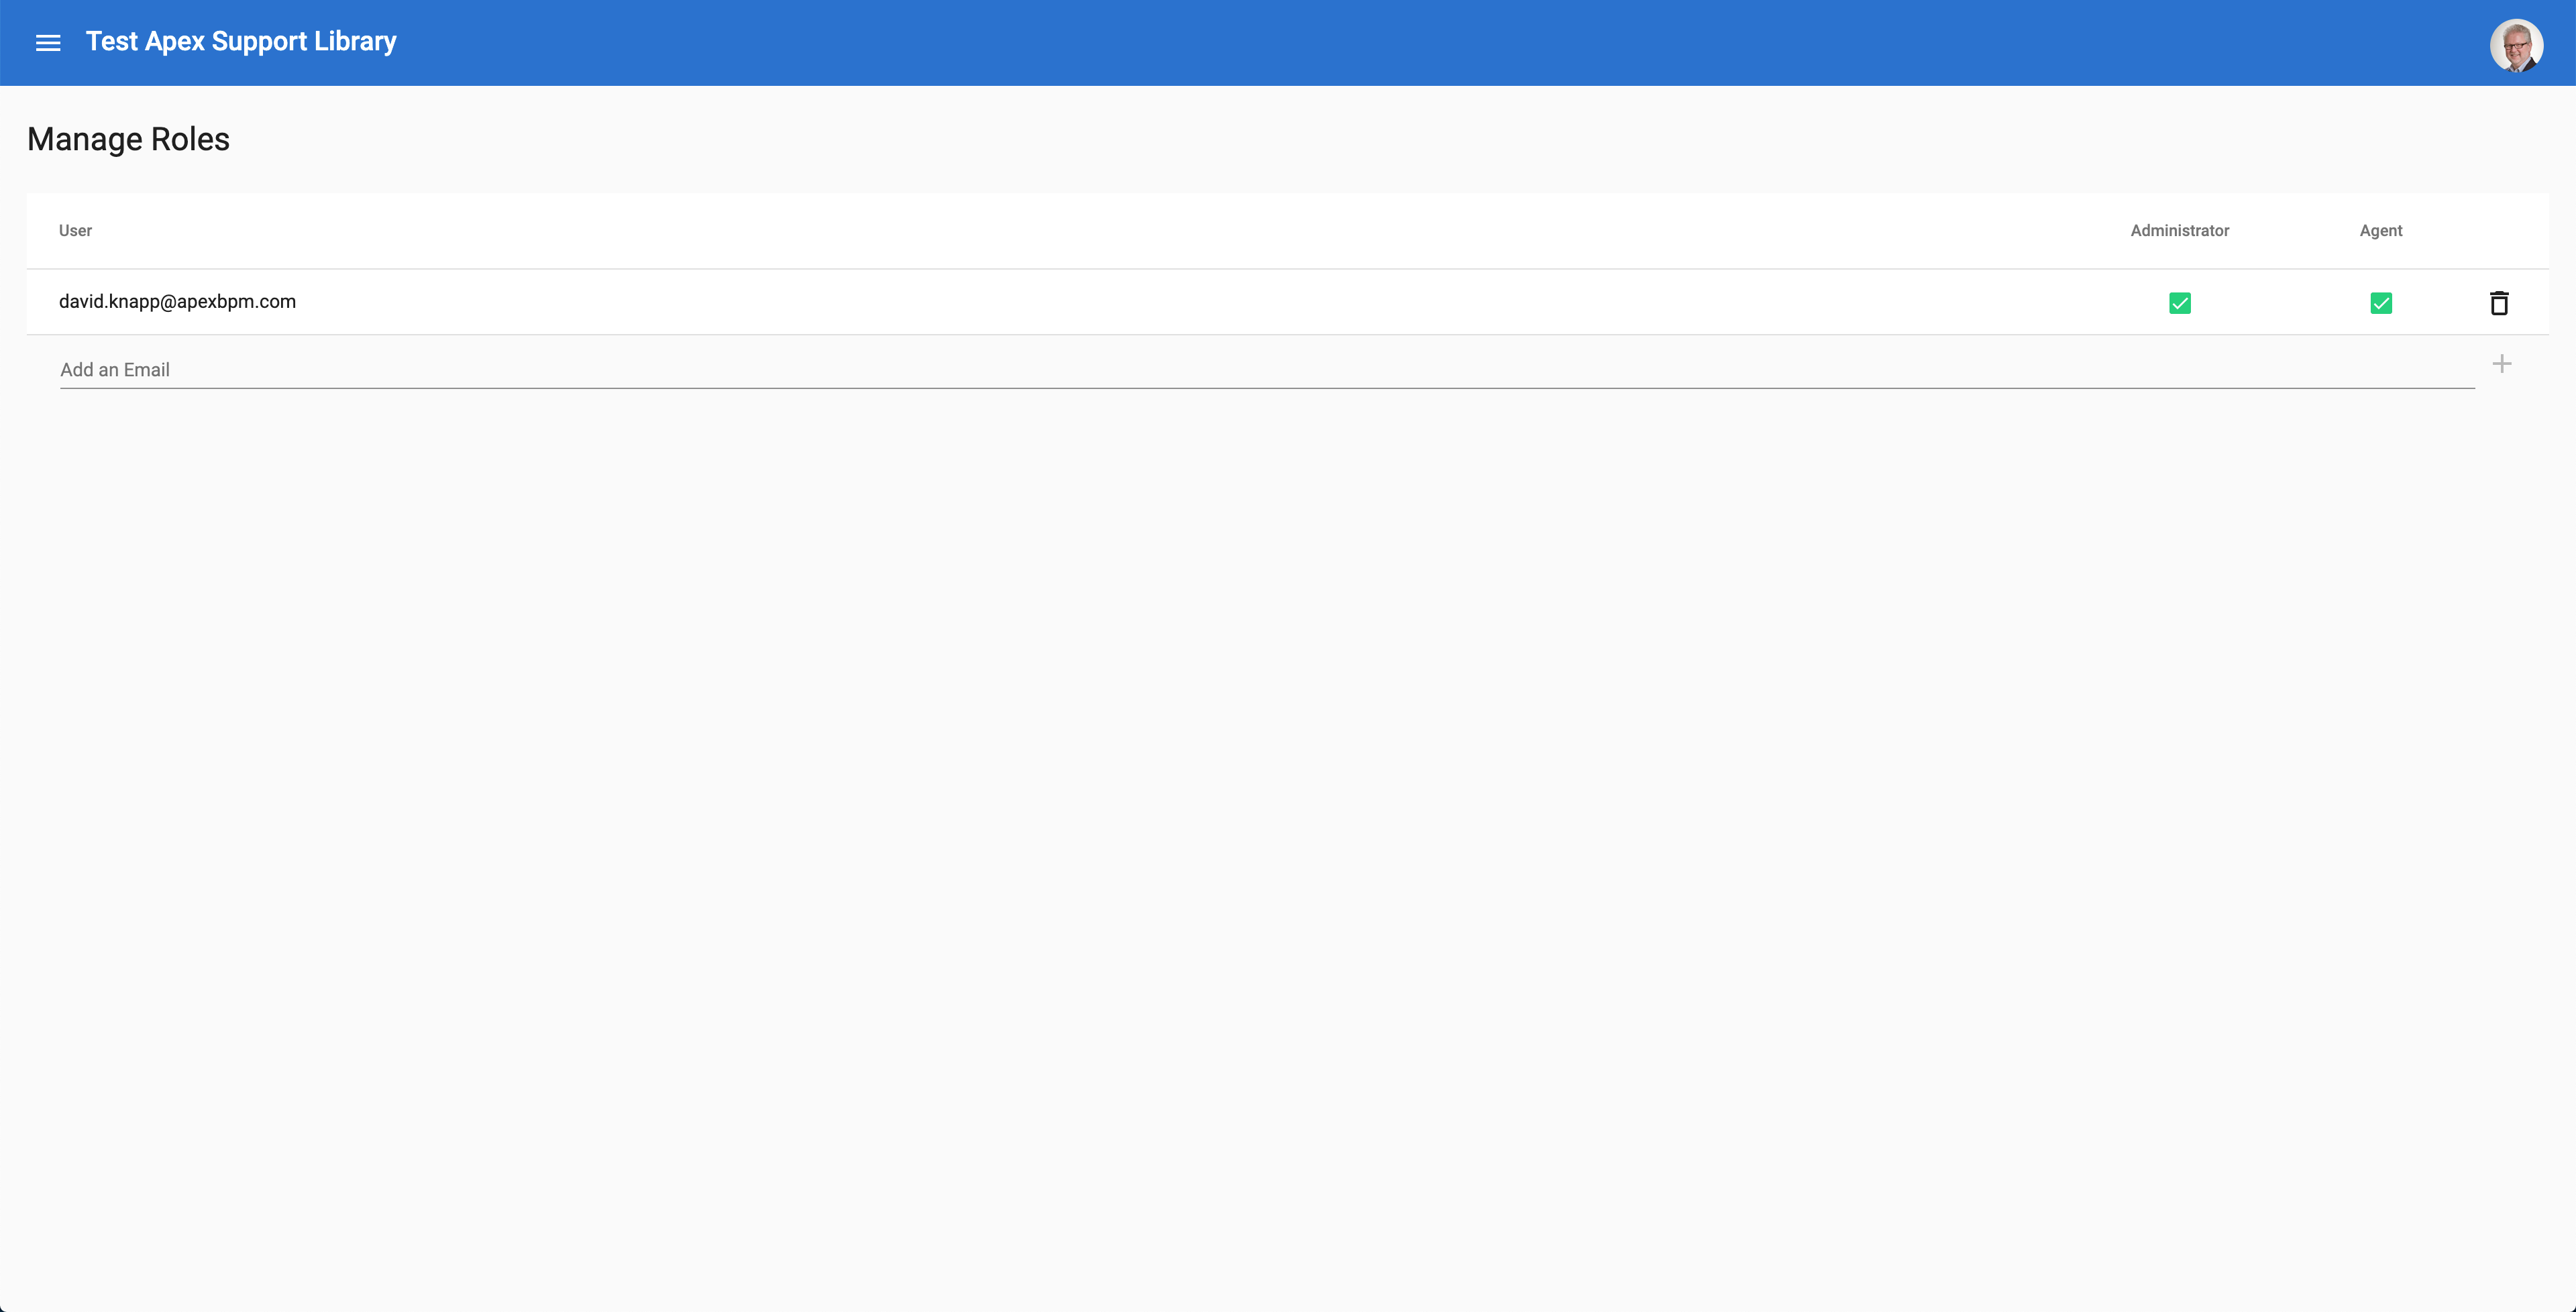
That will give you a page where you can manage the list of people that have the agent role:
Be sure to assign yourself the Agent role so that you can access the pages you will create next.
Add an Agent Conversations Page
Create a page named Agent Conversations (plural) with a Breadcrumb, the Agent Conversations Page Content component and set it to be accessible to Agents:

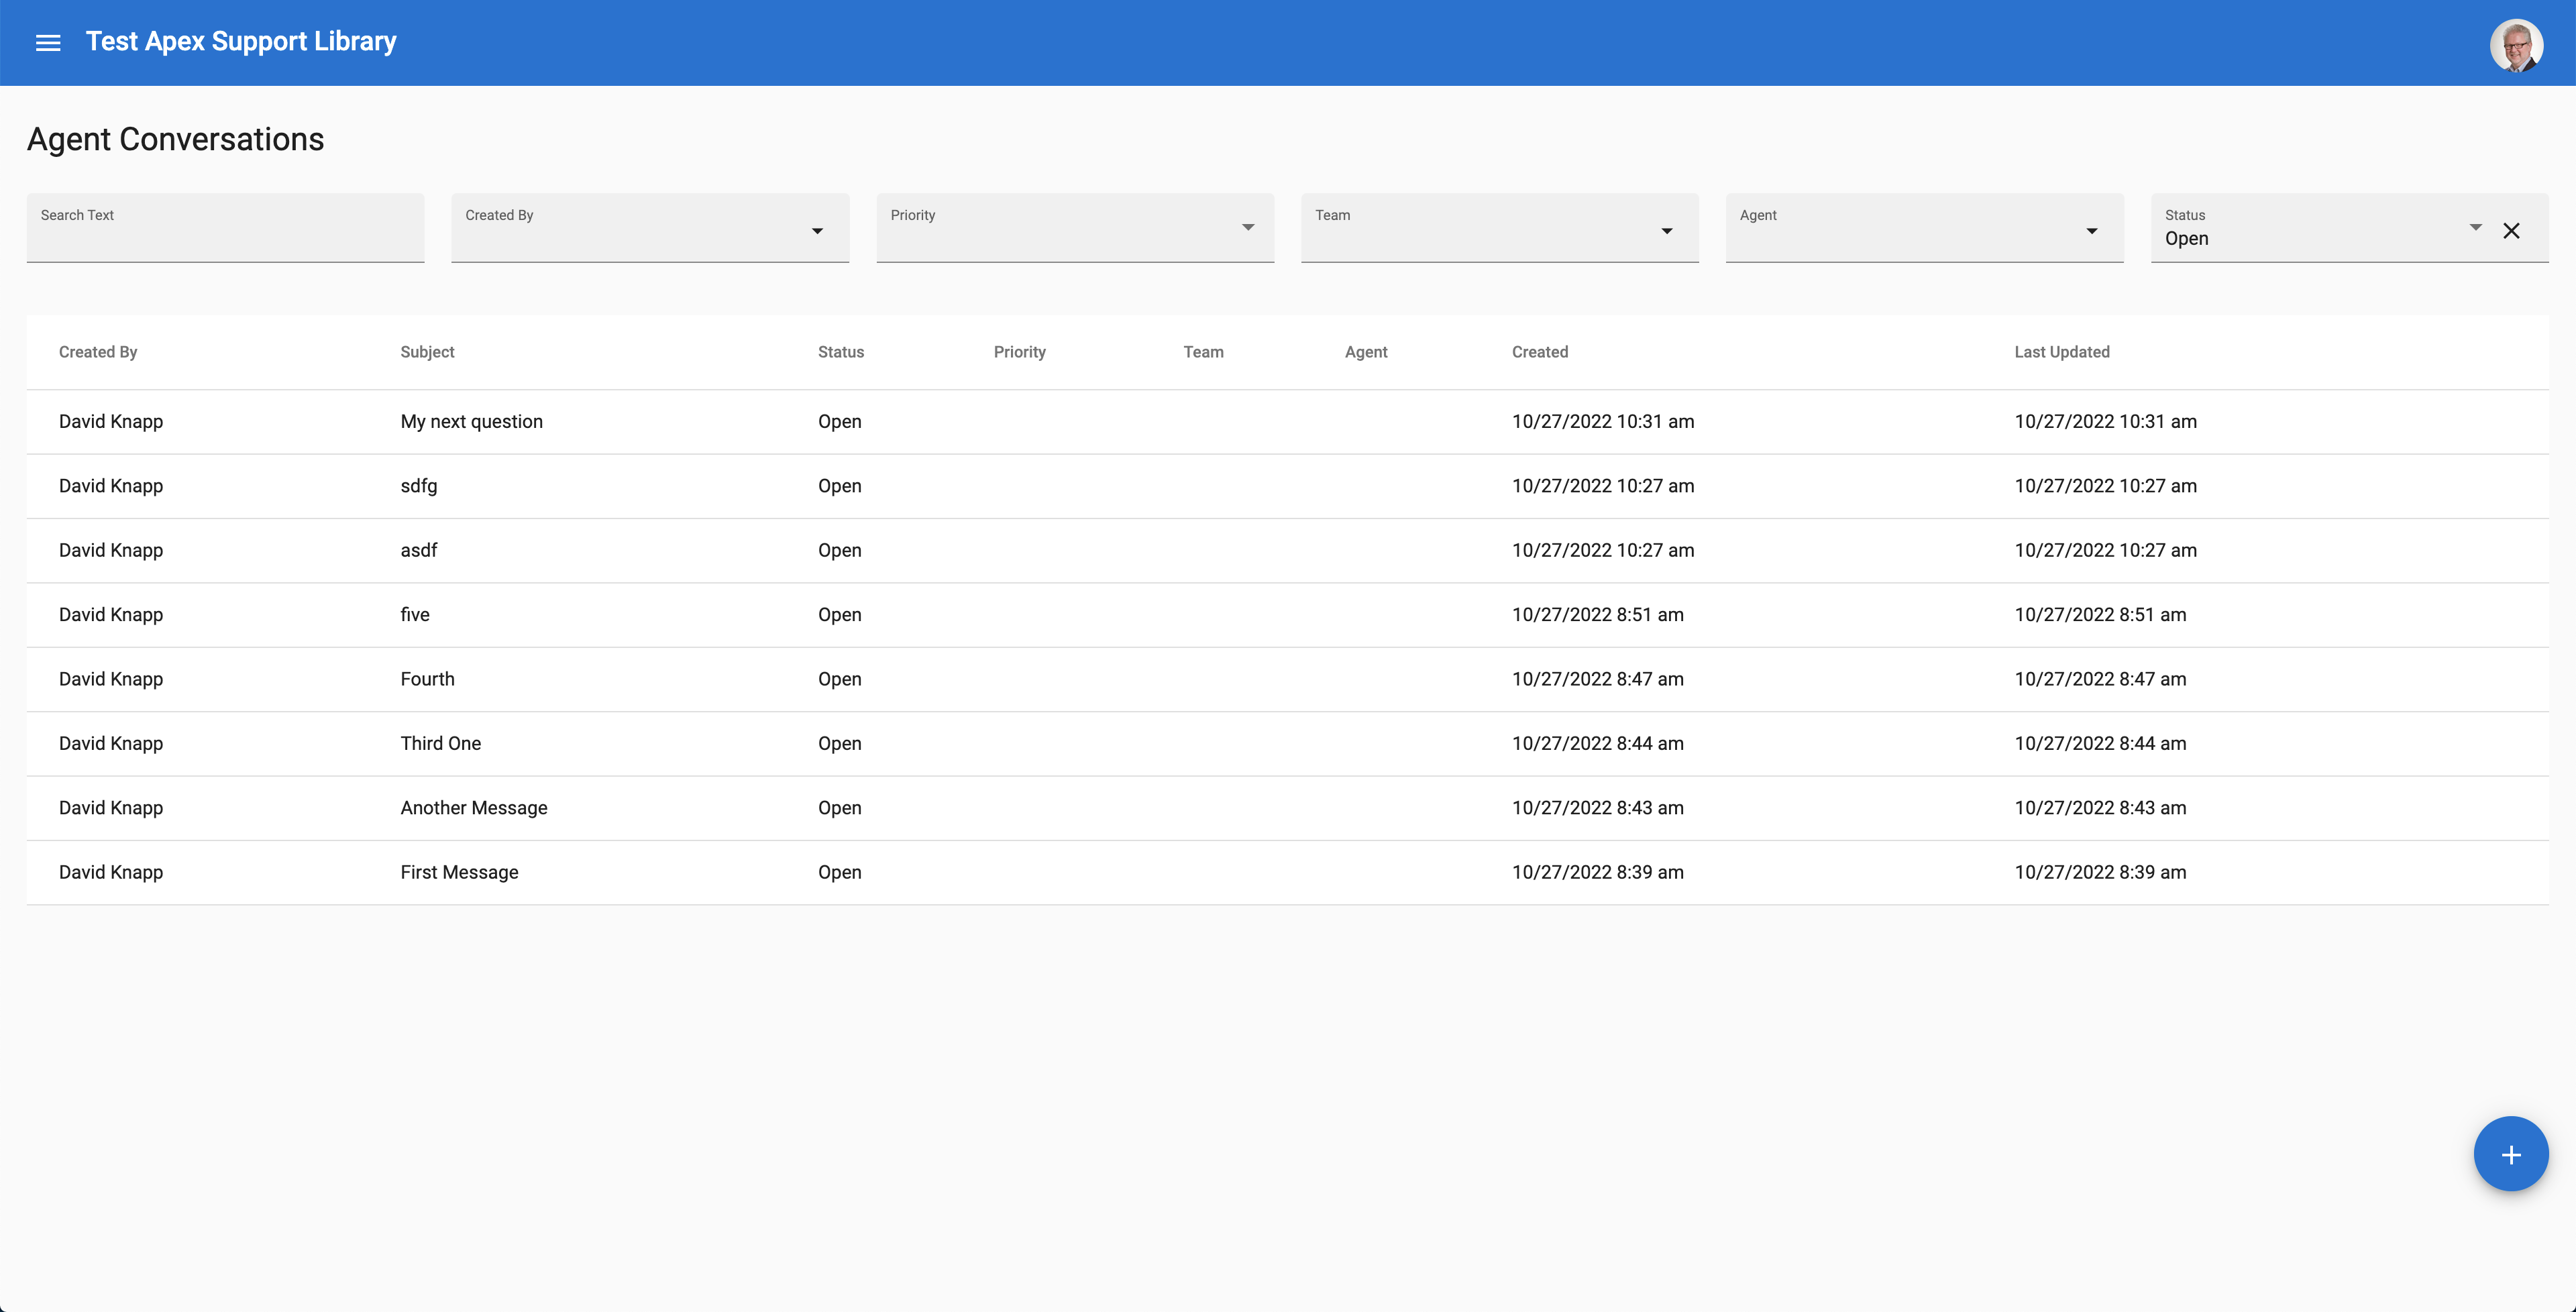
This will give you a place that agents can see and manage conversations:
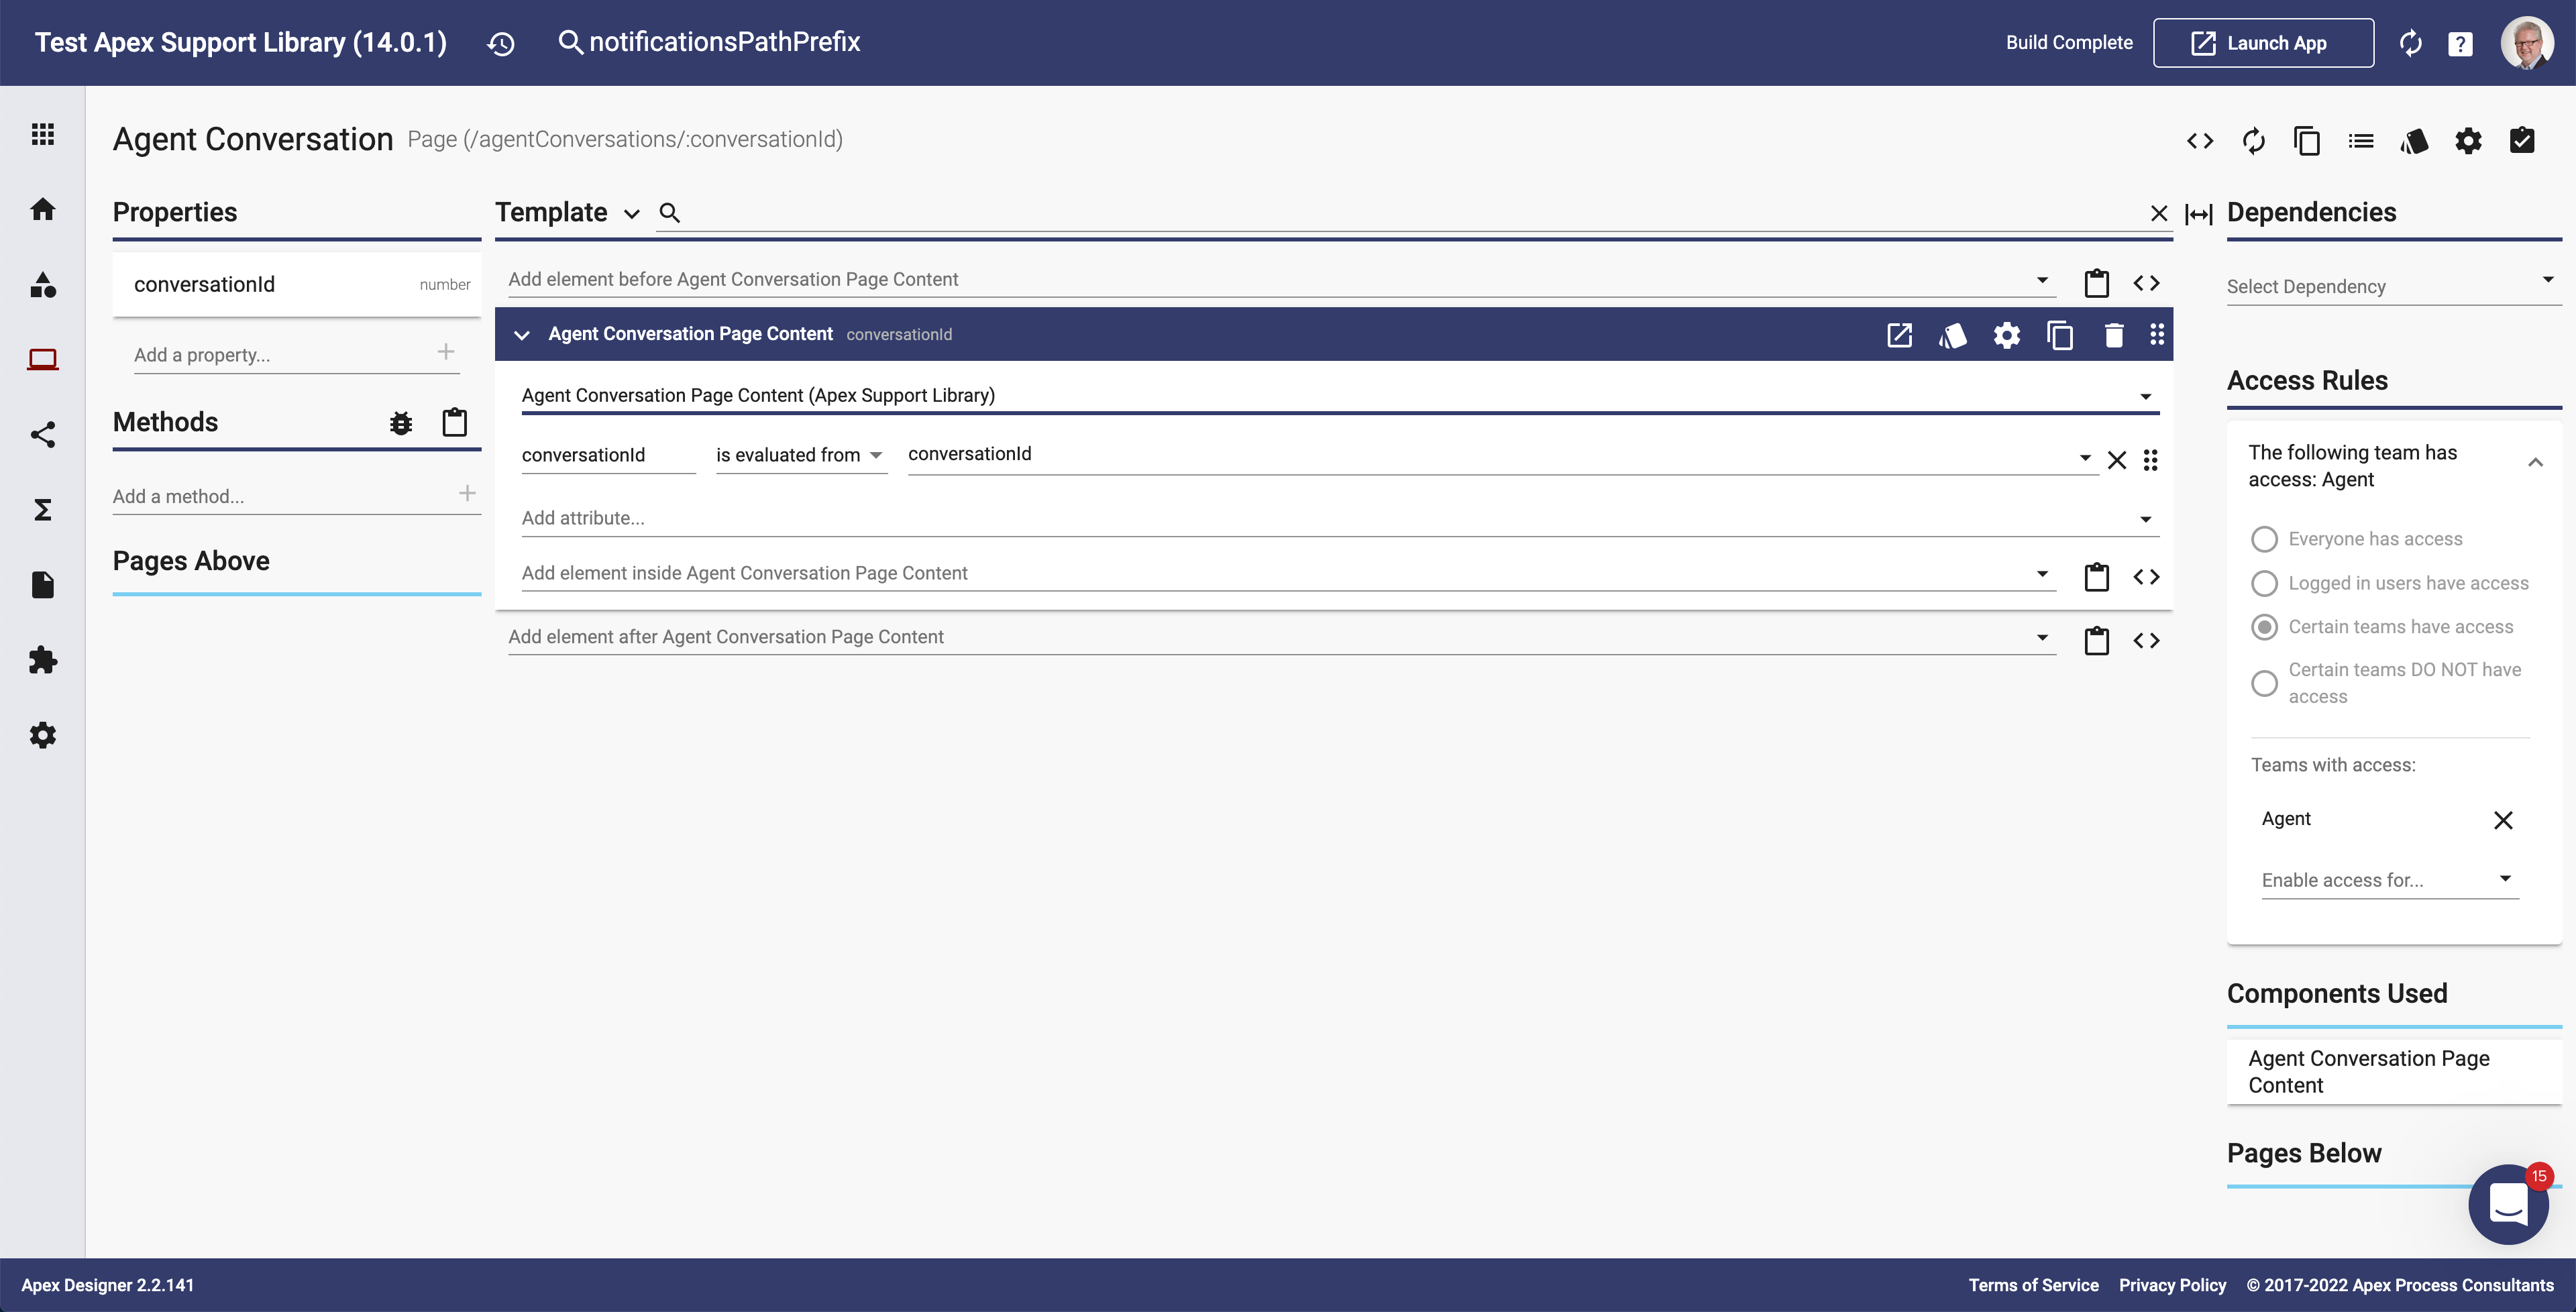
Add an Agent Conversation Page
Create a page named Agent Conversation (singular) with a path of "/agentConversations/:conversationId", a conversationId property (number), add the Agent Conversation Page Content, and set it to be accessible only by agents:
The resulting page looks like this:
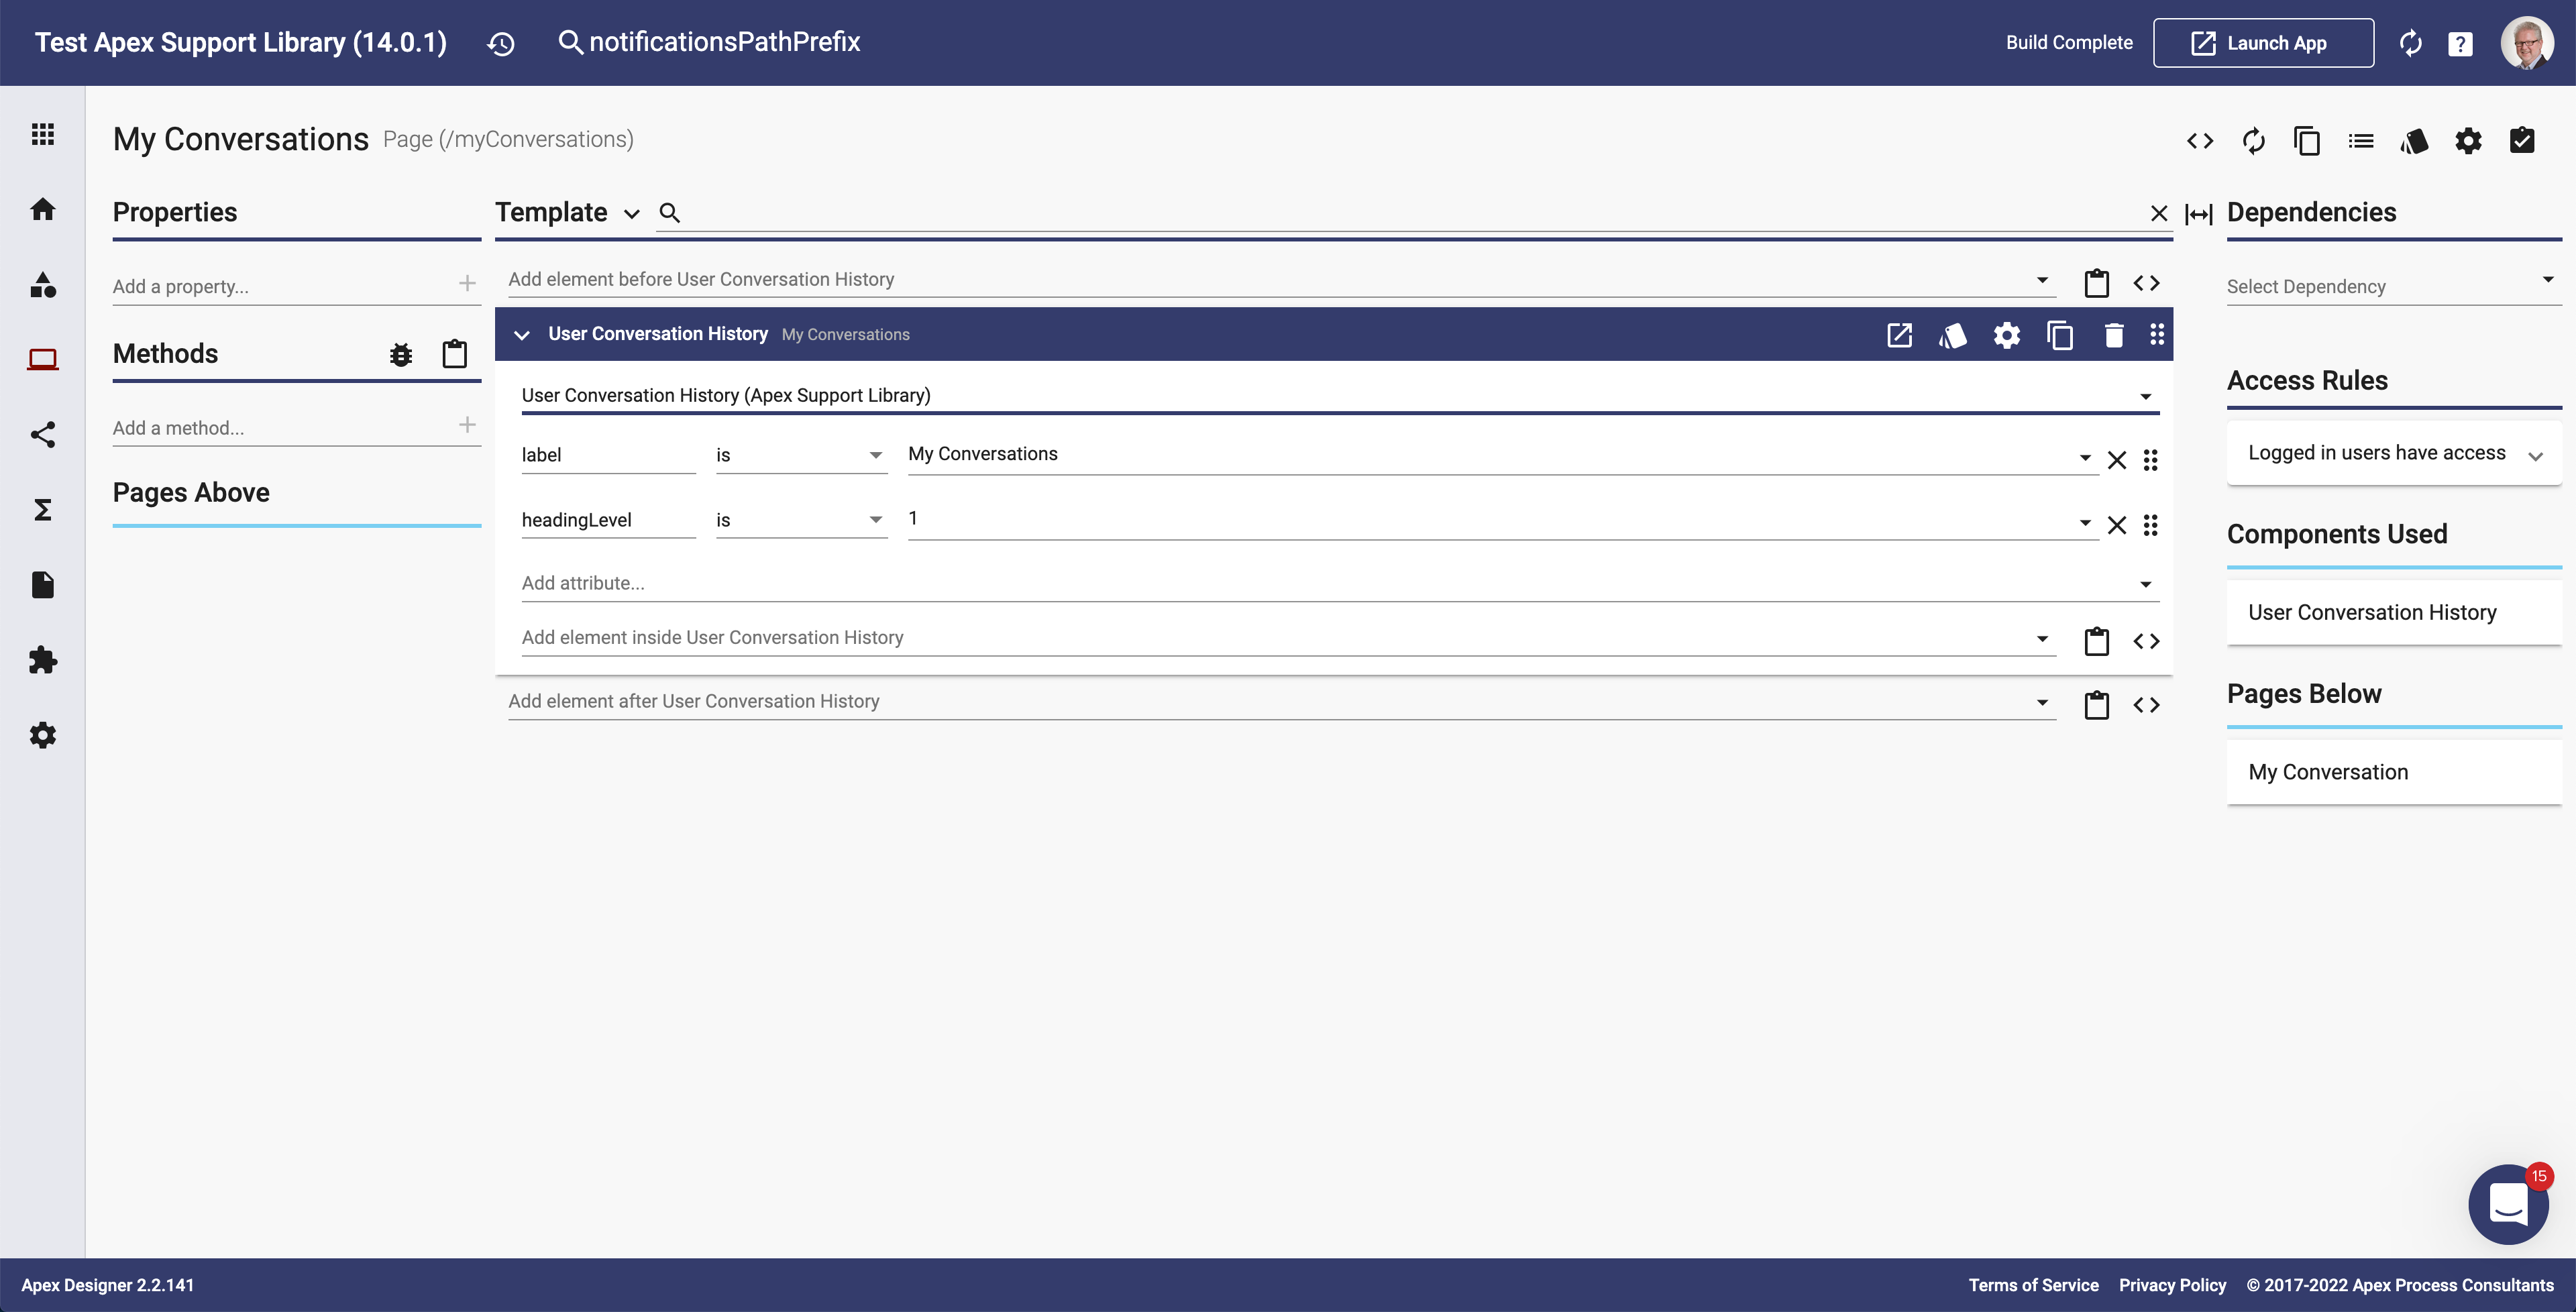
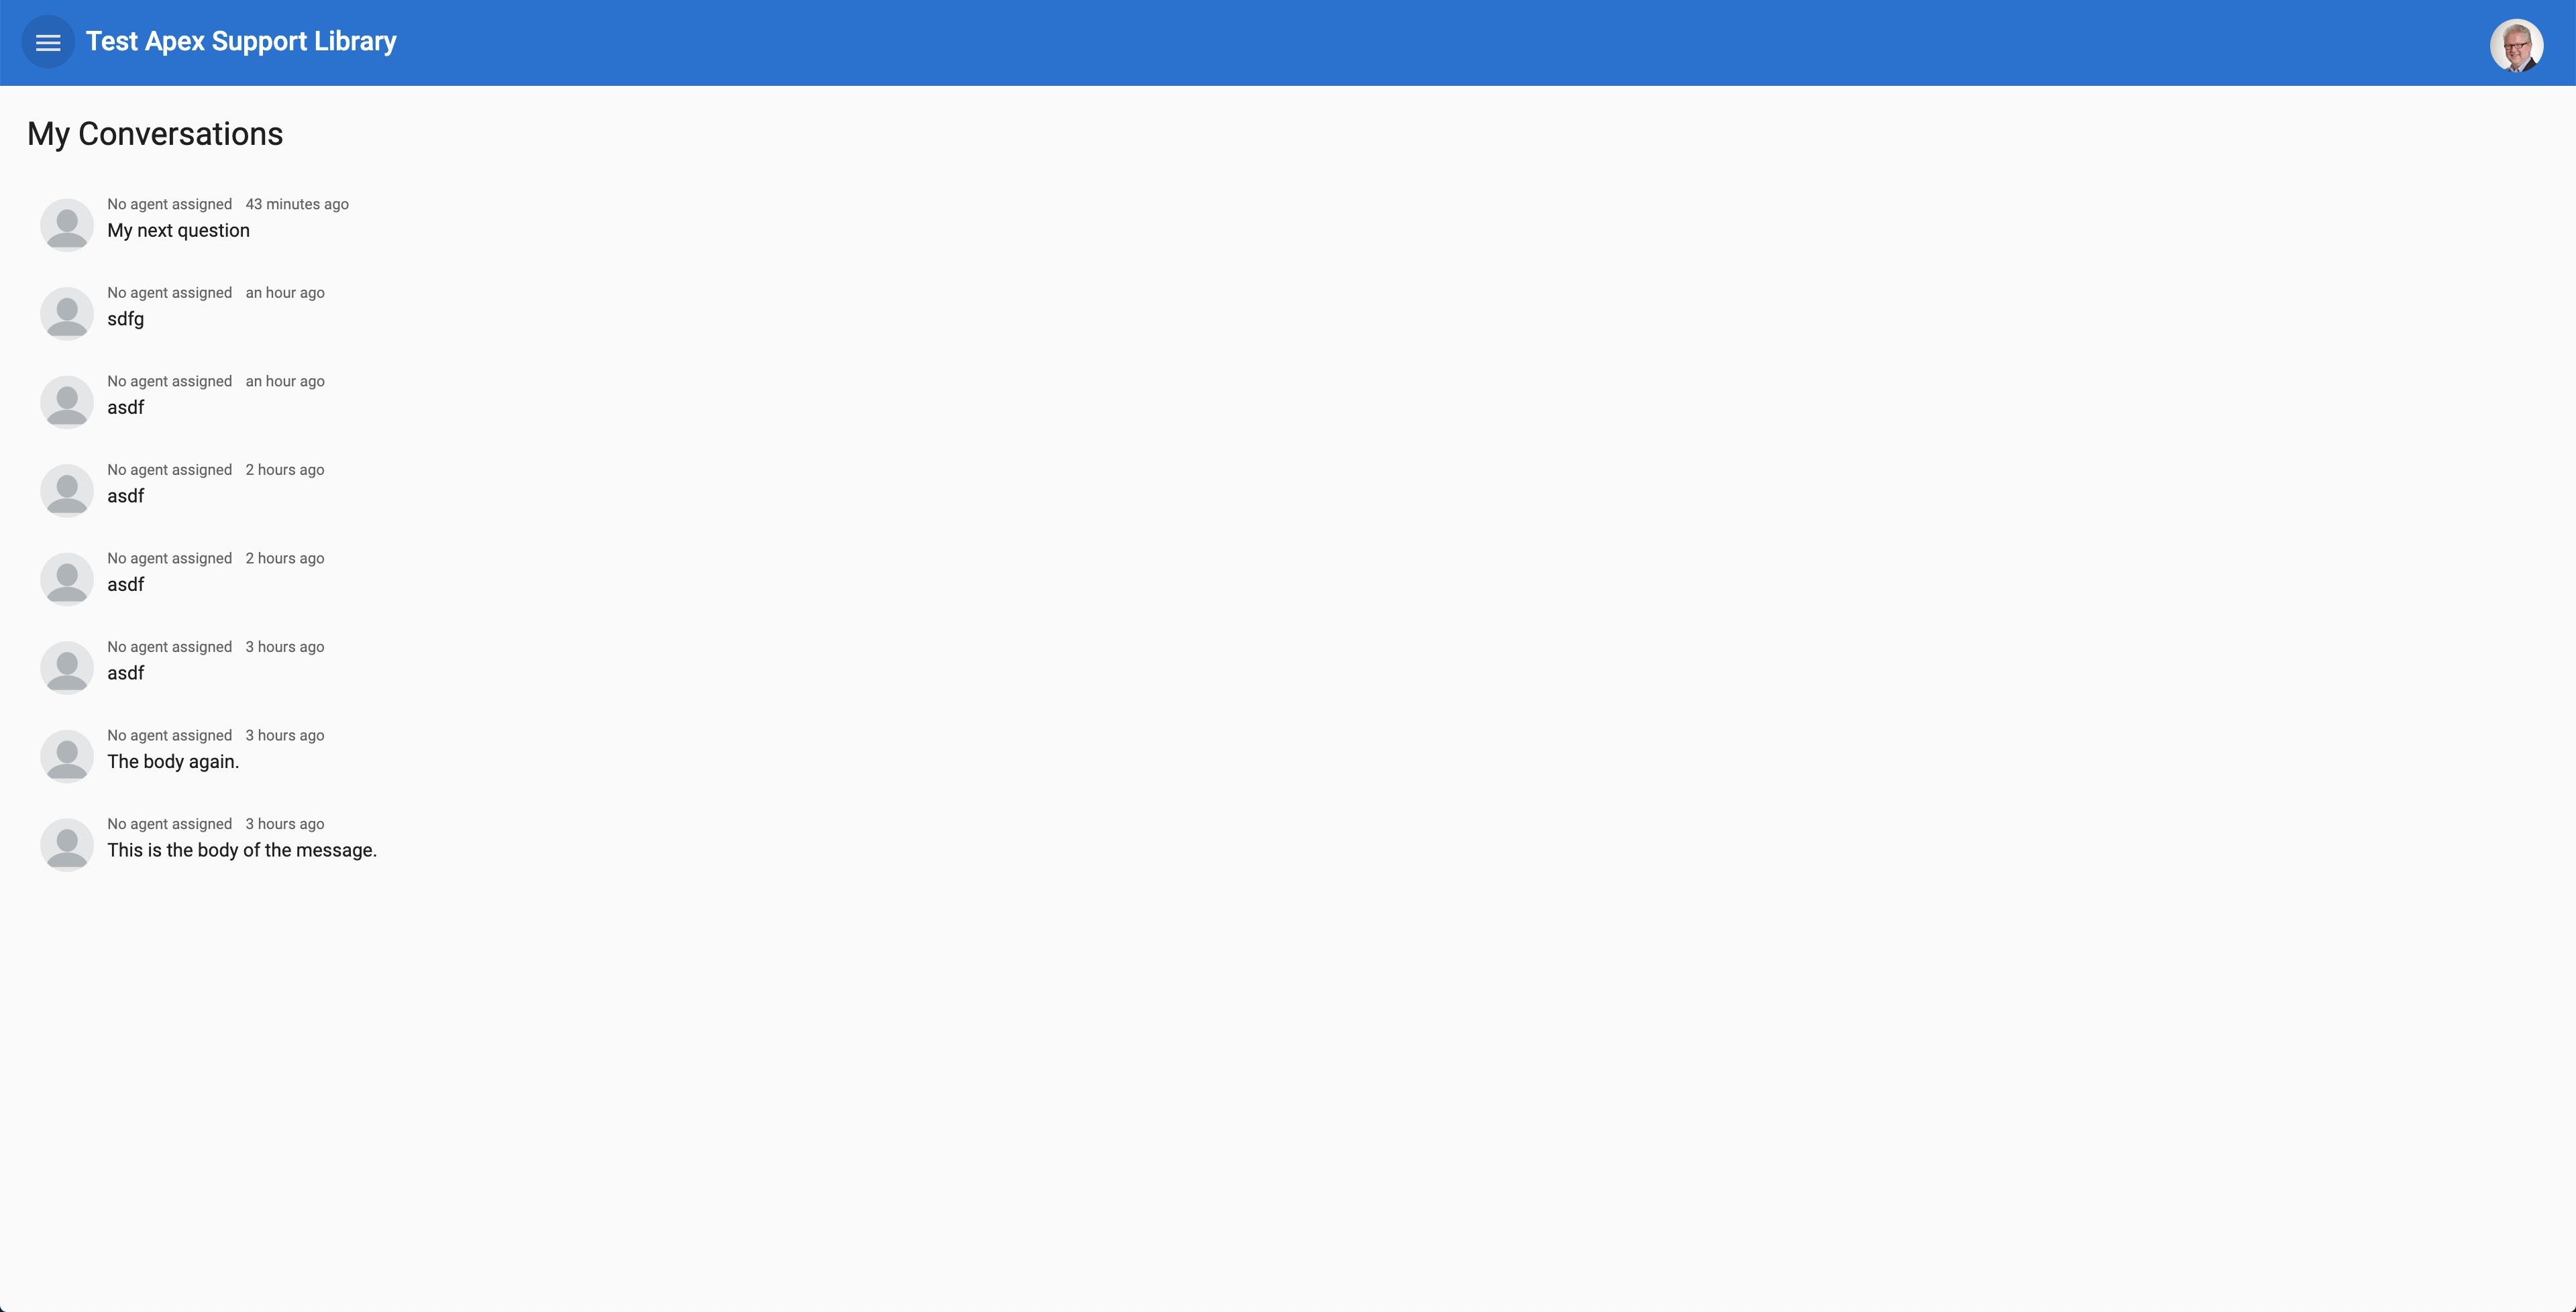
Add a My Conversations Page
Now that we have the agents covered, let's add pages for the end users. Create a page named My Conversations (plural) containing the User Conversation History component with a label of "My Conversations" and a heading level of 1:
The page will look like this:
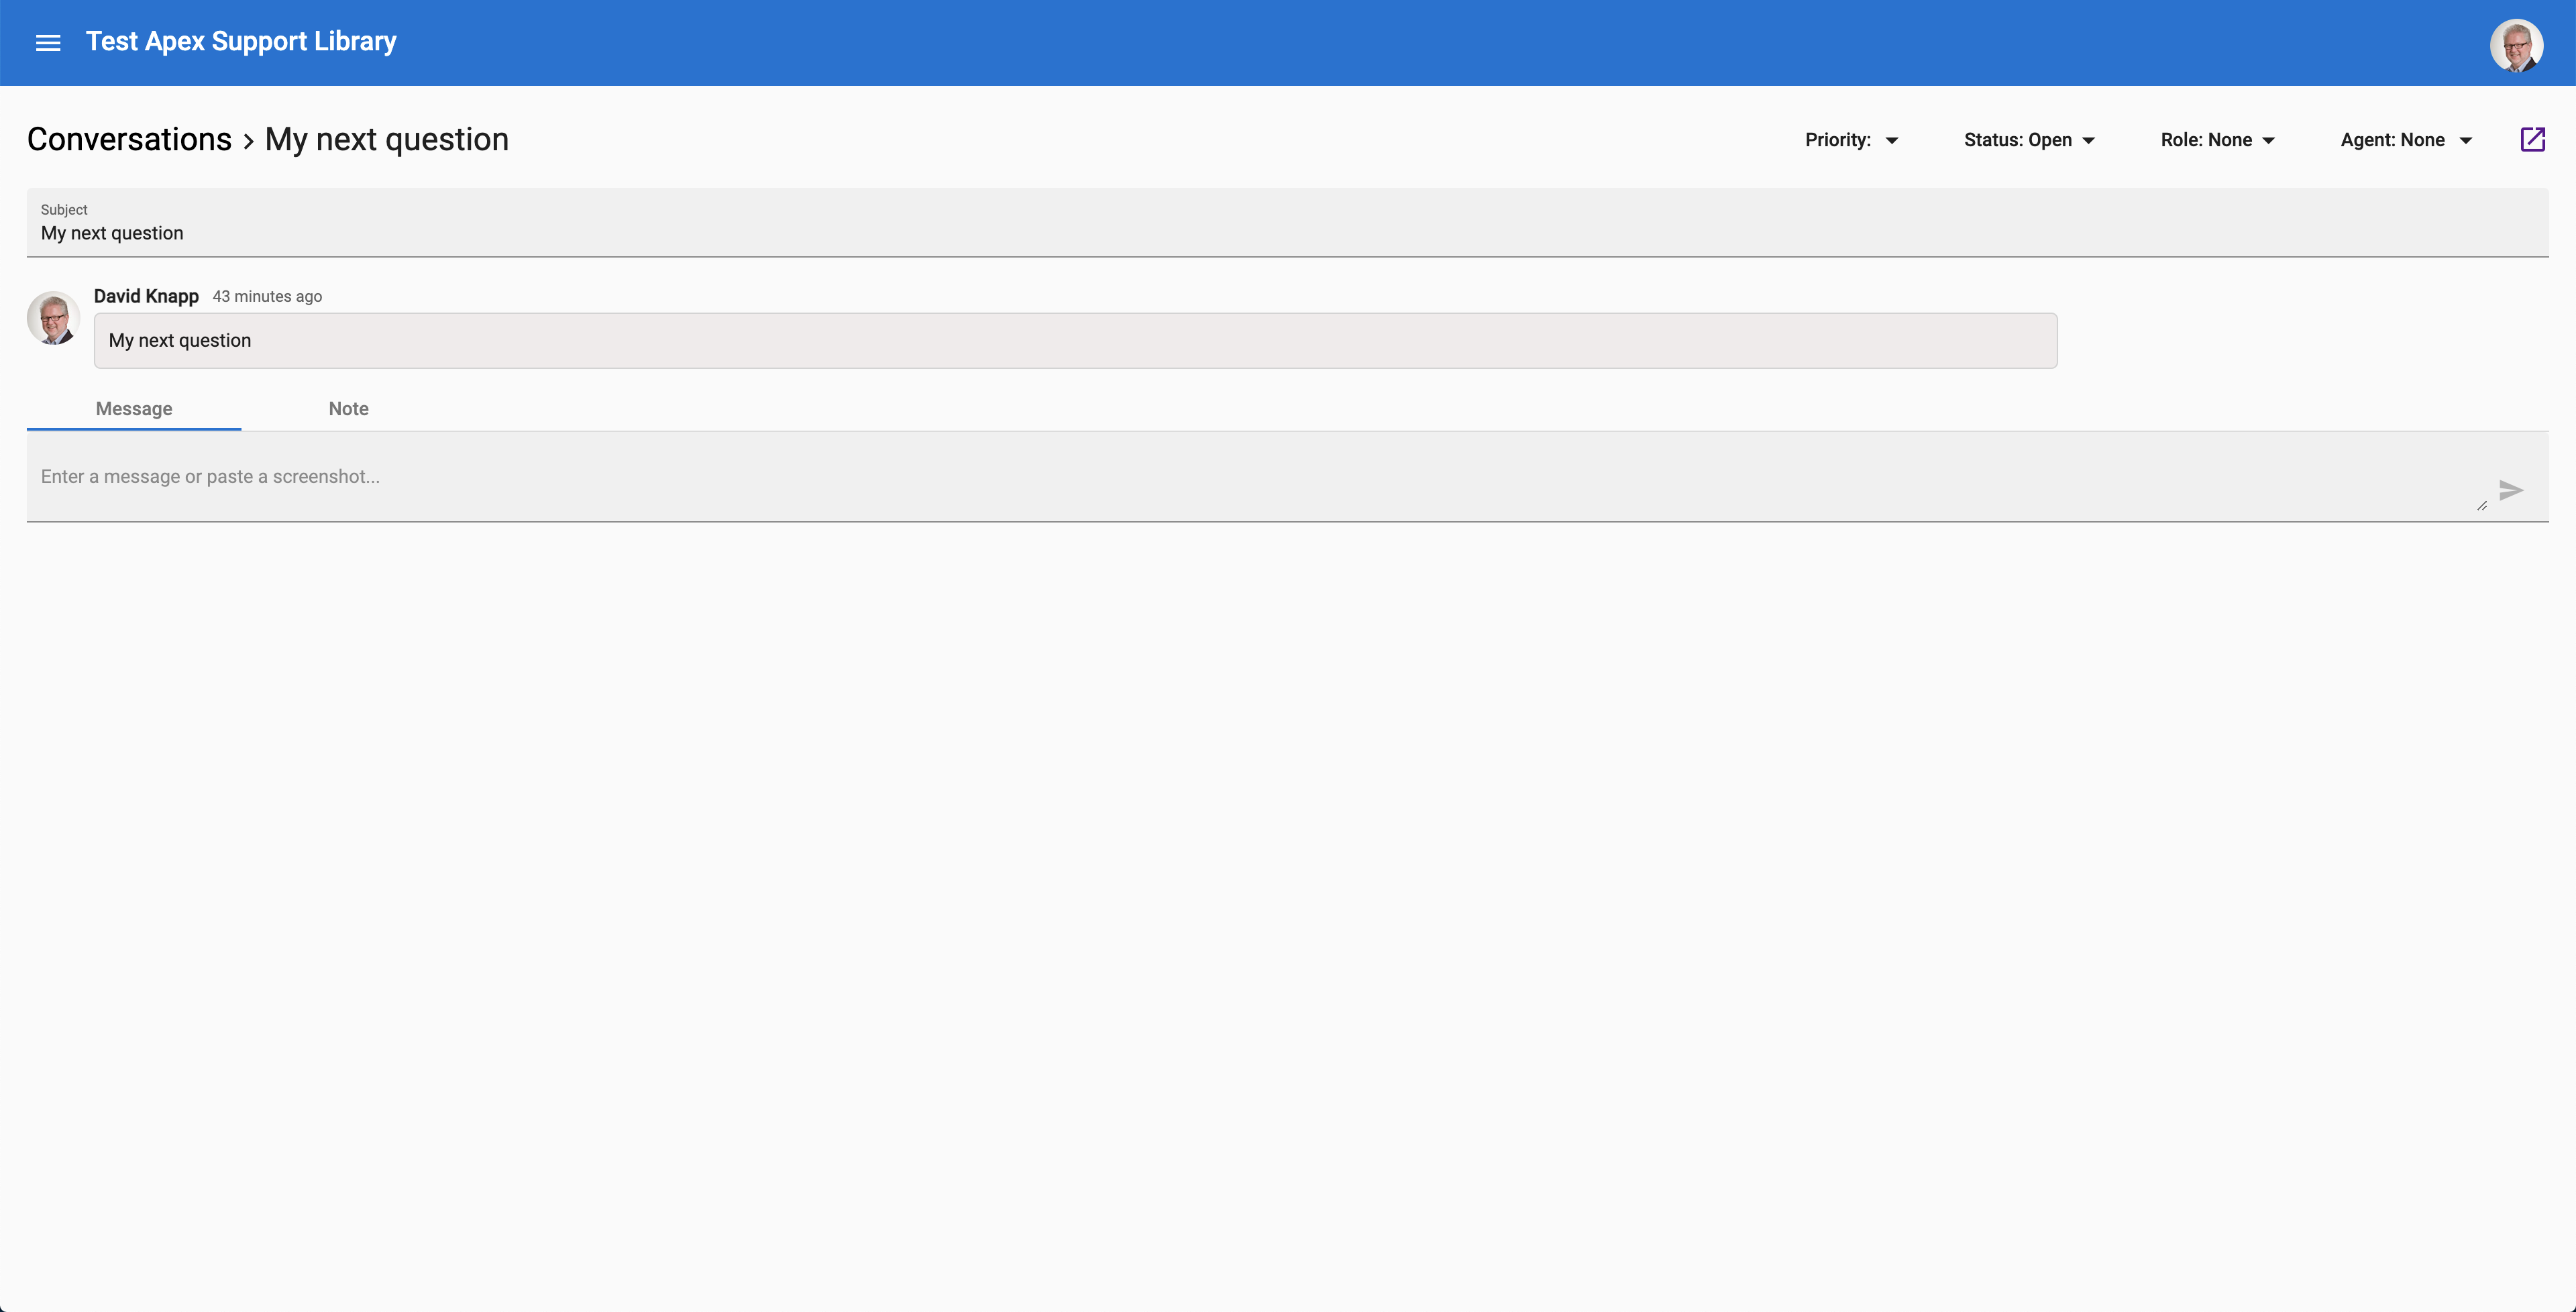
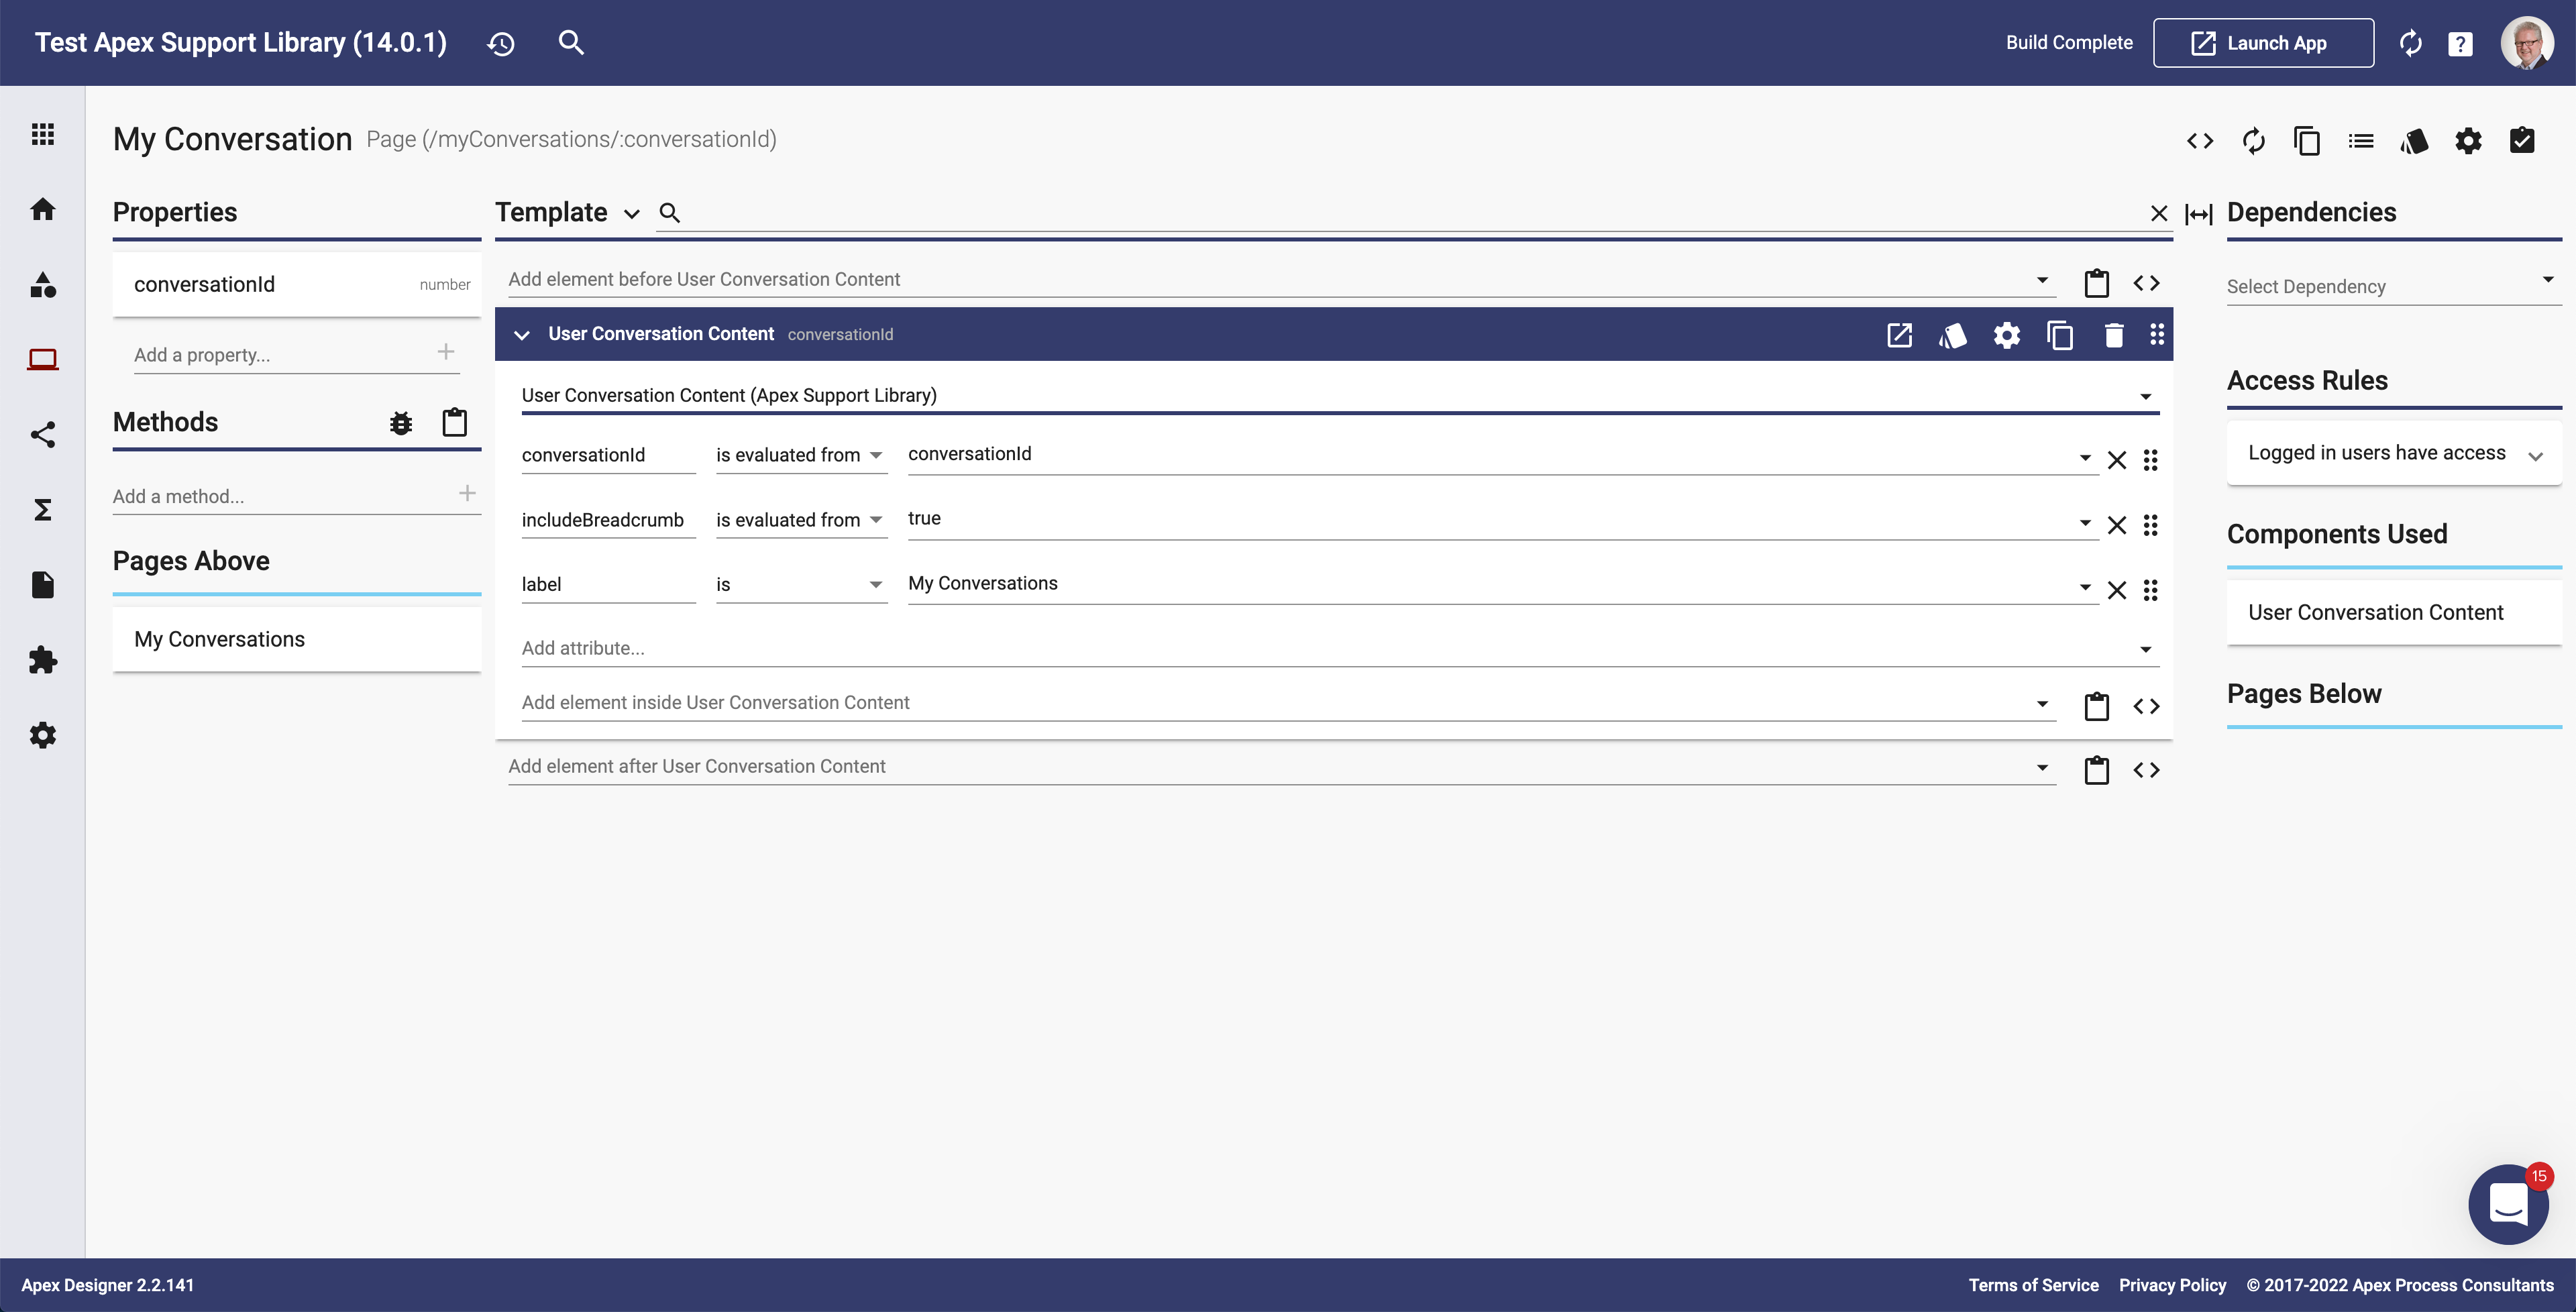
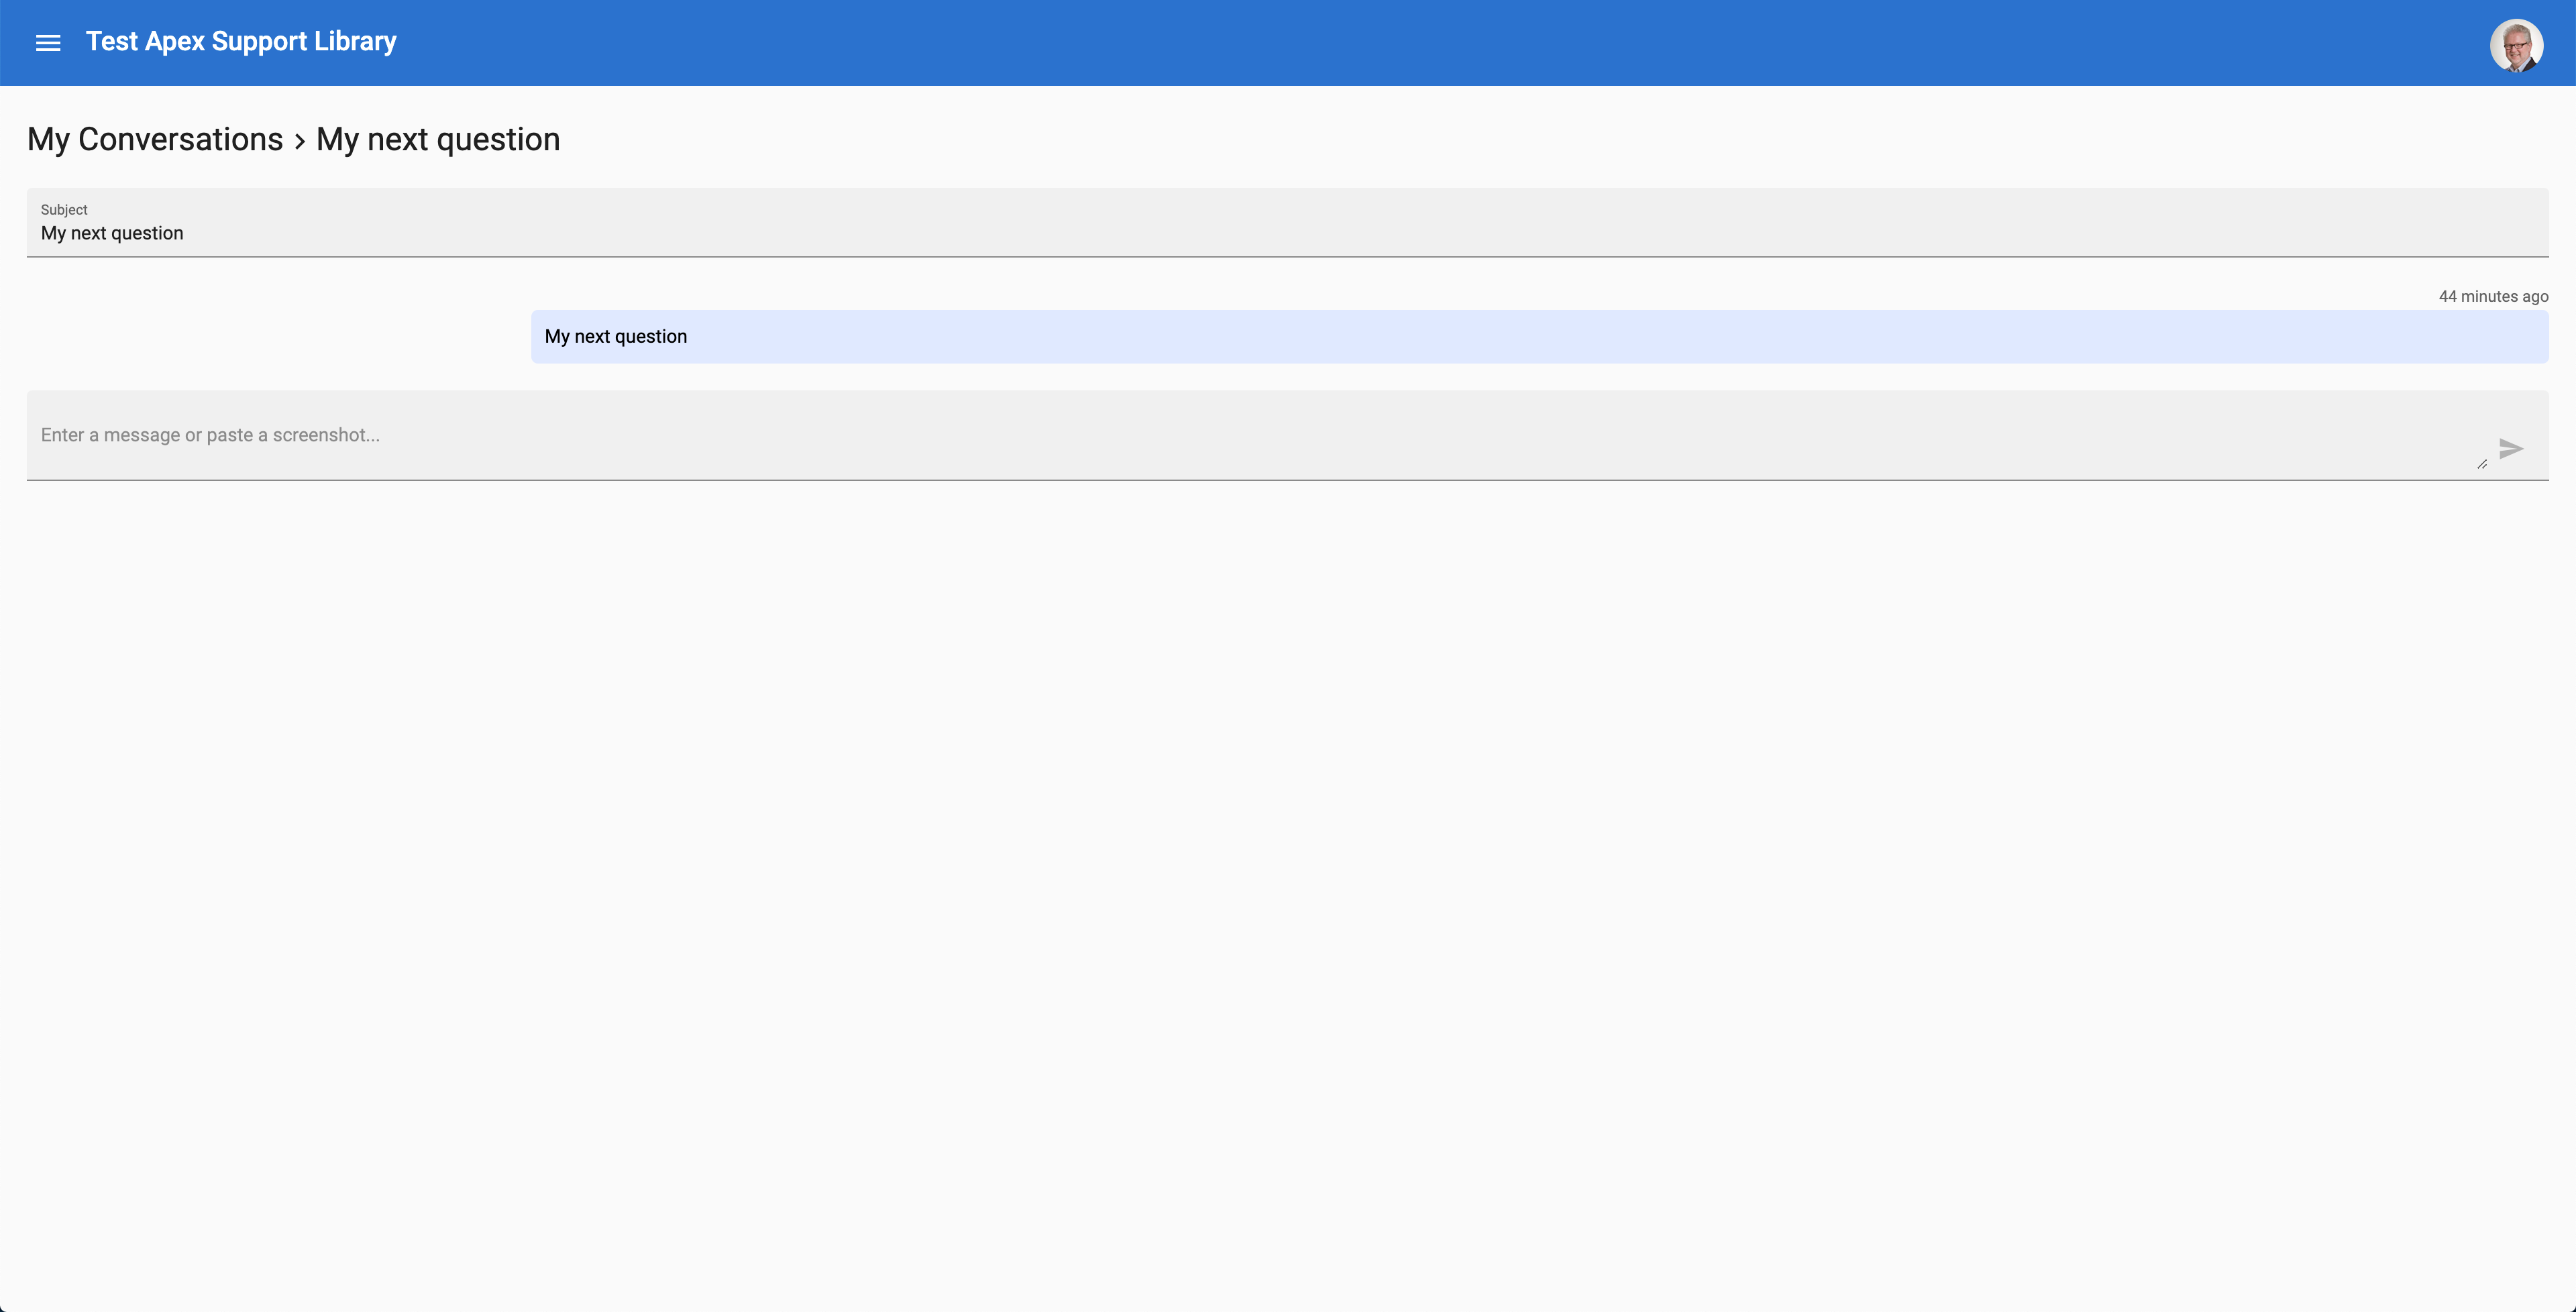
Add a My Conversation Page
Create a page named My Conversation (singular) with a path of "/myConversations/:conversationId", a conversationId property and the User Conversation Content component configured as shown here:
The page will look like this:
Add the Ask a Question Button
The Support Library contains an Ask a Question Button component. Add this to your app by creating a Toolbar Buttons component and adding the Ask a Question Button to it:
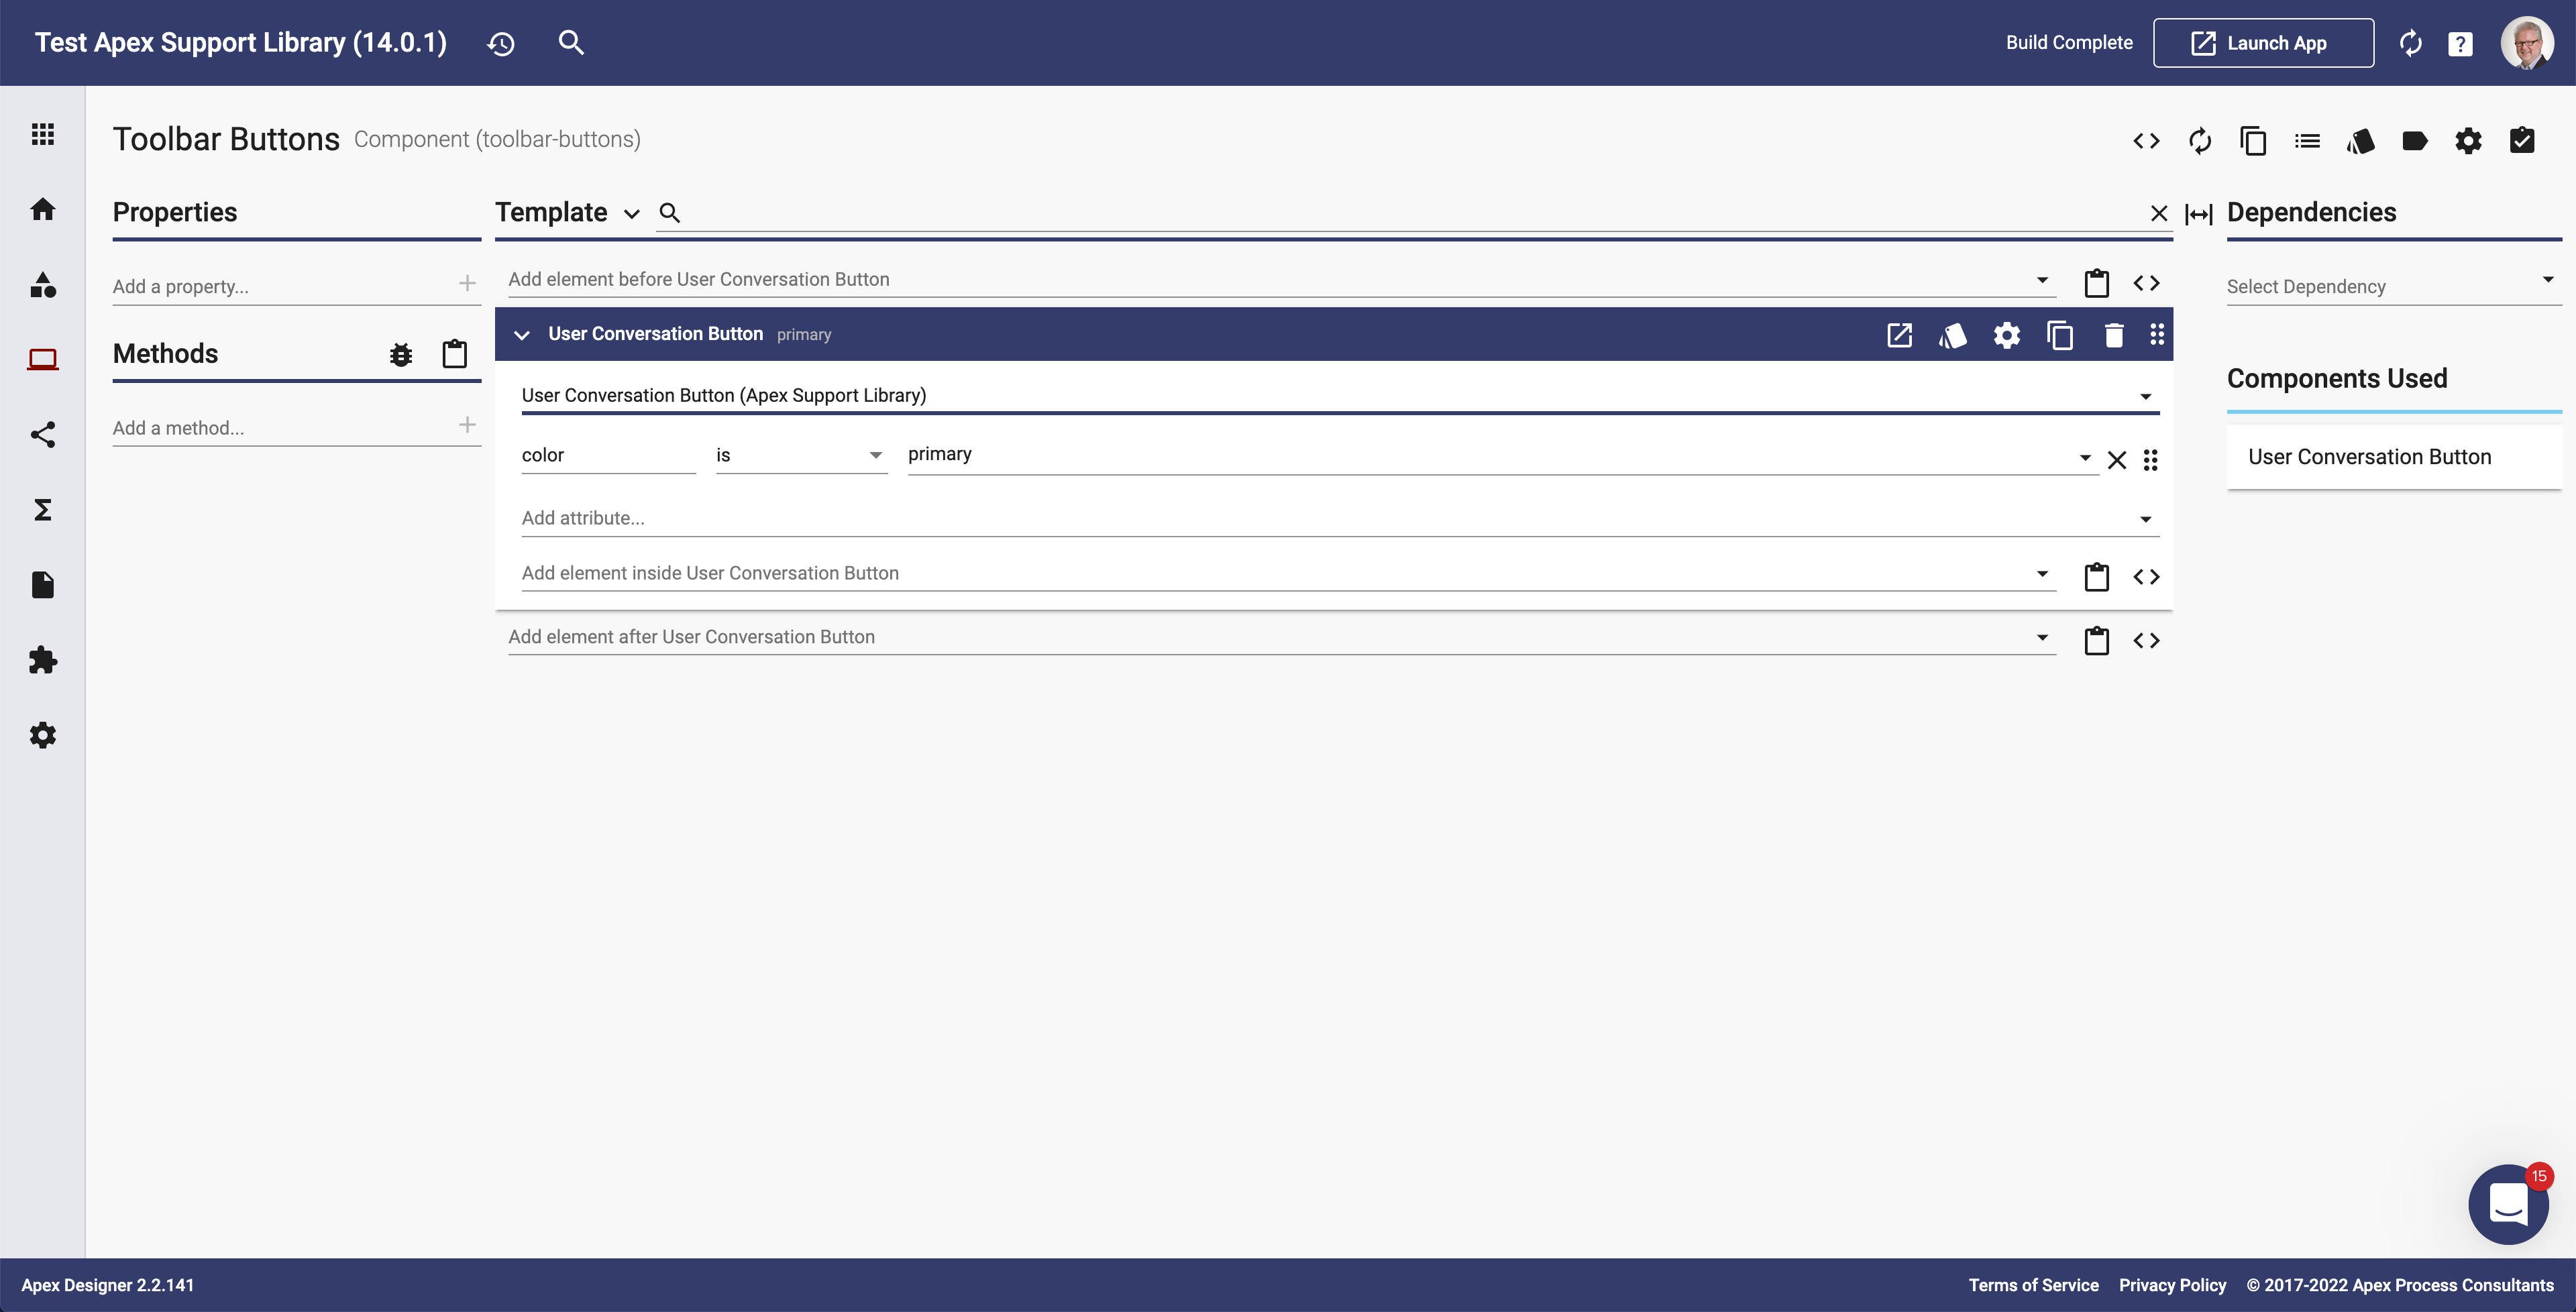
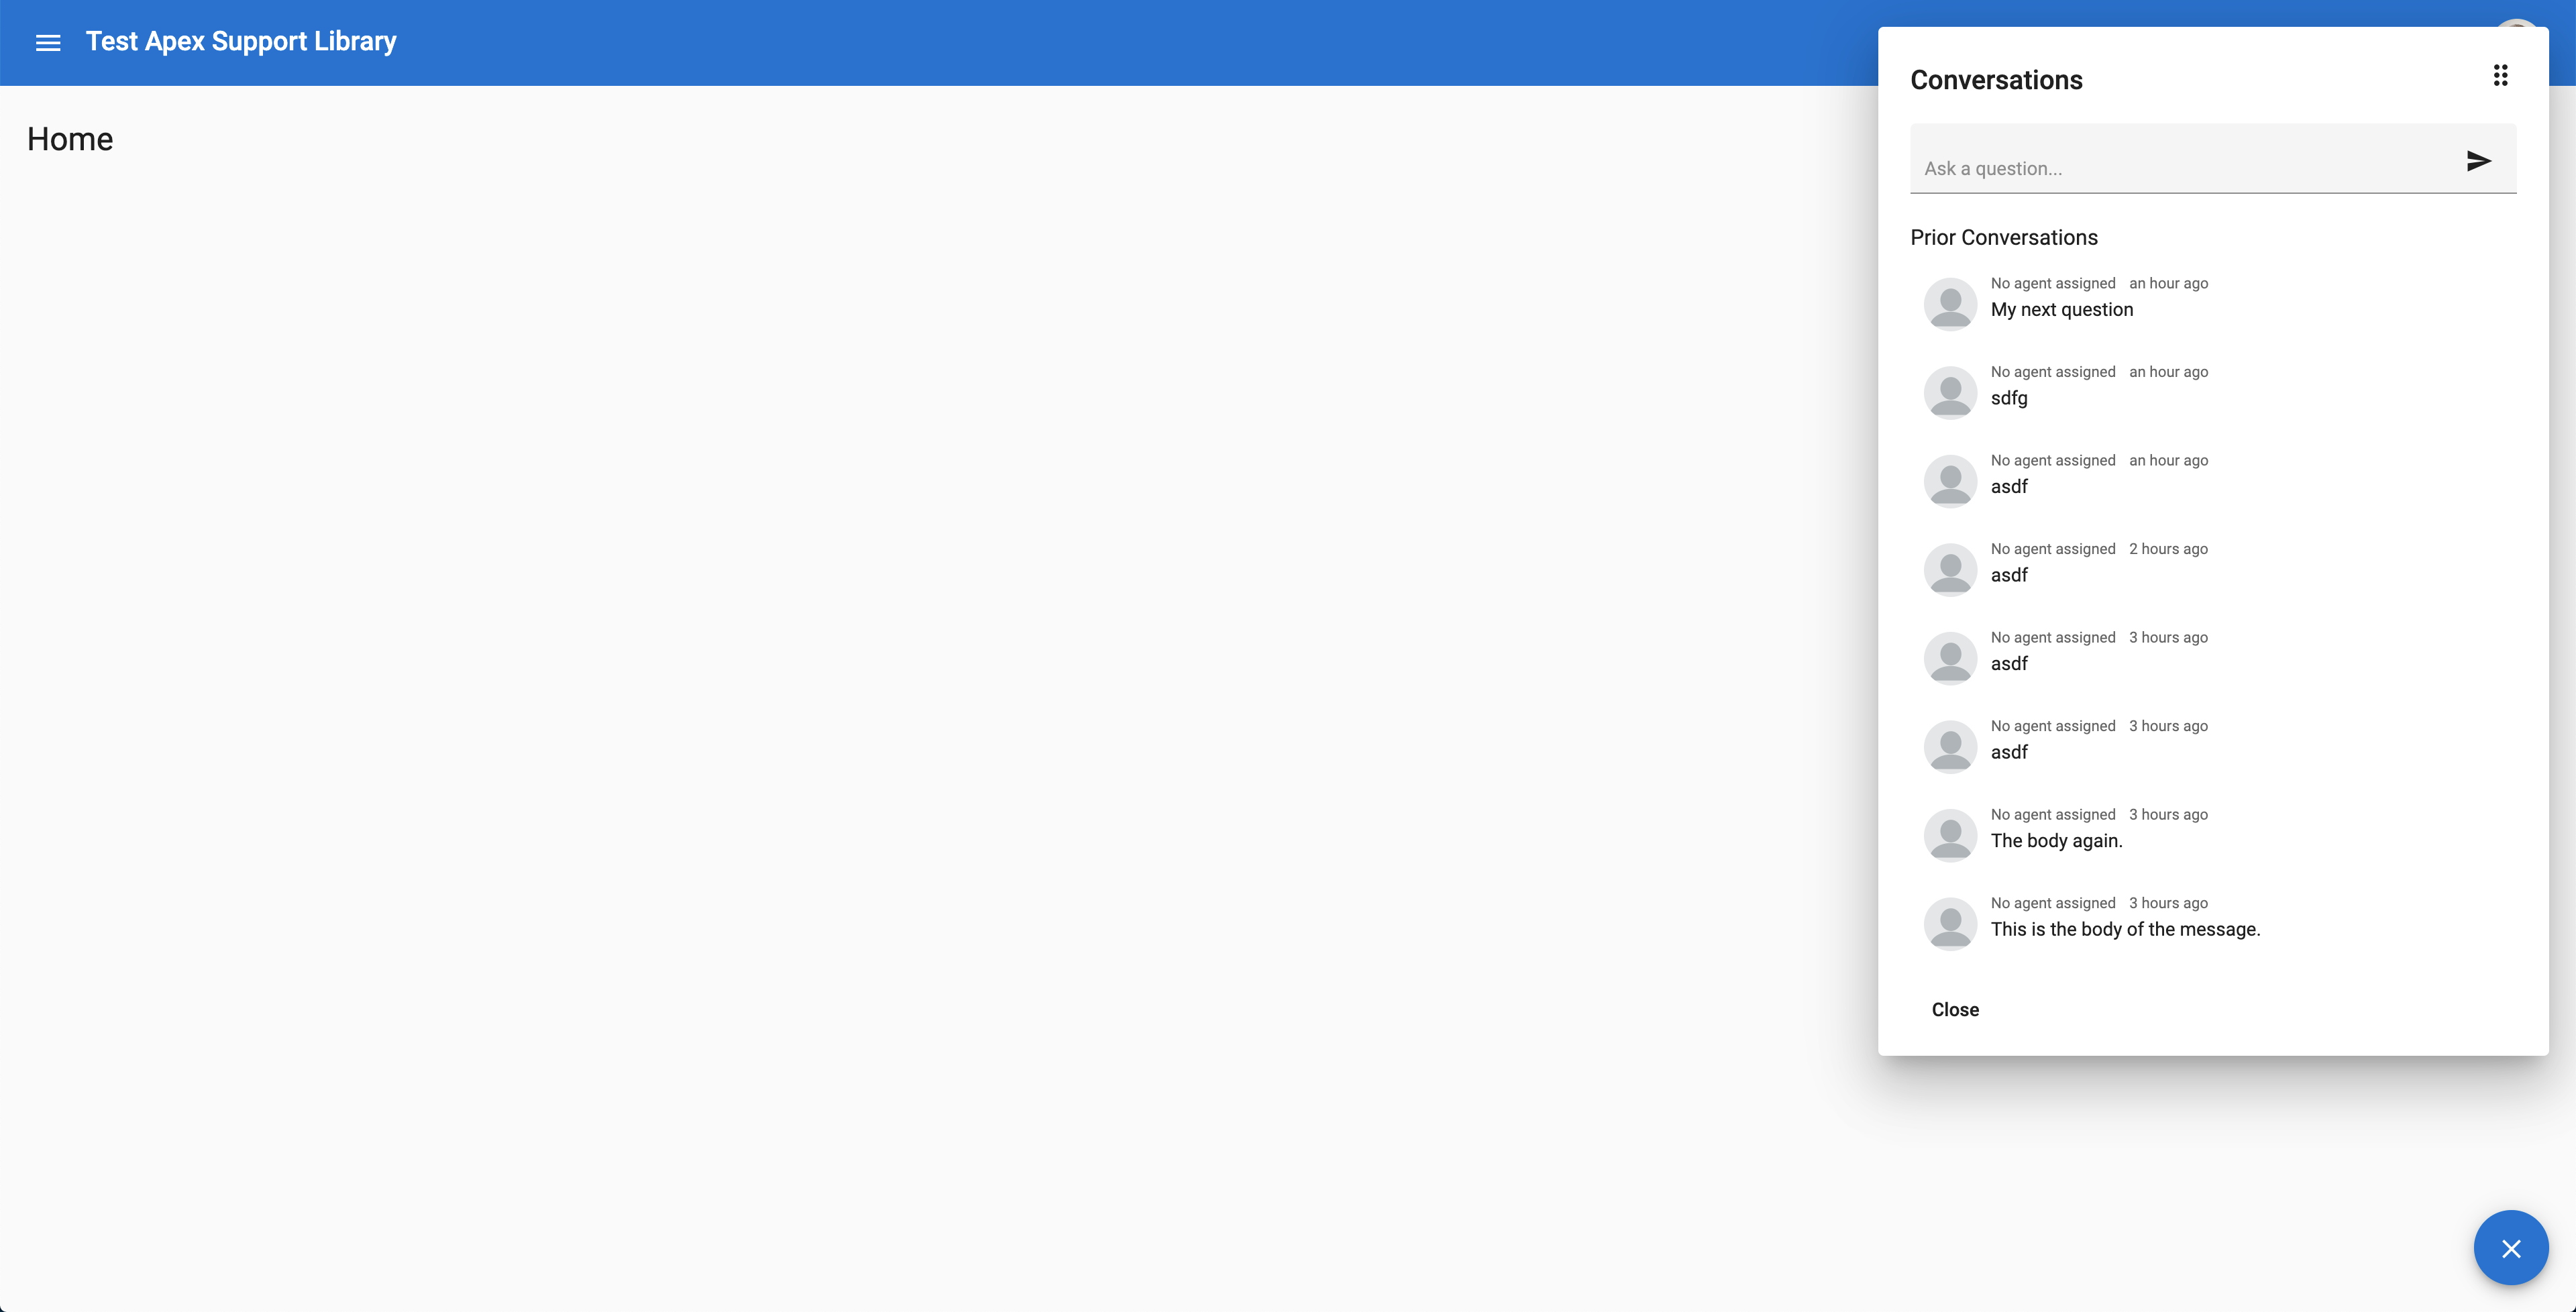
The button will now show up in the lower right corner of the screen. Clicking on it will open the conversation dialog:
Add the Notification Button
Add the Notification Button to the Toolbar Buttons component:
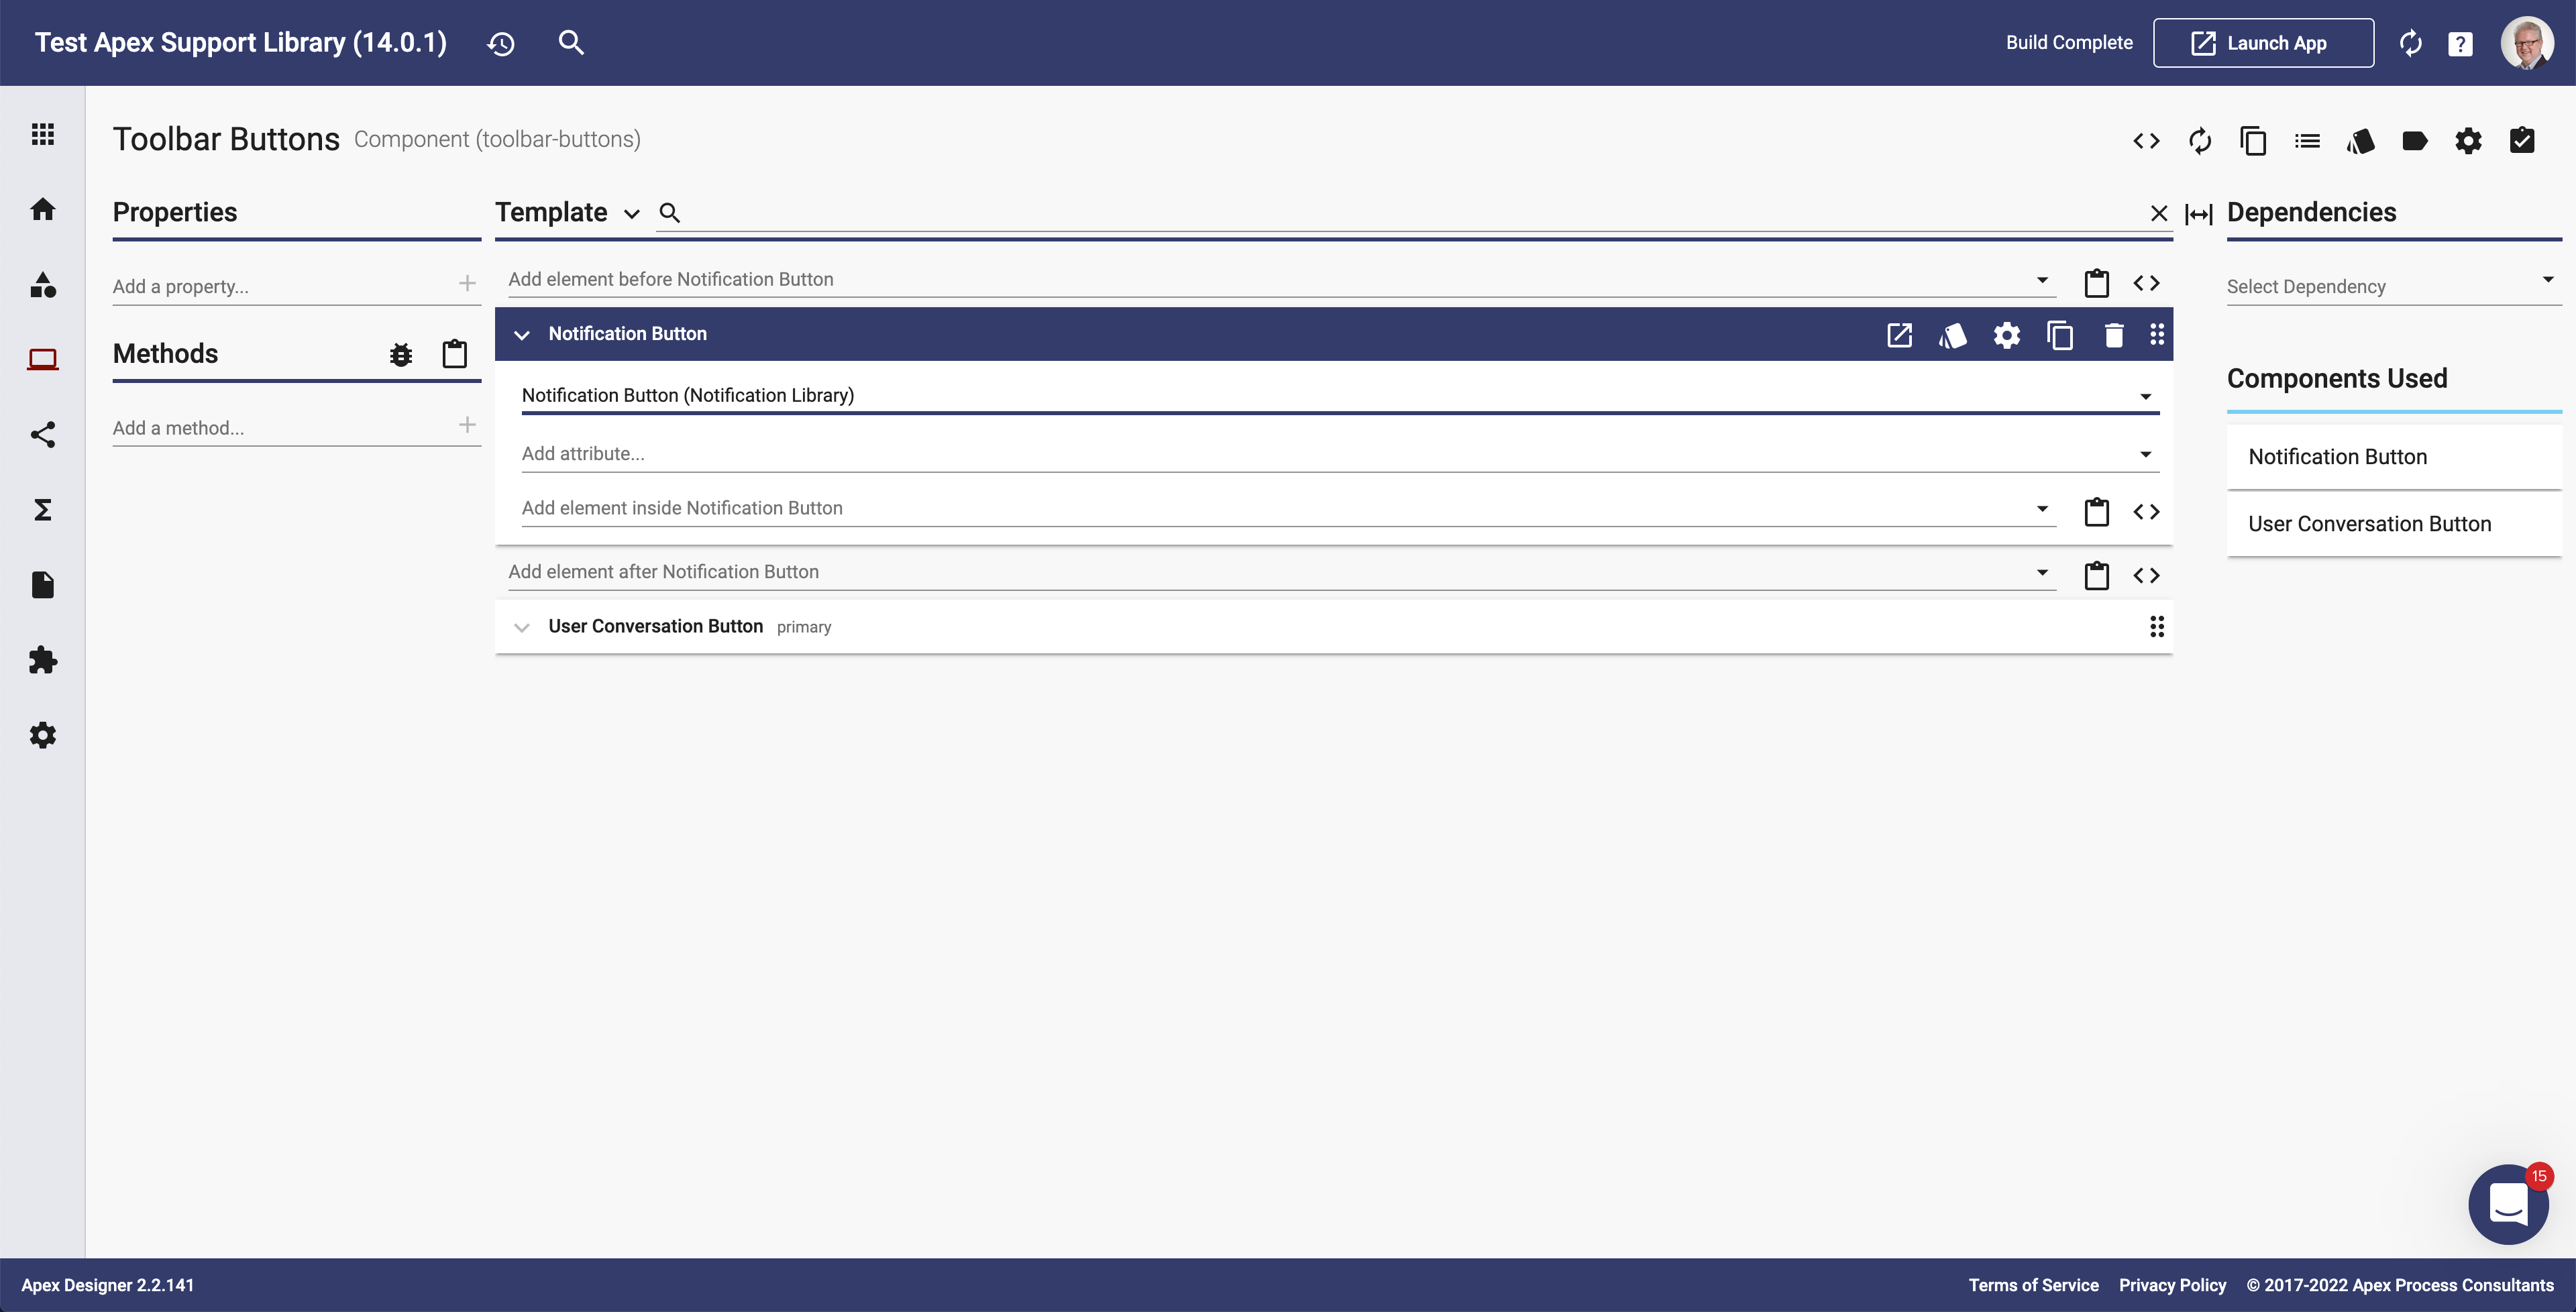
That will add a notification icon button to the toolbar that will have badges for unread notifications.
Set up the Slack Webhook
When users create new conversations or update existing ones, agents can be notified in Slack. Follow Slack's instructions to set up a webhook. Copy the webhook url and add the slackNotificationsWebhookUrl environment variable.